Acuva ArrowMAX Water Filter Review After 2+ Years
We have installed, and used, the Acuva ArrowMAX 2.0 UV-LED water purifier in 2 camper vans over 2+ years. In this review, we are sharing our experience and honest thoughts, as well as, alternatives for camper van water filtration.
In This Guide:
2024 Update - Important!
Acuva Technology is no longer in operation. This review is still accurate and you can currently still purchase this UV water purifier from Nomadic Supply. However, Acuva will provide no support or replacement parts. Please check out our “Campervan Water Filtration Guide” for alternatives.
Acuva Water Filter for Van Life Overview
One of the things we love most about van life is the feeling of being completely self reliant. This includes the ability to get and hold the natural resources that we need in order to live. Healthy and safe drinking water is one of those resources.
A few of the main reasons we love the Acuva ArrowMAX 2.0 system:
- It purifies water at the point of use rather than before it enters our tank.
- It is compact and lightweight which is necessary for van life.
- The purification level is extremely high while keeping calcium and magnesium in the water.
- The install, and replacement of filters, is super easy.
Disclaimer: This post contains an affiliate links. If you purchase through these we get small kickback at no extra cost to you! We appreciate the support if you are interested in purchasing this product and okay with using an affiliate link 🙂
How the Acuva ArrowMAX 2.0 UV-LED Water Purifier Works
It is extremely vital to filter particulate matter out of your water along with viruses and bacteria. The Acuva ArrowMax UV-LED water purifier works in 2 stages:
- Pre Filtration where particulate matter is filtered out, such as lead, mercury, heavy metals, etc.
- UV-LED Purification where bacteria is rendered unable to reproduce, thus inactivating it.

Flow Rate of the Acuva ArroxMAX Water Purifier
The “2.0” in Acuva ArrowMAX UV-LED 2.0 describes the flow rate in liters. The particular unit we have flows at 2 liters per minute which we find perfect for van life. Acuva also offers 1.2 and 5.0 versions of the same unit. However, 5 liters per minute would waste too much water in a camper van, and, we know a van lifer who has the 1.2 liter per unit version who says the flow rate is much too slow.
However, if you are here for a non camper van, or RV, application, you have got your options!
- [1.2 liters /min] Acuva ArrowMAX UV-LED 1.2 – a bit slow for most applications, but more affordable
- [2 liters / min] Acuva ArrowMAX UV-LED 2 – recommend for van life
- [5 liters / min] Acuva ArrowMAX UV-LED 5 – recommended for RVs and house dwellers
Water Purification Efficacy of the Acuva ArrowMAX Series
The Advanced Pre-Filter stage filters 99% of chlorine, lead, chromium 6, mercury, nickel, carcinogens and 95% of fluoride. Additionally, it removes unpleasant odors and tastes (aesthetic improvements) found in public water sources.
The UV-LED purification stage purifies out 99.999% of bacteria such as e. coli. It does this while leaving in magnesium and calcium which are vital minerals.
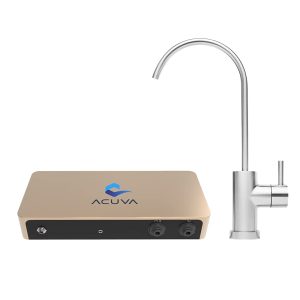
Acuva UV LED 2.0 Water Purifier
The price for these units are almost always cheaper on Amazon; however, we will also link Acuva Technology’s website.
Water Purification vs. Water Filtration
The Acuva ArrowMAX UV-LED system is a purification system. Water filtration is only a subset of water purification. Water filtration is strictly removing physical contaminants by passing through a physical barrier while water purification is a more comprehensive process that aims to make water safe through a variety of processes. What makes the Acuva system a purification system is the use of UV-LED light treatment that is able to render bacteria and viruses unable to reproduce.
Van Life Consideration: Power Draw
The power draw of this unit is super low, we don’t even notice it pulling power. When you are actively purifying water (faucet open) it draws ~9W. When it is at rest, it draws 0.1W.
Learn About Camper Van Electrical Systems!
Installing the Acuva ArrowMAX UV-LED 2.0
We aren’t kidding when we say that installing the Acuva Water Purifier into our campervan water system was a piece of CAKE. All the valves and connectors you need come with the unit. Here is how you install it:
- Mount the small UV-LED purification unit (9 7/8″L x 4 1/8″ H x 1 7/8″ D) below your sink
- Drill a hole in your counter top to fit the base of the Smart Faucet
- Tap into your main cold plumbing line with the supplied T connector
- Run the supplied line through the Advanced Pre Filter
- Run the supplied line from the Advanced Pre Filter to your UV-LED purification unit
- Finally, run the supplied plumbing line to your faucet
- Run 12V power to the main UV-LED purification unit.
The total install time was about 2 hours including drilling the hole in the countertop for the faucet, mounting the system, and splicing into our existing plumbing lines.

Discard Water
Another common type of household water purification/filtration is Reverse Osmosis. This creates 1 cup of “discard water” for every 1 cup of filtered water. This is not efficient for van life as water is a very precious resource that we cannot be discarding half of! Because the water purification method used with the Acuva ArrowMAX is UV-LED treated, there is zero discard water, making it ideal for van life.
Filter Replacements
The Advanced Pre-Filter need replaced every 4,000 gallons. We have a 32 gallon tank which means that every 125 water fills we need to replace it. Generally, we fill every 1-2 weeks so we replace it every 2 years for ease, not bad!
Our Full Van Life Water System Setup
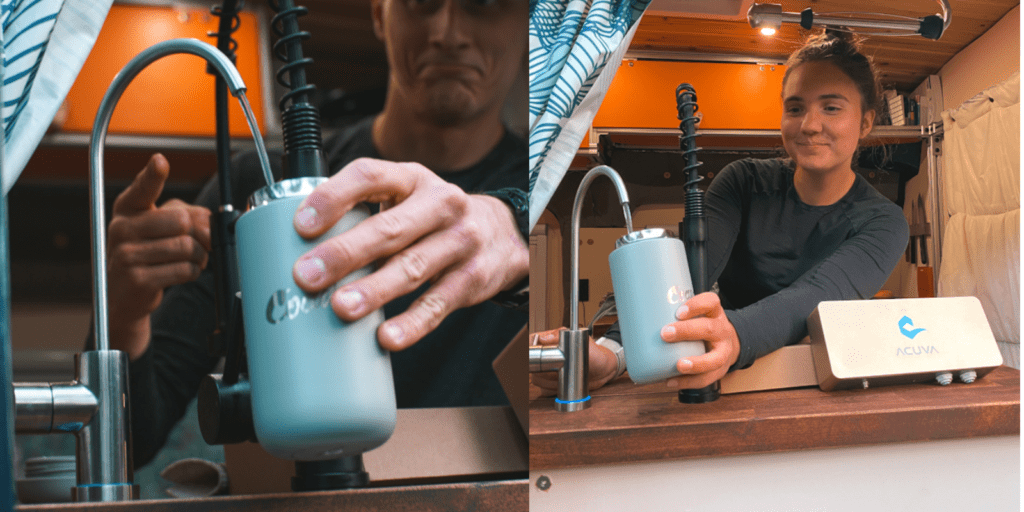
You can see in the photos below that we have two faucets: a standard bigger faucet and the Acuva Smart Faucet. We use the bigger faucet for dishes, showers, and water we are generally not going to consume. Then, we use our Acuva Smart Faucet for drinking water, coffee, washing our fruits and veggies, and cooking. There is no reason you can’t use the Acuva Smart Faucet for all your water but the faucet is a bit smaller and has slower flow rate than a standard faucet. We are personally obsessed with our main faucet because the on/off lever is on the head (#VanLife’s best faucet).
Additional Camper Van Life Filtration Options
Because of the sheer variety of fill ups we use at van lifers, we also filter water on the way into our water tank with a 3 Stage Inline filter from Blu Technology. This is an added layer of sanity that you may, or may not, need.
We dive into all Camper Van Water Filtration options in another guide.

Any complaints?
Not really. When giving reviews of products we always like to cover downsides that we have experienced so we did think hard about this one. There is nothing about the physical product we would call out; however, we do want to note something about “post purification”. Because water purification happens at the point of use, your water tank is technically not completely fresh / sanitized.
As mentioned above, we add an extra step of “pre-tank” filtration just to keep our fresh tank as clean as possible.
Thanks for reading! You Might Enjoy These Next:
Thanks for being here! Happy building!
Eric + Colby
✉️ Join our mailing list for more content!
🙏🏽 If you are looking for more 1:1 van build help, we are here to help via Consulting or Travel Van Building.
[Start Here] Beginner Guides:






Comments 8
do you need a water pump to use the Acuva? and if so do you think a water pump would suffice?
Author
Yes – the Acuva does not pressurize water therefore you will want to put it in line on already pressurized water lines. We use this one.
Do you need an electric water pump for the water to go through the acuva or is there an internal pump in the acuva? Also, if you need a water pump, do you think a foot pump would work? I am trying to use as little electricity as possible but its super important for me to have clean water!
Author
The Acuva does require pressurized water. You basically splice it in line to your already pressurized water lines. We use for our camper van, however, you can use whichever pump you’d like as long as it pressurizes enough!
How long did it Ake you to install it?
Author
Hi Melanie! Installation took us about 2 hours and includes: mounting the unit under the sink, splicing into the existing water line and placing a T joint, and drilling through the counter top for the faucet.
How long does it take to install?
Author
Hi Melanie! Installation took us about 2 hours and includes: mounting the unit under the sink, splicing into the existing water line and placing a T joint, and drilling through the counter top for the faucet.