
DIY Camper Van Conversion - Full Build Breakdown
This guide is going to be a little less technical than our other guides and a little more FUN! We get endless questions about what products we chose, what materials we use, and our thought process so we thought… “Why not do a full camper van conversion breakdown?!”
In this guide we are specifically breaking down our second Ford Transit camper van conversion. Soon, we will have our third conversion to go over.. our 2024 Transit Trail!
If you are interested in:
- Technical DIY Van Build Guides —-> head here!
- Van Life Logistics —> head here!
- Tools for Van Building —> head here!

** Disclaimer: This blog post contains various affiliate links that provide a small kickback to us, at no additional cost to you. We truly appreciate your support if you choose to purchase through these! **
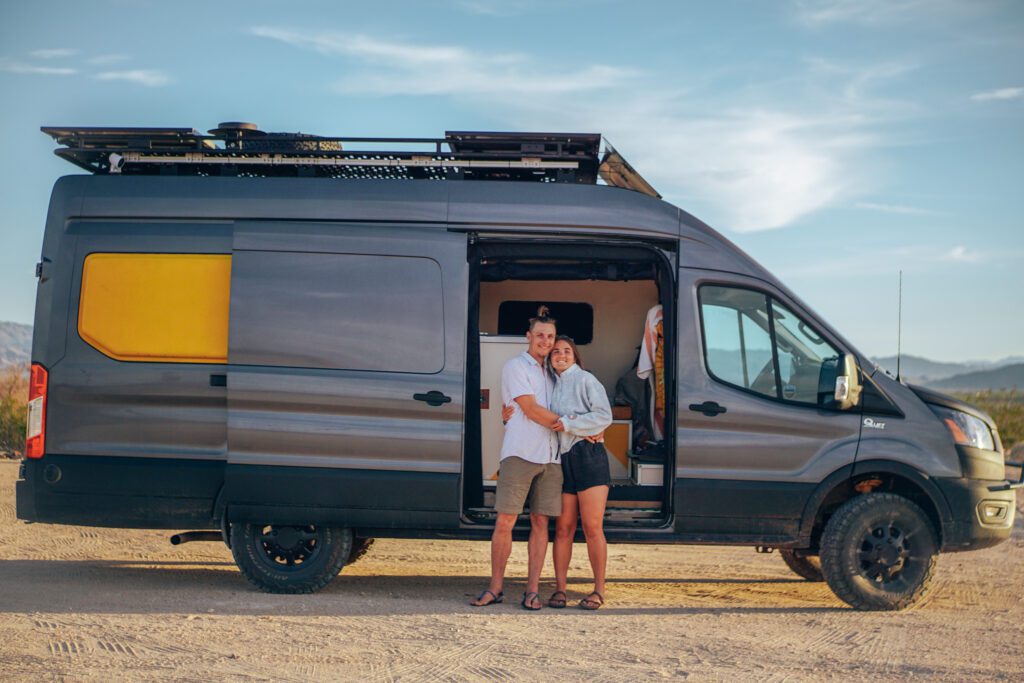
Meet our Ford Transit Camper Van Conversion: Rover!
Rover is our 2nd DIY Conversion Van, it is a 2022 Ford Transit High Roof EXT Cargo van. We built this camper van with 3 principles in mind:
- Redundancy: There are no single points of failure.
- Ready for anything the road brings: Rover is built fully with extruded aluminum and has several body upgrades.
- Winter Van Life (winter van life is the BEST)


Designing the Perfect Camper Van Layout
Because this was our second DIY camper van conversion in which we lived full time, we had a pretty great idea of what we needed for our lifestyle. We knew what we needed, what we didn’t, what worked, and what needed improved.
Our requirements included:
- A permanently fixed bed because we tried the convertible bed thing and it really did not work with our lifestyle.
- Multiple ergonomic work setups for our full time engineering jobs.
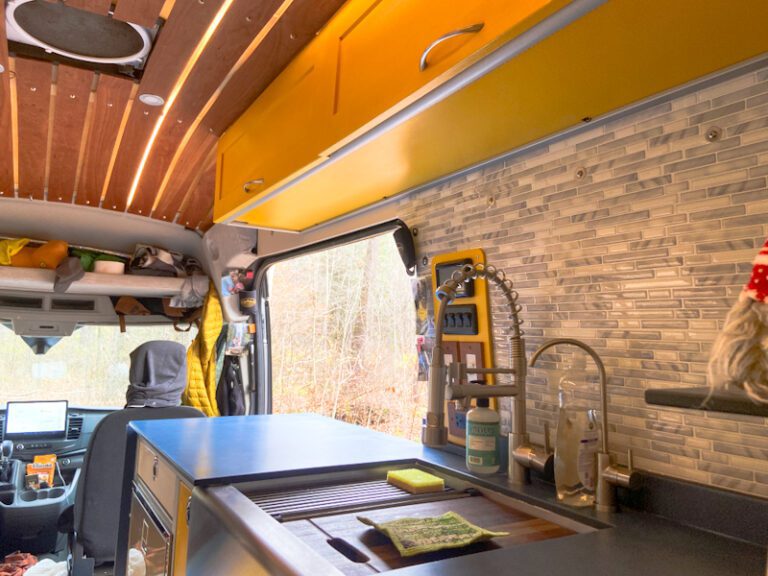
- A comfortably sized kitchen with a large farmhouse sink because we LOVE cooking and wanted the entire process to be enjoyable.
- A way to shower in the winter. We chase powder and only had an outdoor shower installed in our first camper van.
The Layout Process
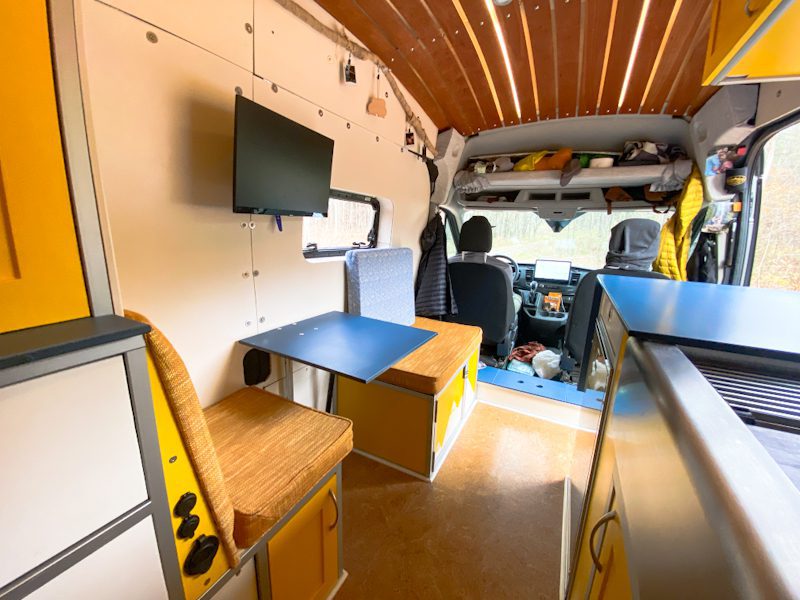
With this list of “hard requirements” we could begin designing our camper van layout. We started our design by placing our bed sideways where we would install flares. The next big question was countertop sizing. In our first camper van, we had 2 separate small-medium counters that made the living space tight. It also made dishwashing hard as we would wash a dish in the sink, drip across the aisle, and put it down on the other counter to dry. For these reasons we opted instead for one large 72″ counter top. From there the depth of the countertop, and drawers beneath it, were determined by our fridge depth (25″).
Next, we knew that we wanted a composting toilet and an option for an indoor shower. In our first camper van, we loved our outdoor shower; however, we planned to spend winters in the deep deep cold so we knew we needed the option for some form of an indoor shower. Because the shower wasn’t going to be used often, we opted for a pop-up shower in a bench [schematics here ] that could store our composting toilet as well. This meant we needed one seat that was 20×32″.
Do you see now the importance of thinking about your priorities? The layout begins to well… lay itself out! From there, we took the remaining floorspace left and began to scheme around additional ergonomic seating, and more storage.
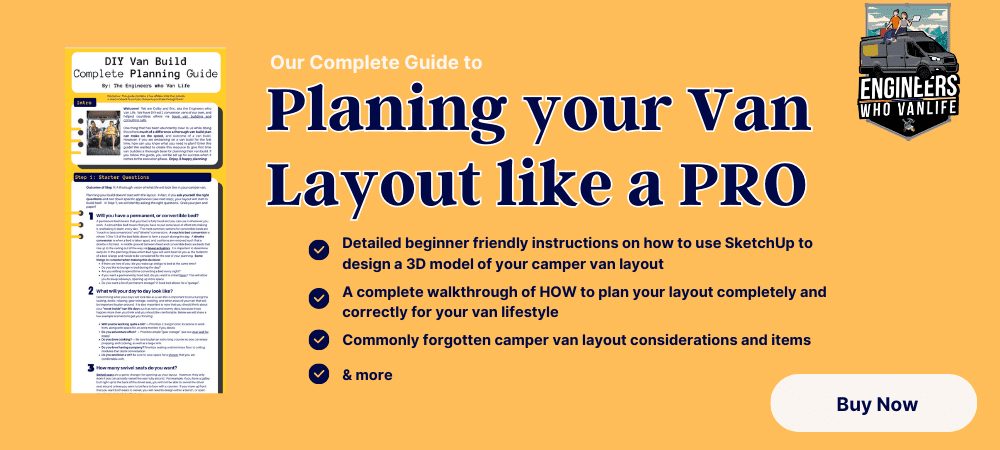
Bonus; How to Build a 3D Camper Van Layout
We speak often about the importance of designing your campervan conversion from the beginning to the end. By designing your layout in a 3D software, it will give you the ability to look forward at building phases such as: where you can pre-wire or pre-plumb your lines, is your walking space is too narrow (?), where you should pre install plusnuts to ease your buildout down the line, and more.
To design our camper van in 3D, we use the free SketchUp Desktop app and have made our layout available for download as a starting place for you. Additionally, in the below video, we teach you everything you need to know to get started using SketchUp specifically for camper van design! The video is free on our YouTube 🙂
Our Camper Van Electrical System
Our camper van electrical system is no joke, we decided on the components with the upmost intention of being fully self reliable during all seasons (more on that later…) It is relatively easy to be self reliable in the summer as solar power is abundant. Where the challenge is, is staying self reliant in the winter. To do this, we increased our battery capacity from our first rig from 400ah to 540ah. And added 2 DC to DC chargers that push a controlled charged into the batteries when we drive. Below is our entire camper van electrical system.
⚡ Electrical System Components ⚡
Main Components
- 570 ah LiFeP04 Batteries (“engineers” for $50 off)
- 3000W Multiplus II Inverter Charger (“Engineers” for 5% off)
- 740 watts Residential Solar Panels
- 2x Lynx Distributors (“Engineers” for 5% off)
- 2x DC-DC chargers (“Engineers” for 5% off)
- 2x 100/30 MPPT Charge Controller (“Engineers” for 5% off)
- 4 AWG Copper Wire (red + black)) (red + black) 25 feet
- 2/0 AWG Copper Wire (red + black) 25 feet
- 6 AWG Copper Wire (red + black) 25 feet
- Battery Lugs
- 12 AWG Marine Grade Copper Duplex Wire (100 feet)
- 8/3 AWG Marine Grade Flat Triplex AC Wire
- DC Fuse Panel
- AC Distribution Panel

Sizing Your Camper Van Electrical System
The above system components were chosen specifically for our needs on the road. We encourage you to visit our “Sizing Your Camper Van Electrical System” guide as a starting point for your electrical system.

Our Camper Van Water System
Camper van water systems are a lot more simpler than electrical systems. The main consideration that we made when designing our water system was the desire to stay off grid longer. To accomplish this, we included the ability to pull and filter water from fresh water sources like lakes and streams. We detail that entire installation here. In it, we utilize our main 12V water pump that pushes water to our points of use to also PULL water from un-pressurized sources. It is complex, but it you are like us, you will absolutely benefit from it!
💧Plumbing System Components💧
- 32 gallon Over the Wheel Well Fresh Tank
- 11 gallon Under Carriage Grey Tank
- Hot water via Eberspaecher Hydronic Heating System
- USA Adventure Gear 3gpm Water Pump
- Shurflo Accumulator
- Pex A Piping
- Brass Fittings
- Compo Closet Composting Toilet
- Indoor Shower in a Bench with 8 Foot Hose for Outdoor Shower
- Large Farmhouse Apron Sink
- Van Life’s Best Faucet
🚰 Water Filtration 🚰
- MRX+ Off Grid Water Filtration System (portable option for our complex system!)
- Acuva UV-LED 2.0 Water Purifier
- Blu Tech 3 Stage Water Filtration System
Designing a 4 Season Camper Van Conversion
If you follow us on Instagram, you know that we chase snow instead of sunshine. In order to do this, we need to be comfortable for weeks at a time in below freezing temperatures. This is accomplished in camper vans with impeccable insulation, and a darn good heater! We chose an Eberspacher hydronic heating system that gives us on demand hot water and hot air with automatic high altitude compensation. The altitude compensation is extremely important, and often overlooked. Many heaters are designed to work up to 5k feet and then require a manual adjustment to account for the change in oxygen levels above that. As folks who spend a lot of time around 10,000 feet, an automatic adjustment was 100% required!
❄️ Climate Control Components❄️
- Eberspaecher AquaSystem (Hydronic Heating System)
- Wall & Cavity Insulation: Havelock Wool
- Ceiling Insulation: 3M Thinsulate
- Thermal Break: Lizard Skin Ceramic Insulation
- Thermal Break on Wall Panels: Low-E
- Sound Insulation: Lizard Skin Sound Control
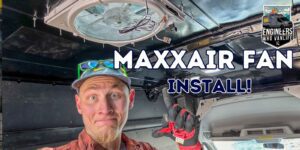
- 2 x Maxx Air Fans 7500k
- 2 x Arctic Tern 300×700 Double Pane Windows
- Van Made Gear Window Shades
What is a Hydronic Heating System?
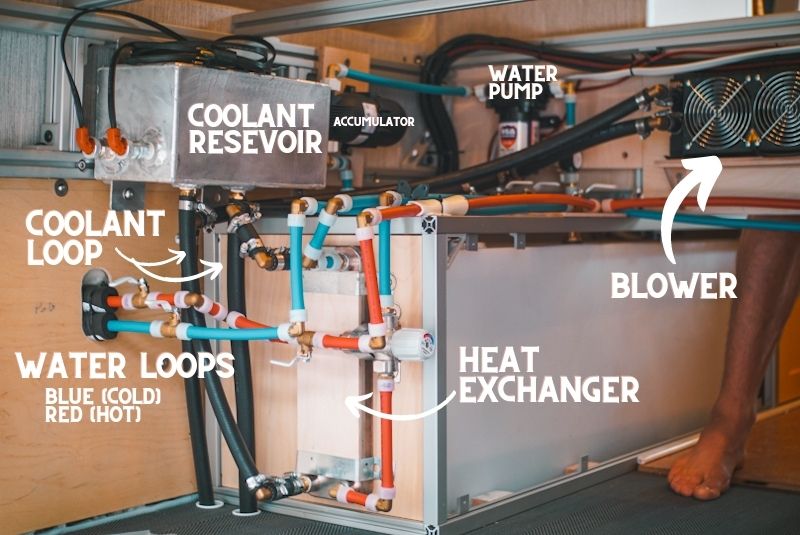
A hydronic heating system was a non-negotiable for us. To explain what it is, let’s back up to what a standard camper van heating system looks like. Most camper van heating systems work by siphoning drips of gasoline (or diesel) from your tank to ignite a flame that heats a chamber. Then, air from the outside passes through to be warmed. This means that combustion happens inside your van and your hot air is limited to the one spot that the heater is placed which is typically under the passenger seat.
Hydronic heating works on the basis of a coolant loop. Coolant is heated and passed across heat exchangers to heat water and air. First, this provides on demand hot water, and second, it passes through blowers to push hot air into the cabin. Because of both the coolant, and hot water loops, our interior space heats a lot quicker. Additionally, as long as the heater is on, we can have hot water in a matter of seconds. The one benefit of a hydronic heating system that we did not take advantage of is in-floor heating. Remember, the basis of this system is coolant and water loops, so you can simply plan ahead and route a loop through the floor.

Exterior Upgrades on Our Camper Van
In addition to being comfortable in cold weather, we made several external upgrades to Rover to ease our minds when taking on winter condition forest roads an up to Alaska [ check out our Alaska Van Life Guide ]! These upgrades include the following:
🚐 Exterior Upgrades 🚐
- Ford Transit 2022 High Roof EXT
- Quigley Q Lift + Strut & Shock Upgrade
- BF Goodrich KO2 AT Tires (LT245/75R16/10 120/116S)
- Flarespace Flares
- FVC Safari Roof Rack
- FVC Side Ladder
- FVC Nudge Bar
- Raptor Liner Protective Paint
- Bug Wall Bug Screen
- Colorado Fairing Company Wind Fairing

Working Full Time from the Road
We mention often that you should convert you camper van with your life in mind. For us, that means equipping our camper van for adventure, but also for us to maintain, and be comfortable, working our 9-5 engineering jobs. To accomplish this we needed 2 comfortable places to work, an external monitor, reliable high speed internet, and ways to stay out of each others way when one / both of us were on calls. We have an entire separate guid dedicated to sharing how we work full time on the road but we will share the components below.
💻 Internet Components 💻
- Peplink Max Transit Pro Dual Modem Router
- Parsec 7-in-1 MIMO Antenna
- T-Mobile 800gb SIM Card
- AT&T Unlimited Small Business SIM Card
- Starlink RV (when in the desert)
- LePow 15.6″ Portable Monitor
- Portable Monitor Stand
A Note on Van Life Internet
We are very passionate about reliable internet for van lifers. We’ve tried it all and have done endless research on solution that work across various factors such as:
- Daily changing of locations and obstructions
- Ease of use and set up
- Power draw
- Ability to output strong internet AND consistent internet
We decide on a Pepwave Dual Modem Router, and a MIMO antennae on our roof. This solution has worked great around the country and in Alaska.
If van life wifi is a topic that interests you, head on over to our in depth guide as to how internet works and how best to use it in a van.
Ergonomics + Workspaces
During the layout planning stage, we knew it was important to plan for ways to stay out of each other’s way and still be comfortable. This mean designing ergonomic working stations with the correct standing height and seat angles (slightly obtuse). As well as, having ways to separate the living area and bedroom.
Camper Van Storage: Our Gear Wall
Did you notice that the back of our van was closed off? Yep! This was a HUGE decision for us. While airflow, and a view out the back are nice-to-haves. A “more-important-to-have” for us was ample, and EASY, storage for all of our backpacking, climbing, skiing, and rescue gear. So, we installed a gear wall. It was a relatively simple install.
To build this gear wall, we traced 1/2″ plywood to the opening above the bed and held it up with 4 plusnuts into the beams. We did have to cut the wall into 2 pieces to finagle it into the space and then hold the pieces together with some aluminum braces. From there, the hooks are all installed with bolts straight on through and masked on the inside of the wall.
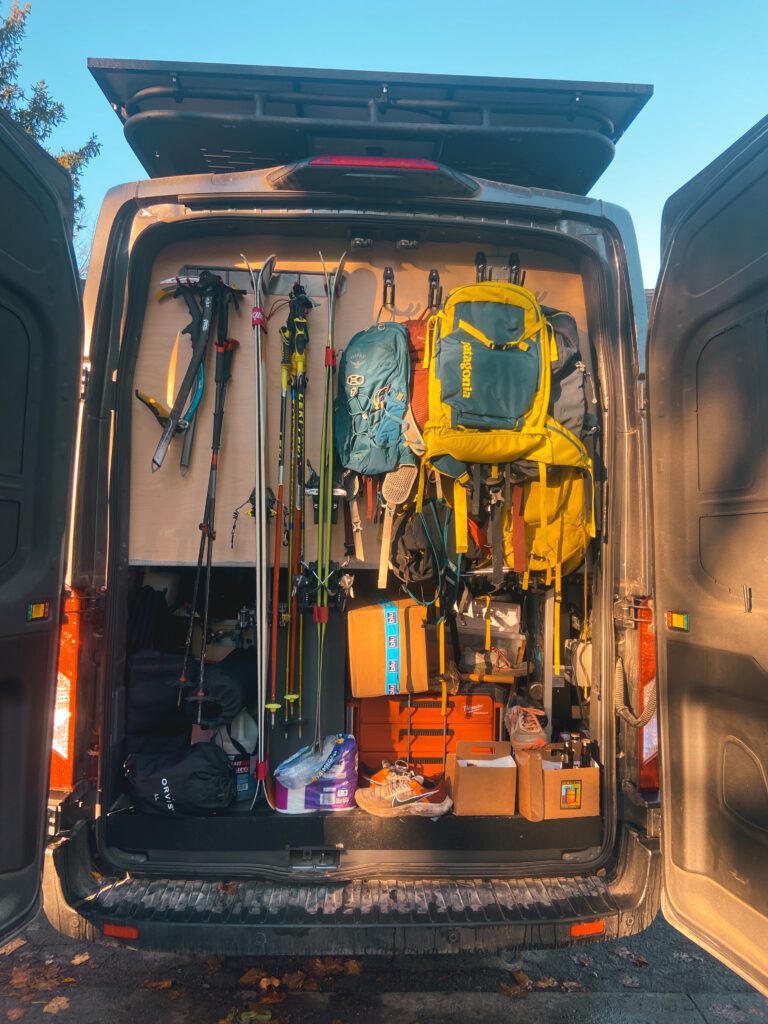
🎿 Gear Wall Materials🎿
- 1/2″ Baltic Birch Plywood
- Plusnuts + Bolts to hold it up
- Ski Rack
- Garage Storage Hooks
Finishing Details
The two other components of our camper van conversion that we had strong thoughts on were the counter top choice and the flooring. In our first conversion van, we made the wrong choice for both of these. Our butcher block counter tops cracked only a few days into van life (this is common!!). And, our LVT click-lock flooring warped and collected dirt like it was its job.
Paperstone Countertops
Camper van countertops are more of a struggle than you could ever imagine. You need something extremely resistant to cracking, chipping, and splitting. This proves rather difficult as driving, especially on forest roads, puts a lot of stress on counter tops. Butcher block is a common choice that you will see; however, in our first camper van conversion, our butcher block countertop almost immediately split, and it was high maintenance to take care of as it frequently needs conditioned.
After evaluating other choices out there, we settled on Paperstone which is made by compressing 100% recycled paper and petroleum free resin. We love it because it is environmentally friendly, require little to no care, has an extremely soft touch, and is very durable. Sourcing Paperstone can be difficult, so an alternative would be Corian.
How to buy Paperstone
We found this to a be a bit tricky so figured it was worth spending a quick bit on. The best way we have found to source Paperstone is by finding a local dealer that you can physically pick up from as shipping is expensive. Additionally, the smallest piece we could purchase at 1/2″ thick was 60″ x 96″ so you should be aware that you will need to cut and finish it yourself. This isn’t difficult as you just need simple wood cutting tools but it does take extra time. We cut most of our slab with a track saw and finished it with 2 coats of Osmo oil.
The large amount of Paperstone wasn’t an issue for us as we ended up using it not only for our 72″ long counter top, but also for any other top surface (table, top of shoe box, small shelves, etc) and really loved how having it all over tied the van together!
Camper Van Flooring and Sub Floor
In our camper van, we have a floating cork top floor, on top of 2Tec2 floor, and a coosa subfloor. Let’s break each of those layers down.
Top Floor
First up, the floating cork top floor. This might just be one of our favorite choices we made in Rover. It is extremely comfortable and smooth on bare feet, and provides us with additional insulation. Also, it does not collect dirt and warp like click-lock flooring, or LVT flooring, which is what most builds have. Installing cork floor in our van was really easy with this tool, and a table saw for cutting the tiles to size.
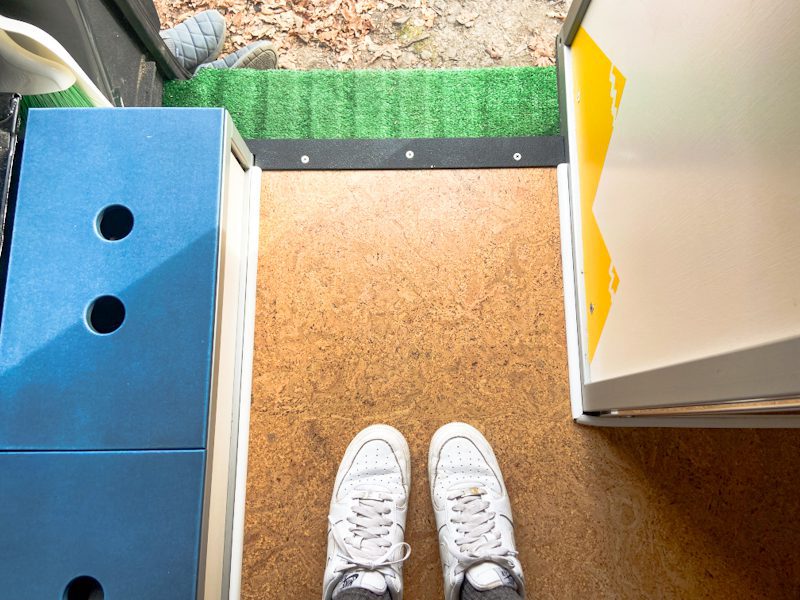
Garage Durable Flooring
2Tec2 flooring is beneath our cork floor, and fully showing in the garage space. This flooring is absolutely incredibly when it comes to durability and ease of install. Admittedly, our original plan was to only use the cork in the winter for additional insulation, and to expose the 2Tec2 all other months. However, we fell so in love with the look and feel of the cork floor, that we won’t remove it during off-season. For that reason, adding 2Tec2 across the whole van was probably overkill and we could have just placed it in the garage where more wear and tear is bound to happen.

Subfloor
Lastly, we opted for a CNC cut, drop in, Coosa Subfloor. We cover this in depth in our guide to camper van subfloor options so we will leave it at that.
DIY Camper Van Conversion Final Thoughts
We know how overwhelming it can be to do a DIY camper van conversion. But, we also know how rewarding it can be. We truly hope this gave you a little peek into our brains of why we made the decisions we did because when it comes down to it, this is your tiny home on wheels and it should be everything you ever dreamed.
If you have further questions, we encourage you to leave them in the comments sections or schedule a 1:1 consultation!

Thanks for being here! Happy building!
Eric + Colby
✉️ Join our mailing list for more content!
🙏🏽 If you are looking for more 1:1 van build help, we are here to help via Consulting or Travel Van Building.
[Start Here] Beginner Guides:

Comments 2
I found it interesting when you said that insulation and proper flooring could provide the best van experience. My best friend mentioned yesterday that he was hoping to find a custom van outfitter that would offer great lighting and kitchen functions for great memories of our family camping. He asked if I had opinions on the best option to consider. You did an excellent job of explaining the importance of planning. I’ll tell him that they can consult a well-known van outfitter service as they help us identify the best van customization approach.
Author
This is a great topic! From our experience, many people can do the aesthetics correctly, but few can build strong bones and base. For a camper van that will last long and be comfortable, it is always good to prioritize the bones first!