
Roof Racks for Van Lifers - Deep Dive
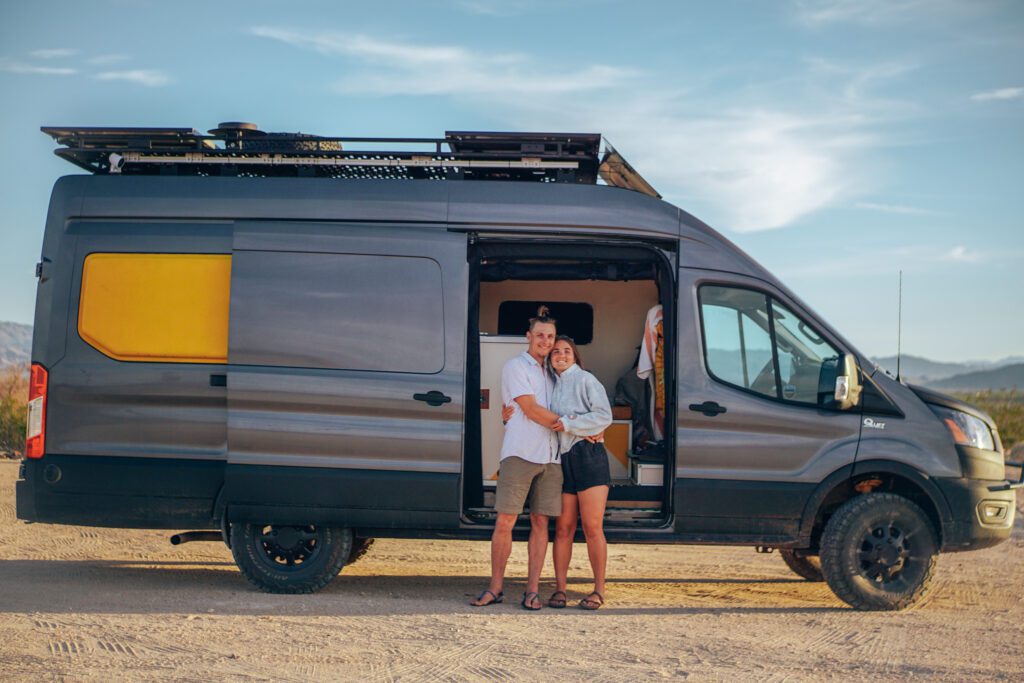
As you can see below, we utilize the roof rack on our camper van to the max. It holds 740W of solar panels, our spare tire, our MIMO internet antenna, and still has additional space for a roof deck. While this is optimal for us, roof racks are very specific to each individual van lifers needs. Before we dig in to our recommendations for camper van roof racks and things to consider, let’s first discuss some pros and cons of having a roof rack at all on your camper van.
Then, we will discuss the following roof rack options:
** Disclaimer: This blog post contains various affiliate links that provide a small kickback to us, at no additional cost to you. We truly appreciate your support if you choose to purchase through these! **
Do you need a roof rack for van life?
Most van lifers opt for some level of roof rack; however, that is completely up to you. Here are some thinking points:
Pros of having a roof rack on your camper van:
- Servicing and cleaning of your solar panels is easier with places to step, especially if you are doing winter van life
- Ease of mounting points for additional accessories like awnings, gear carriers, light bars, etc.
- Extended living space (if you opt for roof deck!)
Cons of having a roof rack on your camper van:
- Increased vehicle height clearance
- Additional weight (60 -180 lbs)
- Increased wind resistance potentially decreasing gas/diesel economy
What should you consider when choosing a roof rack for your camper van?
As with all additions to your campervan, there is quite a lot to consider when choosing a roof rack. The below considerations are in no particular order as priorities for every van builder are different. However, it is still good to consider all of these points!
Use Case
Roof racks enable a variety of things:
- General roof servicing access
- Cleaning / clearing snow from your solar panels
- Mounting solar panels and other accessories
- Star gazing / Lounging
- & more!
So one of the first things to think about is how you will actually use your roof rack/deck. Will it solely be for easier mounting of your solar panels? Do you foresee yourself spending a lot of time up there? Do you need to be up there for any regular servicing (winter time requires clearing snow!!)? Etc.
Depending on your answers to the above, you will lean towards a different style roof rack. For example, say you simply want to mount your panels and call it a day. Maybe a basic DIY solution will do then. Or, say you want to use it as an extension of your living space. Then you will want to look at the Safari Roof Racks. If you are looking for a modular solution for mounting solar panels, roof accessories, and a deck, check out the Low Profile Modular options.
Cost
The cost of a van build can quickly add up. Luckily, a roof rack is an item where you can make decisions that cut $1k-$2k off that final number if you prefer. A DIY roof rack can be as cheap and basic as you want it to be, while a Safari Roof Rack will run you over $4,000, and a Low Profile one will fall somewhere in the middle.
Weight
Camper van conversion weight is something to take very seriously! If you are nearing your GVWR, opting for a lighter roof rack can make a huge, and important, difference. The weight of the Low Pro Roof Rack comes in at about 64 lbs. while the Safari Roof Racks come in between 150-185 lbs
Clearance
With higher clearance comes two issues: wind resistance and well.. a higher clearance. It can be difficult to navigate parts of country the higher your camper van height is. If you follow us on Instagram, you may remember about the time we ended up on a parkway in the NE pulled over in front of a bridge we didn’t fit under. Between our Quigley lift, built up roof rack, and storing our tire on the roof we come in at 10′ 3″. Generally, coming in under 10′ is desired with a van build.
In regards to wind resistance, the more aerodynamic you can be the better, because of our high clearance, we opted for a custom wind fairing from Colorado Fairing Company to help with increased wind resistance. Our Safari Roof Rack is built up over our 2 fans to allow them to open underneath the solar panels. The Low Pro roof racks are almost as low as your can get without ditching the roof rack all together.
Accesorries / Roof Fans
The final consideration when choosing the right roof rack for your camper van is the compatibility with accessories such as ladders, light bars, awnings, and external carriers. Because roof racks utilize all of the factory mounting points on your chassis, the roof racks offer additional built in ways to mount accessories. The Safari Roof Rack base is L-Track for mounting while the Low Pro and HSLD Roof Racks have 80/20 compatible t channels to mount to.
The amount of mounting you want to do is important to consider if you are going the DIY route as all attachments will be custom on your end.

Roof Rack for Van Life Recommendations
In the following sections, we dive into our top three choices of camper van roof rack options. For each, we dig into the criteria we used to develop this list, as well as what you should take into consideration when choosing the right roof rack for your van life.
Best Overall Pick
WHY?
Lightweight
Aerodynamic
Allows for modularity and customization
Modular, Low Profile Roof Racks (HSLD & Low Pro Roof Racks)
We recommend either a Unaka Gear HSLD roof rack, or Flatline Van Co Low Pro roof rack if you are looking for something modular and space efficient. You can’t go wrong with either, but FVC’s tend to be slightly cheaper.
1. Unaka Gear Co HSLD Roof Rock
Unaka Gear Co offers a HSLD (high speed, low drag) roof rack that is extremely modular and low profile. It is constructed with 80/20 cross members that make flush mounting solar panels and other gadgets easy with the t-slots. Additionally, all of their HSLD line roof racks come with a custom bi-directional wind fairing.
2. Flatline Van Co Low Pro Roof Rack
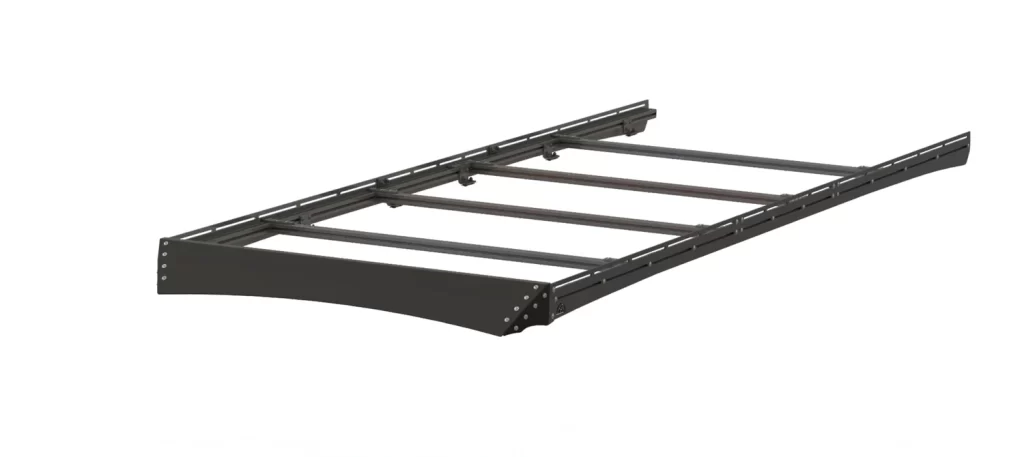
The Low Pro Roof Rack is excellent for mounting solar panels easily and building upon your roof rack in a modular way that is unique to your desires. It does all of this while adding on minimum weight (about 64 lbs) and working to maintain aerodynamics as it hugs the shape of your roof tightly. Accessory add-ons are a breeze because the Low Pro cross bars expose 10 series extruded aluminum t channels.
The Low Pro Roof Rack comes at a cost between $1,695 – $1,995 depending on your chassis. This roof rack van option is available is for Mercedes Sprinter, Ford Transit, and Ram ProMaster camper vans.
The Safari Roof Rack - Roof Deck Ready!
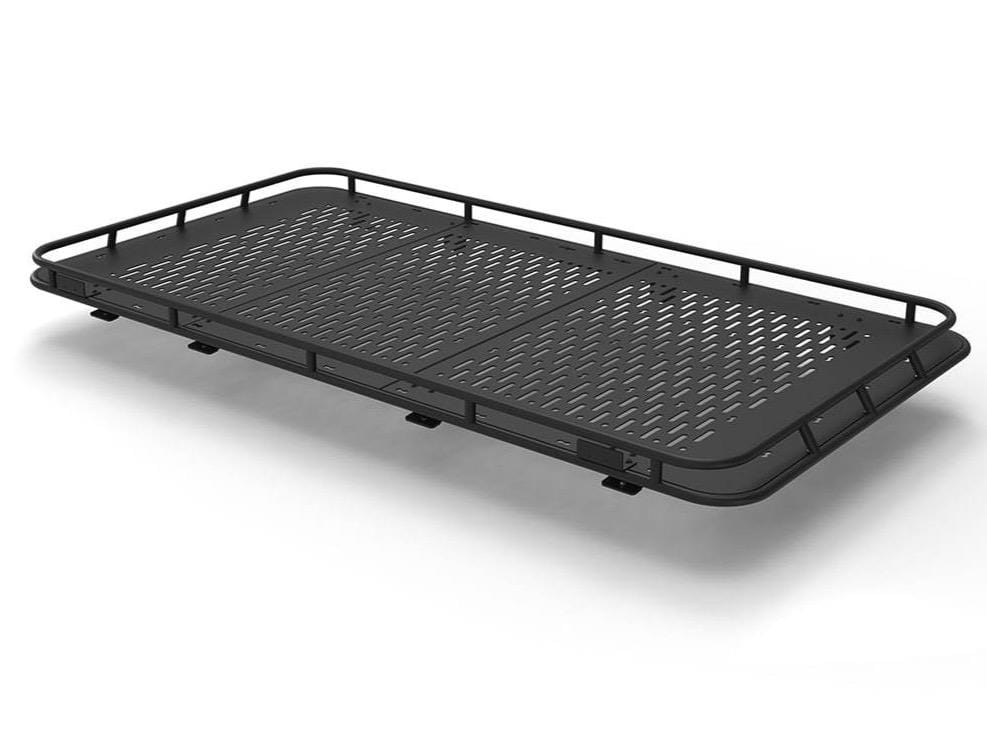
If the main goal of your roof rack is to have a roof deck then the Safari Roof Rack is your best option. As you can see below, once installed, you have a full-blown pre built, structurally sound roof deck. You can remove the panels, or saw through them to install your roof fan(s). The Safari Roof Rack is made of sturdy aluminum and an L-Track deck so that you can mount accessories, ladders, solar panels, and storage easily.
This more extensive footprint comes with a heavier weight (150 – 185 lbs), higher vehicle clearance height, and additional work to saw out where your roof fans need to open through.
The cost is around $4,000 depending on your chassis. The Safari Roof Rack is available for the Mercedes Sprinter and Ford Transit.
Best Pick with Deck
Pros:
Built in roof deck!
Allow for ease of accessory addition
Cons:
Heavy
Adds most amount of height
Safari Roof Rack
sold by: Flatline Van Co
DIY Roof Rack with Extruded Aluminum
DIY-ing your roof rack is a great option to save on cost and/or if you want a smaller roof deck area. For example, in our first van build, we only had room for a small roof deck, so we opted for a DIY roof deck about 1/3 of the length of our van roof.
The basis of a DIY roof rack is 15 series-Lite 80/20 roof rails attached to the factory mounting points of your rig. To attach the roof rails to your roof, you will need a chassis specific “foot” bracket attached to the factory mounting points of your chassis (see photo below). Then you will simply attach 15 series-lite 80/20 lengths to those brackets**. From there you can run deck boards from rail to rail and secure with bolts and slide in t-nuts within the 80/20 channel.
** Be sure to secure everything with stainless steel hardware!
Examples of “foot” bracket mounts per chassis:


Choosing the Right Roof Rack for Van Life
We hope this guide helped you choose the right roof rack for your camper van. If you have any additional questions, don’t hesitate to drop them in the comments section or schedule a 1:1 consultation for more in depth assistance.

Learn More About
Exterior Upgrades for Camper Vans
Learn More About
Building your Camper Van with 80/20
Thanks for being here! Happy building!
Eric + Colby
✉️ Join our mailing list for more content!
🙏🏽 If you are looking for more 1:1 van build help, we are here to help via Consulting or Travel Van Building.
[Start Here] Beginner Guides:


Comments 4
Broken links to the DIY roof rack info. Are they able to be fixed? Cheers
Author
Oii, seeing this very late, sorry about that. Will look at it today!
I’m surprised this doesn’t even mention the Unaka brackets for mounting to the Ram roof support points, nor the Unaka 8020 kits that provide a price in-between DIY ad the other solutions, with options for fairings, etc.
Author
We hadn’t heard of those. Looking them up now though and you are absolutely right. I will add them. Thanks!