Recommended Exterior Upgrades for Your Ford Transit Camper Van
While we aim to make all of the guides on our website”chassis agnostic”, exterior upgrades are often designed for a single chassis. And, as you have probably noticed, we specialize in converting Ford Transit camper vans! So, after not one, but two, Ford Transit camper van conversions, we are so excited to share our favorite exterior upgrades with you:
In this guide, we cover:

** Disclaimer: This post contains various affiliate links that provide a small kickback to us, at no additional cost to you. Thank you for your support! **
Transit Lift Kits for Van Life
Van life often takes you off grid to some pretty epic places. Not being able to get down the last bit of dirt road or crawl over the last rock can leave you pushing the limits of your van more than you should in some pretty remote areas. To overcome this, you can install “lift kits” to give you a few extra inches of clearance. You can also install larger tires which we will address next.
Quigley Lifts Kits for Ford Transits
Quigley Motor Company offers two options for upgrading your Ford Transit. A full 4×4 conversion as well as a lift kit called the QLift. Their Q Lift adds 2″ of clearance and is designed for Ford Transit model years 2015 and newer. This lift system distinguishes itself from its competitors in that it maintains all factory drive angles and most importantly the Ford OEM warranty on both AWD and 2WD rigs.
Installation
Quigley has collaborated closely with Ford Motor Co and sourced many of the critical lift components directly from Ford. Quigley is the only lift kit on the market that is able to fully preserve your OEM warranty. Because of this, the QLift can only be installed at a select number of monitored facilities. Along with their extensive engineering testing and design work that they brought over from their 4×4 conversion platform, the QLift is in a league of its own. Trust us- we visited the shop when Rover got his lift and it is impressive.
Optional Sway Bar, Strut + Shock Upgrade
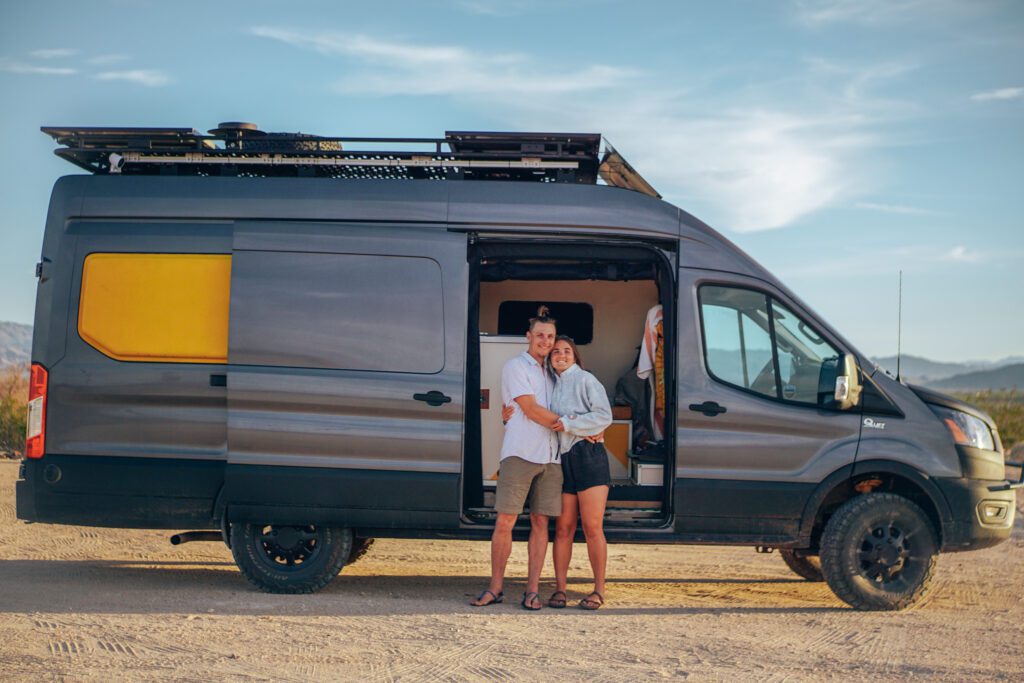
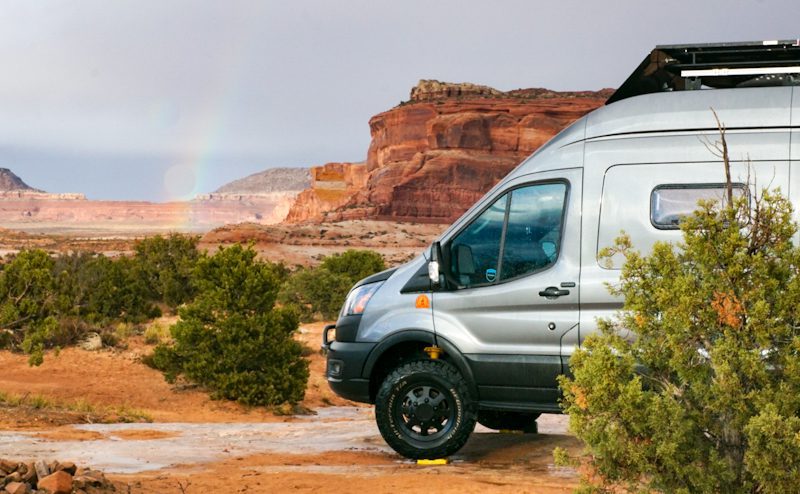
We personally chose to get a 2″ Quigley Q Lift with sway bar as well as the Bilstein B6 Strut & Shock upgrade package that they offer, and we couldn’t love it more. We could immediately feel the difference in how our rig handles over rough roads with the strut/shock upgrades – especially off road. The sway bar keeps us much steadier cornering at speed as well as when driving in strong crosswinds. Being in a high roof transit with a tall roof rack we’ll take all the help we can get. As for the lift itself, the improved departure angle gives us much more confidence driving rutted up roads and dropping off of rocks in the southwest. In the winter there were definitely times when we used the extra clearance to get over snowbanks and patches of deep snow.
Quigley 4x4 Conversion for Ford Transits
The Quigley full 4×4 conversion made its debut for 2015-2019 transit year models and includes a 2″ lift as well, but with the Transit redesign in 2020 Quigley has been in a redesign phase for a few years now. However, we have it on good authority that they are VERY close to roll this out into production! This is, and still will be, the only conversion that has qualified for Ford’s Special Vehicle Engineering (SVE) program for 4×4 systems on Transit and E-Series models. At the price tag of 12k+ this seems like a hefty upgrade at face value, but keep in mind you save 5k+ on the chassis being able to opt for the 2wd version, and then you get the lift kit at the same time. When Quigley does release this, we believe the Quigley 4×4 Transit van will be both a more capable and a more economical choice when compared to the Transit Trail. Getting a Quigley 4×4 will require extra logistical planning because this conversion can only be done at the Quigley headquarters in Harrisburg Pennsylvania, but Transit Trails are also notoriously hard to get right now so it could turn out to be a wash in terms of effort.

All Terrain Tire Upgrades for Ford Transit
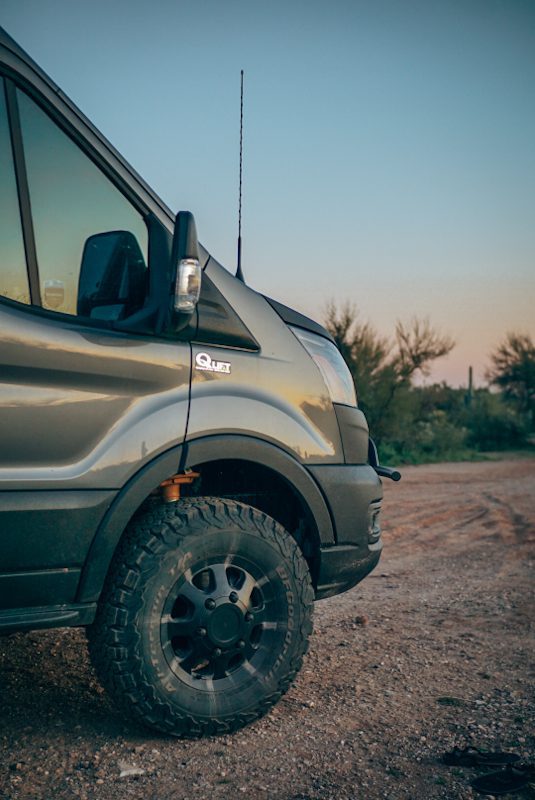
One of the easiest upgrades you can make to your Transit camper van is All Terrain Tires. Tires with a thicker ply and deeper tread will make forest roads, and icy roads a lot easier. We personally chose BF Goodrich KO2 All Terrain Tires size LT245/75R16/10 120/116S. We use these all year long and have been impressed by their performance in snow, ice, and mud.
These are 10 ply (E rated tires) with a 30.4″ diameter while the stock tires are 6 ply (C rated tires) with a 28″ diameter. Because of the larger diameter, these tires also gave us an additional 2.4″ lift on top of our 2″ QLift.
An important note is that the 30.4″ tires do require a small adjustment to the pinch weld for the front two tires. We did this with an angle grinder. You can see the adjustment below.
If you don’t want to make this adjustment, Ford Transits are also compatible with 30″ diameter BF Goodrich AT KO2 LT255/70R16/E 120 S tires.
Transit Tire Carriers
Depending on the wheel you choose your spare tire, may or may not fit into the tire carrier beneath your van in the “factory spare tire holder”. Or, you might not want a spare tire beneath your rig for clearance reasons. Below are a few tire carriers compatible with Ford Transits that we recommend. We personally simply strap it to our roof rack with Thule straps.

Thule Straps
✅ Budget friendly
✅ Allows you to center tire weight over axles
❌ Increases vehicle clearance with tire on roof
❌ Hard to get tire down from roof

Rover Vans Accessory Rack
✅ Modular
✅ Rugged construction
❌ Adds weight and length to rear
❌ Expensive

Aluminess Read Door Tire Carrier
✅ Simple construction
✅ Lightweight
❌ Adds weight and length to rear
❌ Expensive
Transit Flares
One of the best ways to make a cargo van more livable, is to put your bed sideways. The interior width of a Transit cargo van out of the factory is about 69-71″ (the width varies because the walls curve slightly). By the time you add insulation and walls, the interior only leaves room for a small bed. To solve this problem, most folks install campervan flares which are essentially “bumpouts” specifically within the back panels that allow you to have a longer bed. Most flares add anywhere from 3-6″ of room depending on how you finish them.
Flarespace is the original maker of campervan flares and what we personally have in our rig. We have a full guide to DIY Installing Flares as well.
Transit Ladders for Van Life
Having a ladder on your Transit van is helpful for van life. Why? Not only do you need to access your roof to see beautiful sunsets and stargaze, but you also might need to clean your solar panels or service appliances on your roof. There are three main options to choose from:

Telescoping Ladder
✅ Cheap!
✅ No installation needed
❌ Storage space needed
Side Mounted vs Rear Mounted Ladders
We have installed both a side mounted and a rear mounted ladder on our campervans in the past. The main noticeable difference between the two is the sturdiness of a side ladder. We found rear mounted ladders to be wobbly as you cannot mount them to the chassis (else you could not open the door). The rear mounted ladders can only really be mounted to the actual door. While, a side mounted ladder is mounted to the roof as well as the bottom of the chassis.

FVC Side Mounted Ladder
✅ Extremely sturdy
✅ Flat and grippy steps
❌ High price point (but lower compared to alternatives like Backwoods, and Aluminess)

Surco Rear Mounted Ladder
✅ More affordable
❌ “Over the door” mount slides and scrapes paint
❌ Rounded steps
Transit Roof Racks
Roof racks are great for star gazing, and expanding your “livable” space. However, they are also great for mounting your solar panels, antennas, and lights to.

DIY Roof Rack
You can absolutely DIY your roof rack, in fact this is what we did in our first campervan conversion. This is a great budget friendly option. The best way to do this is to use 15 series extruded aluminum and stainless steel hardware to mount the roof rack to your campervans existing mounting points on the roof. You will need specific “foot brackets” – you can find these on Unaka Gear Co.
Once you have a frame of extruded aluminum, you can attach finished wood planks by drilling through them and securing them in the channels of the extruded aluminum. We have a more in depth explanation over on our “Best Camper Van Roof Racks” guide.

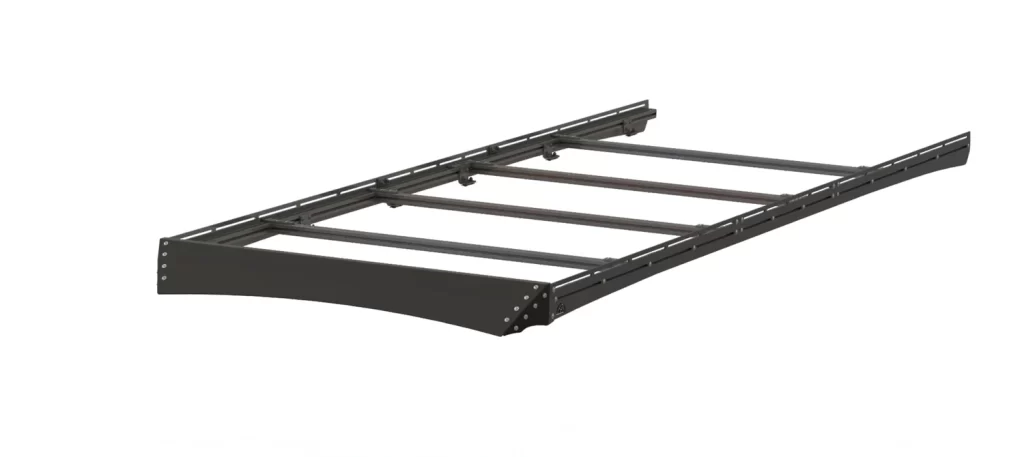
Safari Roof Rack
The next option is a “Safari” Roof Rack. This style roof rack is the most expensive style and is often chosen if you are prioritizing your roof rack doubling as a roof deck. You will need to cut holes into the rood rack and use trim rings to accommodate your roof fans.
While we absolutely love our Safari Roof Rack, extra consideration needs to be made for install. You will need a forklift, or many strong friends to lift it to your roof.
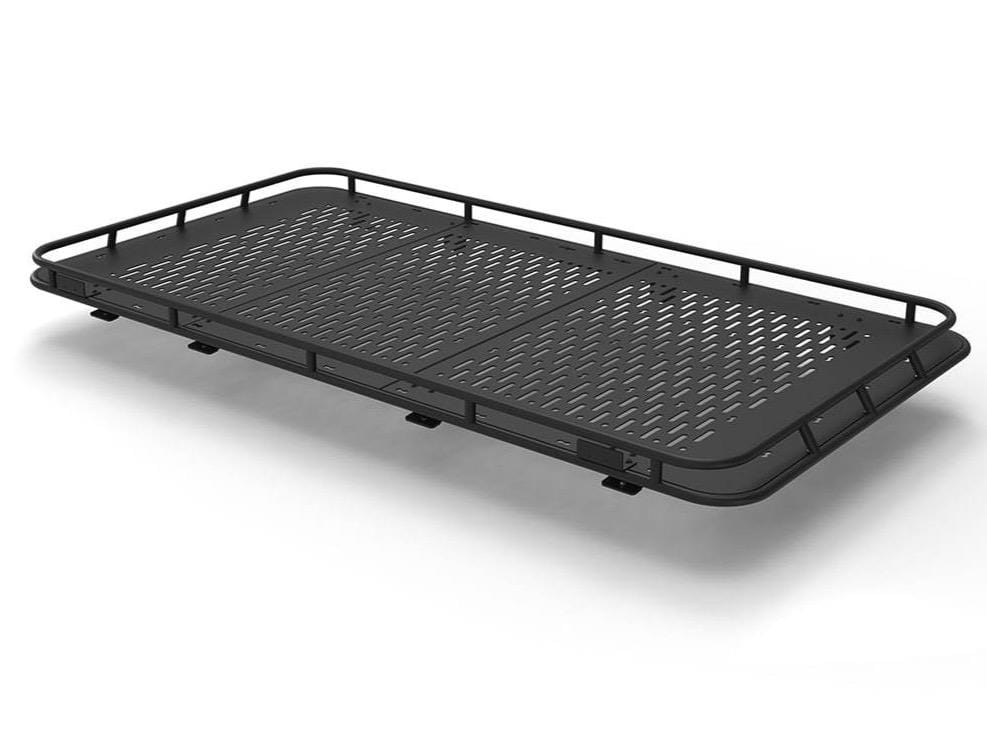
Low Profile Roof Rack
A more common, and cheaper, option for roof racks is a low profile roof rack. This roof rack style essentially gives you a strong base to build off of modularly. As you can see below, there is a hollow structure with mounting points for solar panels and custom roof deck panels. Additionally, there is a fairing add-on in front to help with wind resistance.
When purchasing, be sure to buy the proper length for your rig.
Transit Bumpers and Nudge Bars
When your vehicle is your home, things hit a little bit harder… for instance, a deer. Hitting an animal and totaling your house is not a great day. For this reason, many folks upgrade their stock bumpers for more protection. You have a few options here: full on bumper upgrades, nudge bars, and bumpers with winches to assist in vehicle recovery:
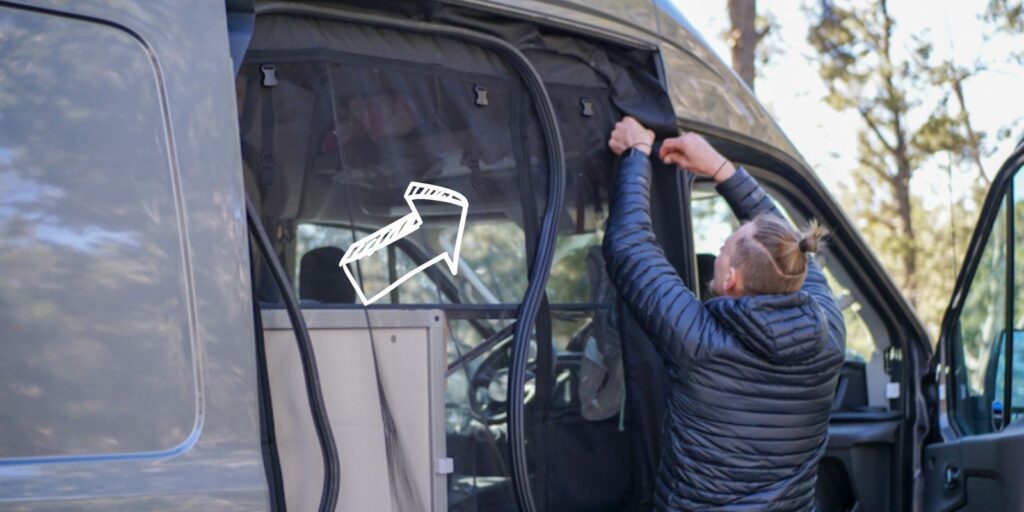
Transit Bug Screens
One of the hardest parts of summer van life, are BUGS. With the heat, it is so crucial to have windows, or doors open for ventilation. However, with open doors and windows come endless BUGS. A bug screen is something we overlooked in our first campervan conversion; but definitely did not in our second.
There are two common options van lifers pursue for bug screens: DIY and Professional. For a DIY bug screen, you can simply purchase a “pre made” bug screen for porches and cut it to fit your door size. For professional bug screens, we recommend The Bug Wall.
DIY Bug Screen
As mentioned above, for a DIY bug screen, you can simply purchase a “pre made” bug screen for porches and cut it to fit your door size. Be sure you buy one wide enough though because most doors are smaller than Transit doors.
We have more in depth directions to DIY-ing bug screens in this guide.
The Bug Wall
If your budget allows for it, we recommend The Bug Wall for professional bug screens made to fit Transit doors. The perk of going with a professional bug screen like the Bug Wall is the effectiveness, and ease of entering / exiting your van.
We really like their “Chill Curtain” for winter van life, but also for desert van life to keep the sand out!
Raptor Liner
Anywhere we thought that the exterior of our rig was susceptible to rocks, dings, and branches, we sprayed raptor liner, or truck bed liner. This includes painting our flares with it as those are the widest part of our van. This has proved to be a great decision and has saved us many times. Additionally, it is so much easier to clean.
Some folks even coat their entire campervan in Raptor Liner, this is not a bad idea! Especially because you can tint it to the color you want.
Ford Transit Exterior Upgrades for Van Life Summary
Between bumpers, ladders, roof decks, tires, and more, there is a lot you can do to upgrade your transit van for optimal van life. As always, be sure to pay attention to your campervans WEIGHT as you do this! (Not sure why? Read this).
Happy travels!
Thanks for being here! Happy building!
Eric + Colby
✉️ Join our mailing list for more content!
🙏🏽 If you are looking for more 1:1 van build help, we are here to help via Consulting or Travel Van Building.
[Start Here] Beginner Guides: