
How to Build a Camper Van Galley with 80/20
Building modules in your campervan with extruded aluminum (80/20) is a great way to have a lighter, strong, and longer lasting home on wheels. In this guide, we specifically teach you how to build a camper van galley with extruded aluminum (80/20). We have built a [free] calculator to size out the parts that you will need, and a corresponding diagram that shows you how to construct your van galley.
If building your camper van with extruded aluminum interests you, check out our additional module guides. Camper van galleys are one of the more complex modules to begin with. Some simpler projects include a bed system, or upper cabinets.
80/20 DIY Van Build Module Guides:
Below you can find specific step-by-step guides to building modules in your camper van with extruded aluminum. If you are looking for a starter project, the bed system, or upper cabinets are excellent places to begin.
Looking for specific assistance? We offer Virtual Consulting and love talking with our community about building vans with extruded aluminum. One of our more common consults is about reviewing your extruded aluminum designs before purchasing.

** Disclaimer: This blog post contains various affiliate links that provide a small kickback to us, at no additional cost to you. We truly appreciate your support if you choose to purchase through these! **
Camper Van Galley Parts Calculator [FREE Download]
We believe the best way to start designing your van galley with extruded aluminum is to understand how a very basic one is built. Below, you can download an excel spreadsheet of our personal camper van galley parts calculator. In this calculator, you will enter your height, depth, width, number of columns, and number of drawers per column. From there, it will determine the 80/20 lengths and hardware that you need.
Please note that this is a basic galley calculator with the intention of helping you begin to comprehend how 80/20 components go together. The output of this calculator is a simple and symmetric galley. With the concepts learned from it you can expand it to fit your needs and trickier components like sinks and fridges!
Download the above calculator and enter your desired number of columns and drawers, height, width, and depth. Then, move on to the schematics below where we will talk about additional (more complex) considerations.
80/20 Camper Van Galley Schematics Diagram
Below is what the output of the calculator would list if you chose a galley with 3 vertical columns and 2 drawers per column. We describe the hardware chosen in depth in our Guide to 80/20 Fasteners to Van Building if you would like to learn more.

How to Customize Further:
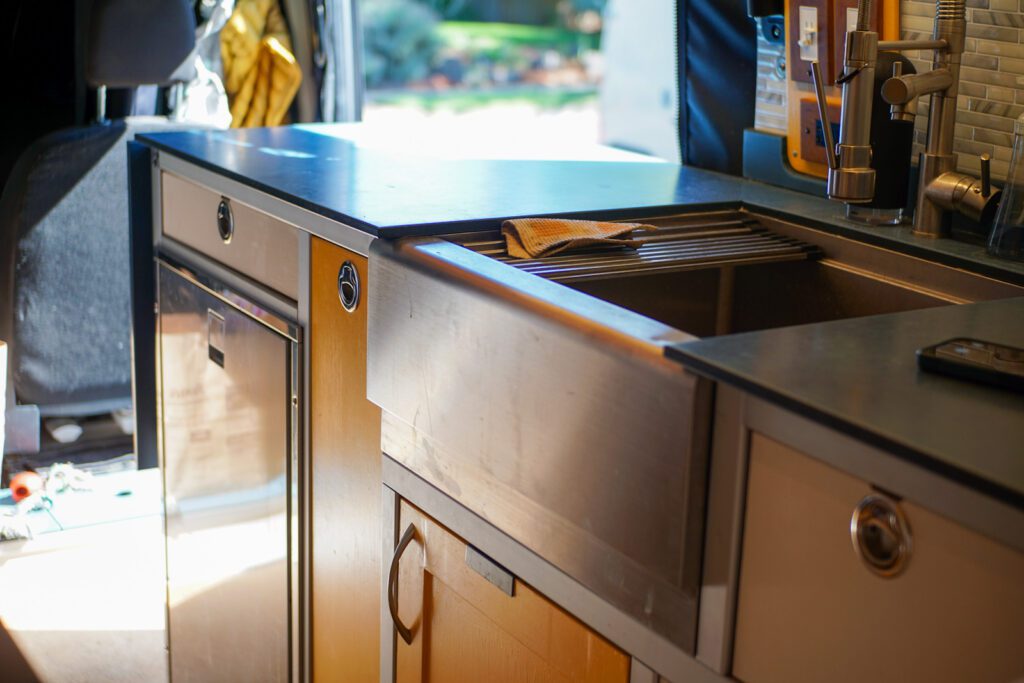
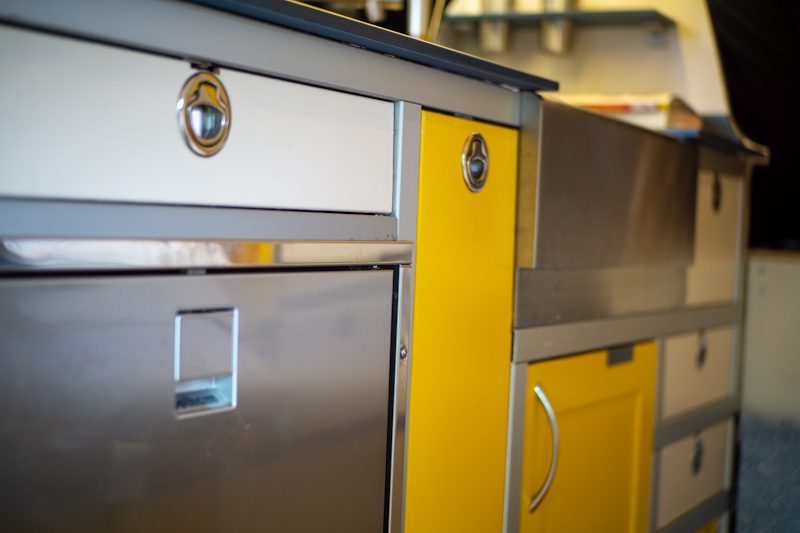
The calculator will output parts needed for a basic camper van galley / counter like pictured above. With this knowledge, you can extrapolate it out to more complex designs with some of the below tips for customizations. Below, you can see our camper van galley that has a pantry, sink, and fridge added to it.

Drawers
This design supports under-mount drawer slides. After working with both under-mount and side mounted drawers, we find under-mount drawer slides easier to work with. Under-mount slides provide a larger margin of error in terms of drawer size and fitting to the mount. When we worked with side mounted slides, we found ourselves constantly beveling out the sides of our drawers to get them to fit perfectly.
Related Reading:
Guide to Perfect 80/20 Drawers
Sink
You will most likely want a sink in your kitchen galley. To install one, you will simply need additional supports in the right horizontal and vertical places. The simplest way to do this, is just to add them to your “basic design”. We recommend using under-mount sinks in camper van conversions as they take up less space, and are easier to clean around because they sit flush with the counter.
One of the design decisions we made in our second camper van conversion was a large sink. We LOVE cooking and wanted a space to do dishes comfortably, or to store them while driving. We opted for a 24″ under-mount Farmhouse Workspace sink. We lined it up with the vertical support for the pull out pantry, and then added an additional vertical support on the other end. This resulted in a smaller drawer to the right.
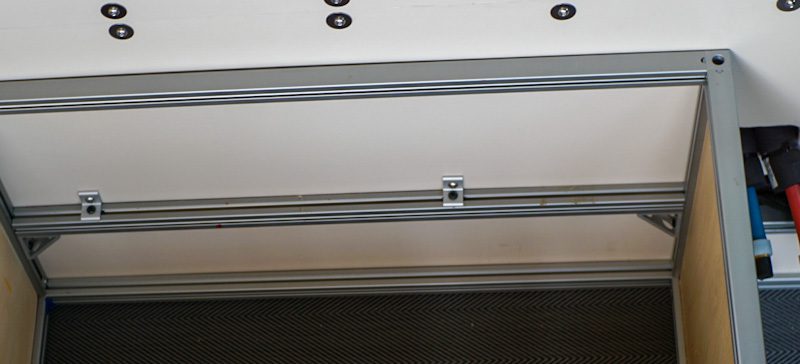
Large Galleys
The bigger the kitchen galley, the more support you will want in all directions. This is simply done by adding additional “depth minus 2 inch” supports along the bottom and top held by inner corner brackets or gusseted brackets. We would recommend making these additions if your galley is anything larger than 40 or so inches long.
How to Have a Smooth Finish
As you can see in these photos, we have a smooth face of 80/20 showing. This is because we opted for part #1503-S 80/20 lengths (one side smooth showing) as opposed to #1515-s with 4 open t-channels. This requires additional planning with where your brackets will go as you cannot use fasteners on a captivated channel, but it does look nice.

How to Anchor 80/20 Modules to Your Chassis
Anchoring to your camper van chassis is extremely important for any module you put in your van, extruded aluminum, or not! Luckily, doing so is quite simple. We anchor our modules to the floor and the wall using a combo of 1/4-20 bolt through pre-loaded inner corner bracket into a 1/4-20 plusnut (wall) or straight into the chassis floor with lagnuts.. Below is an example from our 80/20 shower guide post.
How to Finish Your Camper Van Galley
Now that the bones are good, let’s move on to finishing your camper van galley!
Side Panels
We have a whole guide to fastening panels to your 80/20 modules! Head on over there to explore your panel options and fastening methods. Don’t forget that you do not need to any panels where the panels aren’t showing (backs of modules…etc). This is a huge weight saving and air flow benefit to building with extruded aluminum.
Countertops for Campervans
For our camper van counter top, we opted for PaperStone and do not regret it! It requires a whole lot less maintenance than the more common butcher blocker. It is thinner, and it is extremely ding, dent, and scratch resistant. Oh, and it is recycled paper so hello environment friendly! Another similar option, that is potentially easier to source is Corian.
The one downside to using Paperstone was that we could not source a 1/2″ thick piece small enough for our galley, so we had to get a massive slab and cut / finish it ourselves. The smallest piece we could get at 1/2″ thick was 60″ x 96″. This was a bit messy (blue dust everywhere…) but in the end it did give us extra PaperStone so that we could use it for other top surfaces in the van!
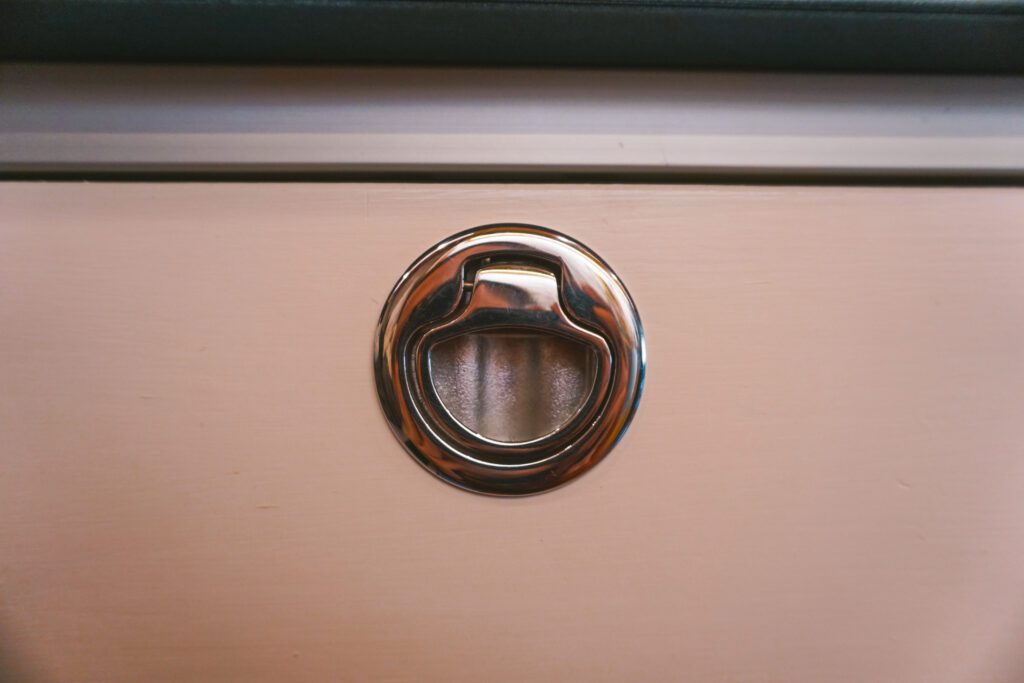
Latches for Camper Van Galley Drawers
Boat latches are the best option for keeping your camper van drawers closed as you drive. They are strong enough to prevent your drawers from whipping open when you round a corner (every van lifer knows…) And, they are flush so you don’t get caught on them as you pass by in tight spaces.
Let the 80/20 Van Build Commence!
Start with downloading our free camper van galley calculator and then extrapolate out to your perfect galley from there. You go this! As always, don’t hesitate to reach out with questions.
Next Reading:
Guide to Perfect 80/20 Drawers
Thanks for being here! Happy building!
Eric + Colby
✉️ Join our mailing list for more content!
🙏🏽 If you are looking for more 1:1 van build help, we are here to help via Consulting or Travel Van Building.
[Start Here] Beginner Guides:


Comments 8
Countertop/Paperstone question. What did you use to cut your countertop? How about the inside corners for your sink… different tool/blade? Thanks!
Author
The paperstone is super easy to cut – we used a track saw, but any standard wood working tools will do. To cut holes, we used a router!
Thanks for all the great information. What additional hardware did you need to make the vertical pantry pullout?
Author
We are happy you find it useful! For the pull out pantry, we used two undermount drawer slides on the bottom, and one side mounted slide about 2/3 of the way up. We used a slam boot latch to hold it in place. This combination has held up really well! We talk about drawer slides in this guide. Hope that helps!
Thanks for this awesome guide! It’s been extremely helpful in getting started on my own project. I have one question, though (well, I have many, but just one right now): how did you attach your countertop to the galley? I would assume (and the pictures seem to confirm) that you didn’t simply treat it as a surface-mounted panel with a countersunk bolt through the countertop, but it’s not obvious what you did instead.
I’m replacing the dinette in our travel trailer with a bar, to give us more work and storage space, so I have a slightly different design of two pedestals built from 8020 with a bar surface on top. One thought I had was to use snap-in panel hangers, that let you mount a ¼” panel flush with the surface, and attaching smaller segments of plywood to the bottom of the bar top that would attach to those on the bottom, allowing the bar top itself to be simply glued to the bottom plate. A countersunk bolt pointing down through the bottom plate would allow you to fasten a nut through the hanger, securing the bar top without any holes needing to be drilled through it.
Author
We used Sikaflex 252 (https://amzn.to/3EgfgTA) and laid a bead down along the entire perimeter of the 80/20 framing. It’s got a great bond strength and is still elastic – so it wont transfer vibrations up to the counter surface to the same degree as directly bolting it would. I agree that every taking it off would be a huge pain because it is more or less permanent.
I see two options for you. The first is a permanent solution like we did of directly glueing (using the sikaflex) the counter top to the two 80/20 pedestals. The easiest, but also the less desireable. The second is to glue your counter surface to layer of plywood and use wooden nutserts. Then you could devise up some brackets and bolt it from the underside giving no exposed hardware on the finished surface. The upside to this is that the counter is removable if need be, but the downside is that you would see the plywood edge. The next level upgrade to this is to makle the 1/2 – 3/4″ plywood recess into each of your two pedestals and use panel brackets from 80/20 rather than 90 degree angle brackets. This would make your counter removable and still be flush with you 80/20. The best and cleanest solution but also the most amount of work and more expensive the hardware.
Hi guys. Really love what you’re doing. I’m over in the UK and planning on doing our build in extruded aluminium too. I’m getting really stuck on the drawer slides for our galley though. How do you fix the undermount ones? The supports for the draw glides don’t seem to run the whole depth of the galley to be able to fix to the front and back supports. I tried to check your links to the undermount draw slides you used but they’re not popping up on the UK Amazon. Any help or pointers much appreciated!
Author
Great question! This is actually an active blog post I am writing, but the quick and dirty is a T-nut/bolt combo fits perfectly for the front channel and in back you will have to fashion a custom bracket using 1/8″ thick aluminum angle. I used 2″x4″ and trimmed it to size, but 2″ x 2″ should be just adequate and is much more commercially available at many big box retail stores like Home Depot or Lowes in the US. Cheers from across the pond!