
Complete Guide to Camper Van Walls: Install & Finishing Options
At first, camper van walls sound simple; however, there are a lot of ways to go wrong. Trust us, we speak from experience! But, don’t worry, we have you covered below with all you need to know about the most common materials for camper van walls, how to finish them, how to install them, and other considerations.
In this guide:
🎙️ Listen on Van Life Lab Podcast
Do you prefer to learn by listening? We recorded this blog post as an episode on our podcast Van Life Lab. Listen in, or explore our other episodes:
- Listen on Spotify
- Listen on Apple Podcasts
** Disclaimer: This blog post contains various affiliate links that provide a small kickback to us, at no additional cost to you. We truly appreciate your support if you choose to purchase through these! **
When is the Best Time to Put Walls Up In Your Camper Van?
The timing of putting up walls during a van build is where most people go wrong (us included, once!)
The best time to put up your camper van walls is right after insulation, subfloor, and pre-wiring/plumbing. It is crucial to at least get your walls cut out and dry fit before any modules go in because it is very difficult to template and slide walls into odd spaces when things are in place. You can add final finishings to your walls at the end of your built; but they should get installed before anything major in the space goes in.

Common Camper Van Wall Materials
The two main categories of materials for walls in camper vans are:
Let’s dive in to each of these below.
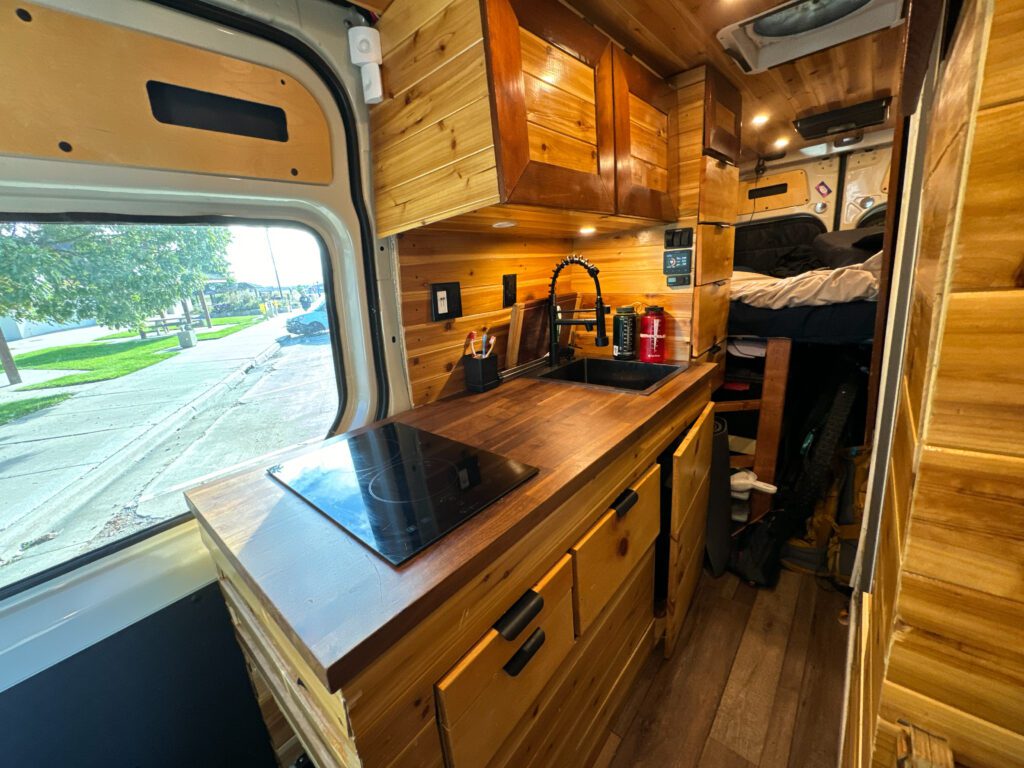
Tongue & Groove Camper Van Walls
Tongue and groove camper van walls can be made of various materials:
- Shiplap
- Cedar
- Pine
- Other woods
No matter what tongue and groove material that you choose for your walls, they all go up the same way. You put one board up at a time and the next board locks via a tongue and groove locking mechanism. Generally, when installing tongue and groove wall panels you work from the floor to the ceiling, and sometimes even wrap around the ceiling.
How to Fasten Tongue and Groove Camper Van Walls
Fastening tongue and groove panels requires having furring strips on your ribs and ceiling. You then use finishing nails, or screws to fasten each piece of wood to the furring strip. While the tongue and groove holds each panel together, you still need to attach the panels to the wall of your van.
Tongue and groove is generally a cleaner looking approach compared to the bolts discussed below for plywood panels.
” I used Home Depot Cedar Tongue and Groove (~$27 in NH for a 6 pack of 3.5” wide x 8’ long boards), sanded and finished with Semi-Gloss oil based polyurethane 2-3x for a super smooth finish that is durable and reflects some light to make it feel brighter in the van. The major con here is the oil based poly will yellow over time (with UV exposure) but I wanted the extra saturation to bring out the Cedar tones and grain variants. “
– Ryan LeCours (friend and epic videographer)
Plywood Panels
The second category of wall panels is plywood; however this can be extended to any material that you make large panels out of to cover the whole wall. This method requires templating (discussed later) to the area of the wall to cover.
How to Fasten Panel Camper Van Walls
One of the benefits of panel style walls is that you gain back space as you do not need to bump them out with furring strips. Instead, you install plusnuts with a plusnut tool in the holes around your chassis and hold the panels up with bolts straight through the panel into the plusnuts.
Utilizing bolts and plusnuts also makes removability incredibly easy which is one design strategy we believe is important for servicing of your camper van.
Are furring strips or plusnuts better as a thermal break?
Both furring strips (wood) and plusnuts and bolts (metal) are poor insulators. Therefore, both create a similar amount of thermal bridging. This is not good for insulation.
To solve this problem, we recommend adding a thermal break layer which could be as simple as one of the following:
- LOW-E foam on the back of your panels
- Lizard Skim Ceramic Insulation

How to Finish Your Camper Van Walls
There are 3 main ways to finish your camper van walls:
- For a cozy finish, you can wrap your panels in a thin layer of foam and then fabric.
- For a “cabin”-y vibe, you can stain your panels with a subtle stain of choice.
- For a more typical home style finish, you can paint your panels any color.
1. Upholstering Wall Panels with Fabric
Upholstering your wall panels in fabric is a common option. We have an entire guide to DIY Upholstered Wall Panels (it can get tricky on the corners!), so we will leave you with that. Spoiler alert: all you need is a lot of 3M 90!
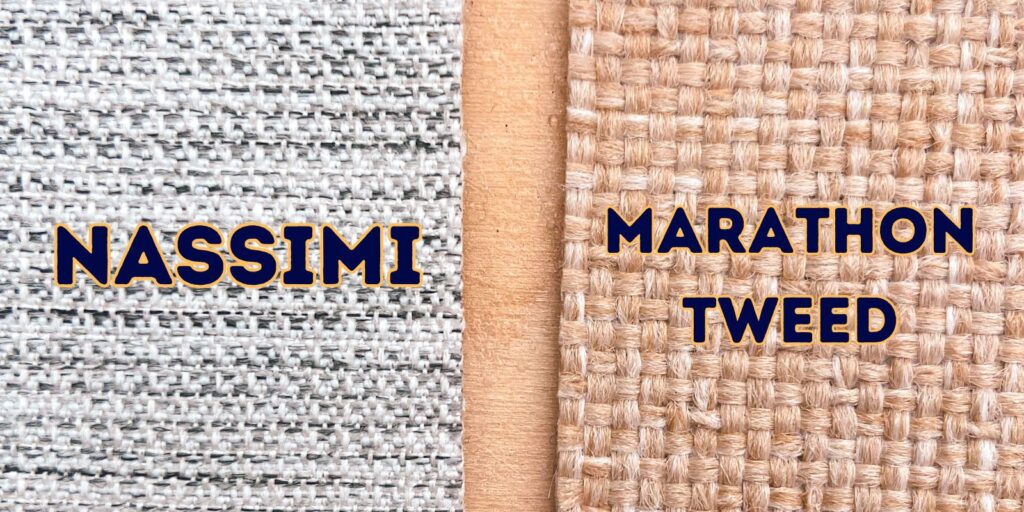
While you can truly choose any fabric at your local fabric store, there are 2 common durable fabrics that we have seen used in many rigs:
- Marathon Tweed is a cheaper and has a coarser weave that is a bit rougher to touch. BONUS: Marathon Plus Fabric already has PAD5 foam on the backside.
- Nassimi Fabric is more expensive but softer and a tighter weave that is easier to wrap panels with.
Read our guide: DIY Upholstered Wall Panels for Your Conversion Van
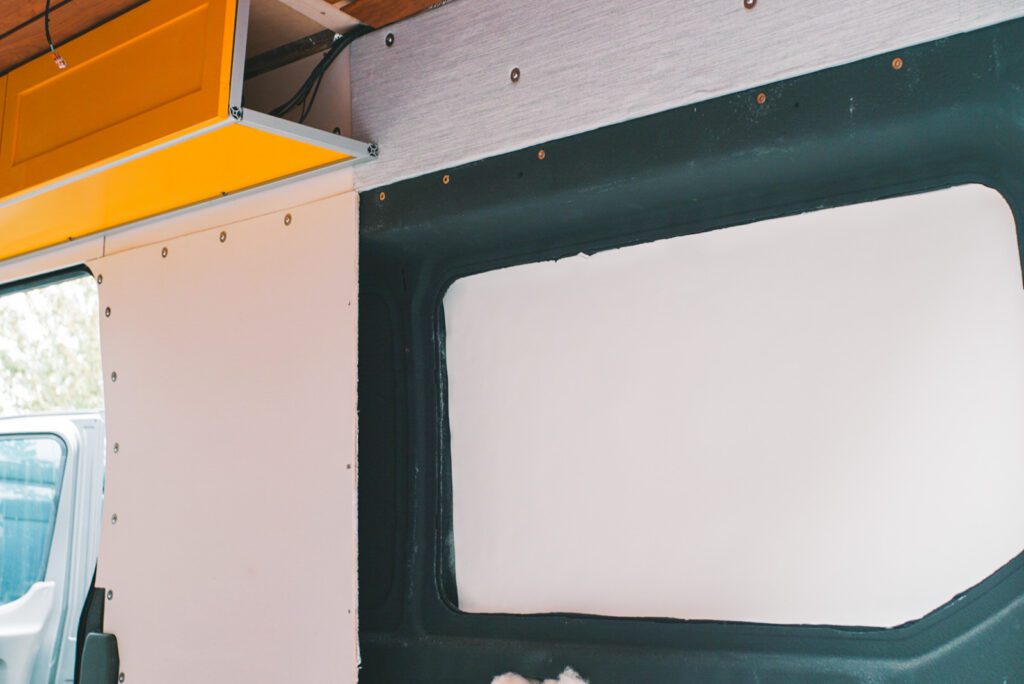
PAD5 Foam
When using fabric, we recommend first adding a 1/8″ layer of closed cell foam to the panel. This produces a softer wall than plywood alone, especially comfortable in the “bedroom” of your camper van. This is also easy to apply with 3M90.
Below you can see the PAD5 foam nestled into our flare as well.
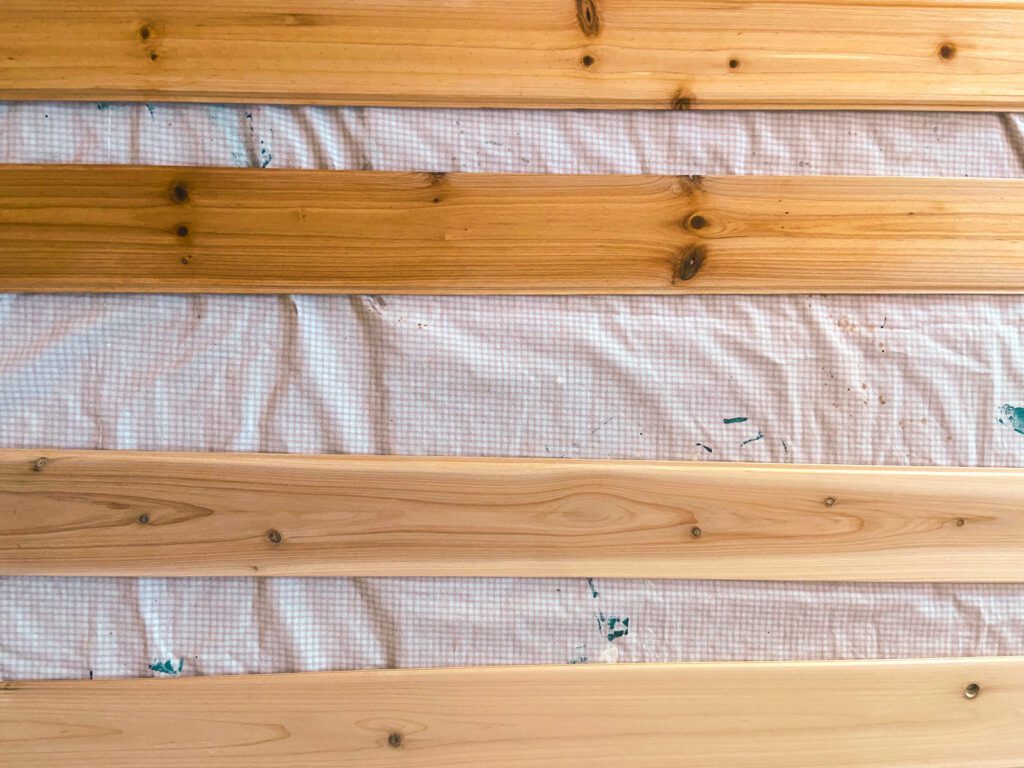
2. Stain or Paint Your Wall Panels
If you decide to stain, or paint your panels, we highly recommend 2 coats of polyurentane on top of your paint / stain. This will protect your finish greatly as you travel and live in your van.
Below, you can see stained cedar panels (top 2) and raw cedar panels (bottom 2).
How to Template Camper Van Wall Panels
There are 3 different options for templating the panels in your camper van:
- Fully DIY templating and panelling
- Pay for templates, but do the paneling yourself
- Pay for CNC panels
DIY Template + Panel
The cheapest option is to template and cut every panel in your camper van on your own. We did this in our first camper van to save some money, and while it does that, it can be incredibly frustrating to template the odd shapes and curves of a camper van. If you have patience, give it a go! We recommend templating with Kraft paper, or cardboard. Cardboard is more rigid and will be easier to handle.
Then, with the templates, simply cut your panels from your 1/4″ plywood of choice.
Template Kit + Panel Yourself
For about $400, you can purchase paper templates that you can lay over plywood and jigsaw out your panels. For panels, we recommend using a 1/4″ piece of plywood.
CNC Panel Kits
For about $2,000, you can get CNC cut and drilled 1/4″ panels. As the Engineers who Van Life, we like to do the math. If you buy the wood yourself, you probably need about 8 sheets of plywood @ ~ $125 each. This is $1000 + the time spent templating and cutting.
General Tips for Installing your Camper Van Walls
Here are some final tips for installing your camper van walls.
Plywood Grain
Because camper van walls curve you want to think about the grain of your plywood when installing. Generally, plywood will bend easier with the grain running parallel to the curve and have less stress over time. If you try to bend your panels perpendicular to the grain, they will be quite strained.
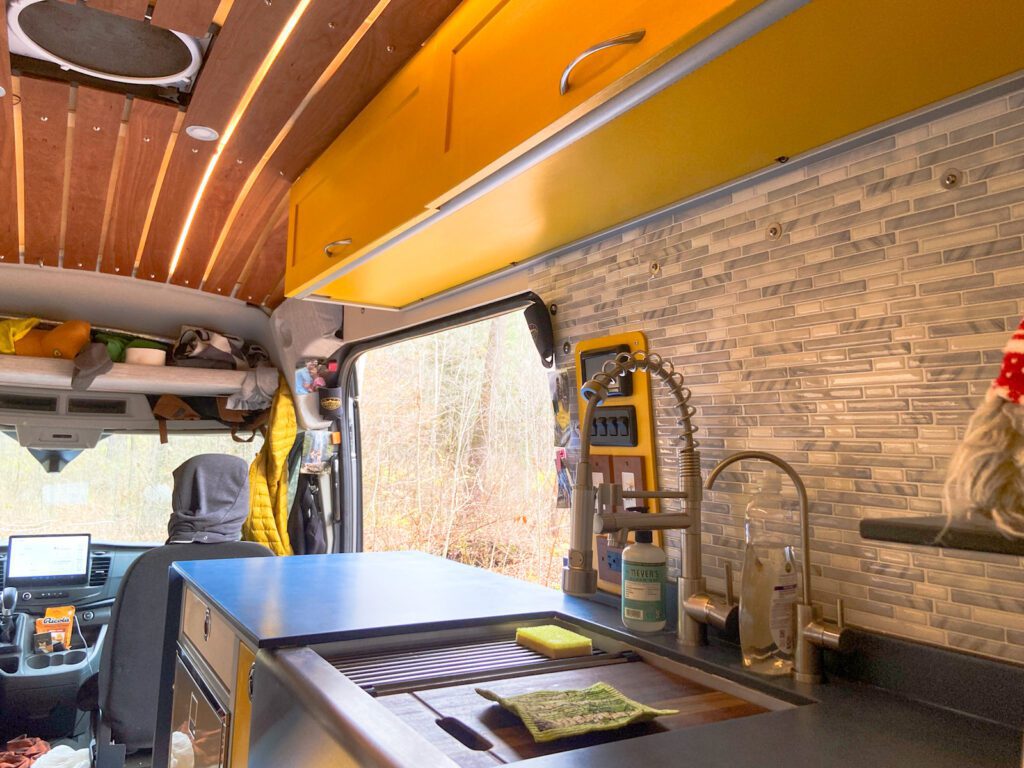
Peel 'n Stick Kitchen Tiles
The area of wall where you cook most will need cleaned often. For this reason, we recommend some sort of backsplash. Some good options include:
- Peel ‘n Stick Kitchen Tiles
- Copper Sheets
- Ceramic Tile… we do not highly recommend this due to the bumping around that happens on Forest Roads, but some people really love their tile.
Thanks for being here! Happy building!
Eric + Colby
✉️ Join our mailing list for more content!
🙏🏽 If you are looking for more 1:1 van build help, we are here to help via Consulting or Travel Van Building.
[Start Here] Beginner Guides:


Comments 5
Hi, for your plusnuts, did you go with stainless steel or did you use the standard gold zinc plusnuts? I wasn’t sure if it is worth the added cost for the stainless or if there are concerns with rust using the gold zinc ones on the van
Author
Most of ours are the standard type – unless we thought they were in locations susceptible to water.
When choosing your plusnuts, did you just use the standard gold zinc plusnuts? I see stainless steel ones that are much more expensive and wasn’t sure if that was necessary. Thanks!
Did you use plusnuts to fasten all your 1/4″ x 3.5″ (assume cedar) boards to the ceiling. It looks like the strips to create the space underneath all line up with van body ceiling beams. The ceiling layers are 1/4″ Baltic birch cover then strips aligned with ceiling beams to create depth, then cedar planks?
Author
Hello! Good eye. Yes- all bolts go through the cherry planks, a 1/2″ spacer (wood, or delrin) that tapers with roofline, and into plusnuts! The spacers are just so that we could recess strip lighting. That is optional.