
Camper Van Sub Floor: DIY vs Drop In Options
A subfloor will serve as the base to all parts of your camper van buildout. For this reason, a strong, waterproof, and solid subfloor is an important part of your rig. In our previous van builds we have installed both DIY subfloors and “drop in ready” subfloors so we will detail out both below with pros and cons.
In this guide, we will discuss:
** Disclaimer: This blog post contains various affiliate links that provide a small kickback to us, at no additional cost to you. We truly appreciate your support if you choose to purchase through these! **
What is a camper van subfloor?
A subfloor is absolutely crucial for any conversion van. A subfloor is exactly what is sounds like: a solid base beneath your main flooring. It is the first layer of thermal barrier, insulation, and rigidity. ** Insert cliche phrase about starting with a strong base. **
There are a few key things to keep in mind when choosing and installing your subfloor:
- There is a proper balance to find of insulating qualities while maintaining rigidity, and not adding too much height. The height you have to play with is completely dependent on how much vertical standing room you are able to lose.
- You should prioritize moisture remediation. For example, if you are using plywood, you will want to properly seal it. Or, your can purchase marine grade, or other sealed plywood.
- Always think about minimizing weight. Every ounce matters in the long run.
Camper Van Subfloor Options
As DIY van builds becomes more established, more “drop in” solutions for different stages of the van build appear on the market. Subfloor is one of those stages that we have begun to see really efficient, and interesting solutions for.
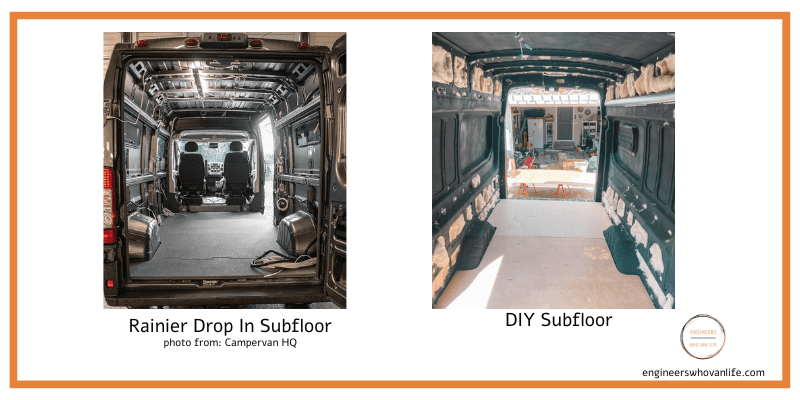
In our first van conversion we fully DIY-ed our subfloor, and in our second, we opted for a drop in solution. Below we will share both of these options, the pros / cons of each, and additional information we have learned along the way from others.
Drop in Subfloor for DIY Camper Van Builds
As DIY-ers we tend to shift away from drop in components, however, for us, the subfloor is an exception. We did our own subfloor twice, and actually replaced the second one with the drop in Rainier RV Flooring System.
What is the Rainier RV Flooring System? This is a CNC [computer numerical control] cut closed cell foam (Coosa) sub structure reinforced with fiberglass. It is divided into segments that lock together in a dovetail mechanism to ensure tight fitment and absence of movement. Coosa in particular is incredibly unique in terms of its inability to absorb water due to the construction and impregnation with fiberglass. Similar materials have more of a honeycomb structure which does trap water.
Why did we pivot from a DIY subfloor to use the Rainier subfloor?
- It is 60% the weight of traditional plywood. We truly believe every pound matters in a van build, especially when you plan to go places.
- It has zero rot ability which is important as it is easy for moisture to make its way through and under a van floor. As two snow chasers, moisture is something we take extra steps to mitigate.
- It has a perfect fit (due to its CNC cut), and it’s dimensional stability. We suffered from creaky spots in our first rig, and that wasn’t something we wanted to deal with again.
- Install is simple and quick. DIY-ing a subfloor can take a few days to do correctly.

Rainier RV Flooring System
Photo Source: Campervan HQ

Radiant Heating Drop in CNC Subfloors
As of 2023, there are also heated subfloor options. If a hydronic heating system is on your radar, this might be a good option for you. Heated subfloors work by in-laying PEX tubes in your subfloor. Your hydronic heating system then pumps heated fluid through the tubing to heat your floors.
The Columbia Flooring Radiant Heat System is a full CNC cut, ready to assemble and install option of heated subfloor.
Columbia Flooring System
Photo Source: Campervan HQ
Be sure to purchase the correct WB and wheel #.

Pros / Cons of a Drop in CNC Subfloor
Pros
- Time saving in terms of templating, cutting, etc.
- Perfect fit due to CNC templating
- 60% lighter than plywood
- Extremely moisture and rot resistant with no added work
Cons
- Price point is quite a bit higher than if you were to DIY
- Posses more insulation than plywood, but not as much insulation as XPS foam, to solve this we cover our subfloor with cork
How to DIY Your Camper Van Subfloor
With proper time and resources, you can also DIY your camper van subfloor for a reasonable price. We did this for our first van conversion and it worked great, but we did learn some things to enhance your experience that we will share below.
Materials needed
For a DIY camper van subfloor, you need only a few materials:
- Floor Joists for support
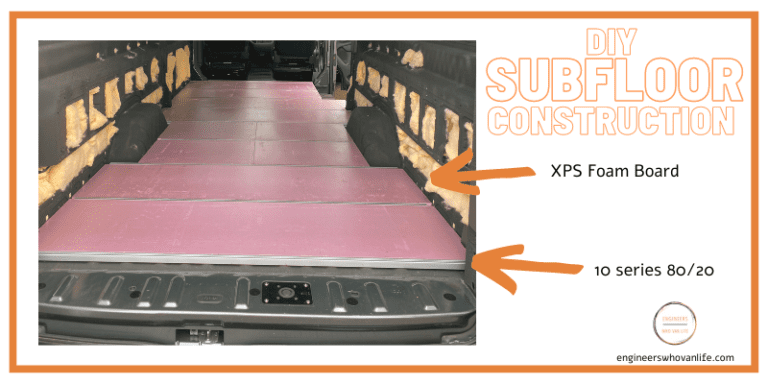
- XPS Foam Board for rigid insulation
- Plywood for the actual base floor
- Construction Adhesive to stick it all together
Floor Joists
Joists laid horizontally across your floor are your first layer of rigidity. We recommend 10 series extruded aluminum (8020) for this. You can also use wood supports. However, we recommend using 80/20 for a few reasons, it is:
- Moisture (mold) resistant
- Perfectly straight which reduces creaking and shifting from wood imperfections
- A stronger base
No matter what joist material you decide to go with, it needs to match the thickness of your rigid insulation layer. Floor joists should be placed between each segment of XPS foam board shown in the diagram above.
For our Ford Transit 148 EXT we used the following. However, you should be sure to measure and choose the proper length of 10 series (part # 1003-s) for your chassis.
| 8020 Part # | Length | # Needed | Link |
|---|---|---|---|
| 1003-S | 53″ | 1 | Add to Cart |
| 1003-S | 59″ | 3 | Add to Cart |
| 1003-S | 67″ | 5 | Add to Cart |
Related Reading:
How to Build a Van with 80/20
XPS Foam Board
Next up is the XPS Foam Board that you will lay between the floor joists. This layer is for rigidity, and insulation. We like to use 1″ thick XPS foam (pink board). This insulation has an R-value of 5 and is pretty moisture resistant compared to other types of foam board.
Related Reading:
Camper Van Insulation Deep Dive
Construction Adhesive
You will need construction adhesive for keeping your subfloor in place. This construction adhesive should be rated for foam board (like this one) use as you will be adhering the plywood to the foam board, and the joists to the chassis floor. And, some adhesive will eat away at certain materials.
Plywood
The plywood is the top rigid layer that you will lay your “top floor” upon. We used 1/2″ baltic birch sealed with Kilz primer but our (awesome) community brought X grade plywood to our attention. X grade plywood is essentially plywood with an “X” stamp that designates it as outdoor use friendly. The most economical option for this is CDX plywood.
No matter what plywood you choose, you will need to template your floor and transfer it to the plywood in multiple pieces.

DIY Camper Van Subfloor Instructions:
- Template your chassis floor with cardboard or particle board. This step is crucial and will save you time!
- Lay joists in place.
- Cut and lay XPS foam board between joists (utilize your template!)
- Cut plywood to size and lay on top of joists + XPS foam board. You will need to cut multiple pieces of plywood. We used 4 separate pieces for our subfloor.
- Once test fitted, apply construction adhesive:
- joists to floor
- XPS board to plywood
- Weigh down thoroughly and allow to fully cure based on adhesive used. We like to weigh ours down with the remainder of our camper van build supplies! Or, you can use drywall “3rd arm” supports.
Pros / Cons DIY Subfloor
Pros
- High insulation factor due to XPS foam
- Customizable to your layout
- Besides the time factor, it is a pretty simple DIY project with the proper tools
- Cheaper than drop in options
Cons
- Time consuming
- Templating and cutting XPS, and plywood, can be tricky without proper tools
- Extra work must be done to ensure proper moisture sealing
- Potentially squeaky if you do not shim or fit properly
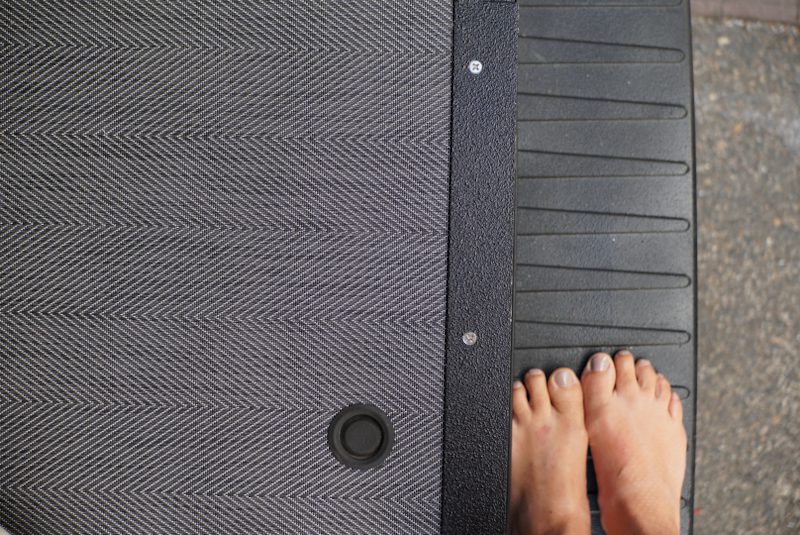
BONUS: Top Floor Options
Your sub floor is meant to just be a strong, and well insulated base. On top of this, you will lay some sort of “top floor”. We recommend installing your top floor after all of your modules are in place and you are done with the messy building phases.
Top floor options include:
- Floating Cork (Most comfortable but hardest to source in small quantities)
- 2Tec2 (Awesome and durable for garages)
- Lonseal (Also really durable and cheaper than 2Tec2 – different look)
- Click Lock LVT (Cheap but degrades over time and hard to clean)
Our flooring choices: Winding Stream Floating Cork [living space] + 2Tec2 Shades Steel [ garage ]

Additional Considerations for Camper Van Subfloor
Installing the proper van subfloor should be given adequate thought as it is the base to the rest of your van conversion. Here are a couple “gotchas” that we learned along the way.
- Ensure proper, and full, adhesion of rigid insulating material to chassis floor as even the smallest misses result in a noticeable squeak.
- Utilize shims in places where the chassis floor beams are missing, or uneven, as this results in an unevenly supported floor which again, causes squeaking. Also, this could potentially lead to floor separation if you used tiles or flooring in pieces (like LVT, etc).
- Weighting your floor during the adhesion stage is tricky. You need enough weight to gain proper adhesion, but not too much weight such that when you remove it, the floor springs back and pulls the adhesive off. Be sure to follow the directions carefully!
Next Reading:
Camper Van Insulation Guide
Thanks for being here! Happy building!
Eric + Colby
✉️ Join our mailing list for more content!
🙏🏽 If you are looking for more 1:1 van build help, we are here to help via Consulting or Travel Van Building.
[Start Here] Beginner Guides:


Comments 7
I’m a newbie, still looking for THAT van….And doing some “Homework” during this interim. Question: Can I use drivers for the subfloor? Any further recommendations? My van will primarily used for weekend warrioring and vacation excursions (aka: short road trips). So,with that in mind,my focus is sustainability and comfortable.
Author
Hello! Exciting! Good to do your homework 🙂 What do you mean “Drivers” for the subfloor?
Hey guys, thanks for all the info! I can’t decide how to address thermal breaks in my subfloor, which will be 10 series and XPS foam board per recommendation. I would like to avoid the hassle of lizard skin installation, even though it looks like a great option. CIosed cell foam doesn’t seem like a good option for layering in between aluminum/chassis, plywood/aluminum..? Seems like it would disrupt stability and strength. Appreciate any guidance you can offer.
Author
I definitely agree that closed cell foam would not be your best bet! It would also compress down pretty quickly. Something like a layer of thin cork underlayment would do the trick and withstand the pressure.
You guys are the best 🙏🏻😊
Questions for DIY floor:
1) Is everything glued (80/20 to chassis floor and plywood, XPS to chassis floor and plywood)? If so, would a better profile for 80/20 be 2 open t-slots opposite each other so you have 2 solid surfaces to glue to? Confirming there are no fasteners from the plywood to the 80/20?
2) I was thinking I would apply a solid sheet of commercial grade vinyl (LVOC vinyl adhesive) to the 1/2″ CDX plywood sealed at the permitters so no water can get into the subfloor. Then add floating floor surfaces on top (cork, garage floor, etc). Any thoughts?
Author
Hi Craig!
1. The way we have done it for our rigs is simply using adhesive between 1) joists to the floor and 2) the plywood to XPS. This has been more than enough strength. You could do more if you’d like, this might prevent some of the squeaking that sometimes occurs. If you do choose that route, yes you should opt for 2 smooth surfaces on your 80/20. Good call!
2. There are no fasteners needed.
3. Thats a great plan for moisture management – we wished that we used CDX plywood.