
A Comprehensive Guide to Effective Camper Van Insulation
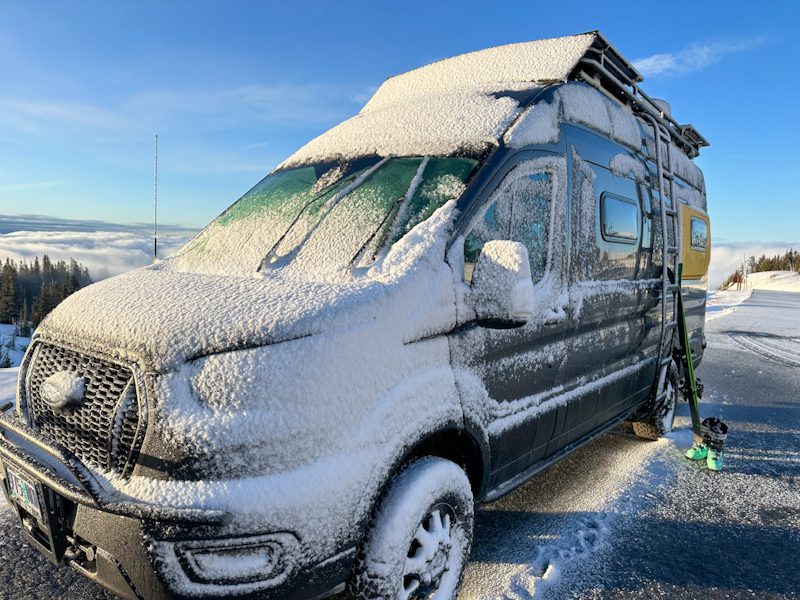
With correct camper van insulation you will keep comfortable all year round wherever your adventures may take you: hot, or cold. It is a common misconception that insulation is only for the winter. However, proper camper van insulation is the solution to both staying warm in the winter, and cool in the summer. This guide is dedicated to not only providing you with camper van material options, but also educating you on the science of camper van insulation, common weak points, and lessons we have learned over our various DIY camper van conversions.
In This Guide:
** Disclaimer: This blog post contains various affiliate links that provide a small kickback to us, at no additional cost to you. We truly appreciate your support if you choose to purchase through these! **
TLDR; The Best Camper Van Insulation Strategy
Below is what we have settled on as the best camper van insulation strategy after several DIY van builds. Read on through our guide to understand why we chose this combination, as well as some additional considerations.
- Walls and Cavities: Havelock Wool
- Ceiling: 3M Thinsulate
- Ceramic Insulation / Thermal Break: LizardSkin OR Low-E
The Science of Camper Van Insulation
Understanding why camper vans get hot and cold easier than houses do, and what we need to focus on is key to insulating properly. There are just a few key things to understand:
- How heat transfer occurs
- The difference between mass and radiant insulation
- How and why thermal bridging exists in camper van buildouts
Heat Transfer in Camper Vans Explained
There are three main modes of heat transfer: Conduction, Convection, and Radiant heat transfer. All three can result in both heat gain and heat loss depending on the time of year. It is important to keep all three in mind when choosing insulation materials for your camper van floors, walls, and ceiling (the three areas you will need to insulate in your van).

Radiation Heat Transfer
Radiant heat transfer is when a warmer object emits heat and it travels to a cooler object through electromagnetic waves without needing a medium such as air. An example in terms of camper vans is the sun warming your camper van through the windows. The main way to insulate against radiant heat transfer is quality window shades.
Conduction Heat Transfer
Conduction heat transfer is the transfer of heat between materials in direct contact. A fantastic example of this is the sheet metal of a camper van body. Metals have tightly packed molecules which make them extremely efficient at this type of heat transfer. On a hot, or cold day, heat is transferred through the chassis, into the interior of your camper van. The best way to insulate against this heat transfer is to include a type of thermal break in your insulation strategy such as Lizard Skin, or closed cell foam. This is often a type of camper van insulation overlooked, but can make a massive difference!
Convection Heat Transfer
Convection heat transfer is the movement of heat through gas, or liquid. An example of this in a camper van is simply the movement of hot air, or cold air throughout the interior of you camper van. The best way to insulate against this is the minimize “air gaps” in your mass insulation, and the insulation all of your beams and walls.
What Types of Camper Van Insulation Materials Do You Need?
- Mass Insulation: This is for cavities, walls, ceilings, and the like, and is used to fight against convection and conduction heat transfer. Common options include: 3M Thinsulate, and Havelock Wool.
- Thermal Break Layer: This is used to fight against conduction heat transfer, especially on hot days. We place this layer on the back of all wall panels and anywhere the chassis touches an extruded aluminum module. Common options include Lizard Skin Ceramic Insulation, or closed cell foam.
- Radiant Heat Loss Barrier: For this, you simply need window shades to prevent radiant heat gain in your windows.
Mass insulation is best measured by R-Value, while, radiant heat loss insulation is best measured by E-Value.
What is R-Value?
The most common standard for defining the quality of an insulation is by a measure called the R-value. At a very basic level, the higher the R-value the more insulation it provides. As mentioned above, R-value defines insulation characteristics of material that fills cavities, referred to as ‘mass insulation materials’, and it works by slowing convection heat loss/gain.
R value is a unit of measurement that quantifies how resistive a material is to absorb heat and pass it through to the other side of the material. Important to realize though is that the heat is ultimately absorbed by this insulation material so it is simply serving as a heat sink to slow the inward or outward transfer of heat. When reported, R value is typically normalized per inch of insulation, so a higher R-value of insulation can always be achieved by increasing the thickness or number of layers of insulation – within the spatial limitations of your van, of course.
What is E-Value?
An E-value is a number 0 to 1 that represents the percentage of radiant heat that is absorbed into the material. Thus, a low E-value means that radiant heat is being reflected outwards instead of being absorbed into the medium. If properly used and achieved, this type of insulation can be extremely effective, especially in camper vans as they are metal boxes.

Deep Dive: Thermal Conductors and Thermal Bridging in Camper Vans
Unfortunately, much of your van building materials are good thermal bridges. This includes all the metal, wood, and vinyl in your build. Being a good thermal bridge equates directly to being a poor thermal insulator. Thus, the first big concept in creating a stable interior environment is preventing this process of thermal bridging by utilizing a thermal break material.
Thermal bridging occurs when there is a complete path of thermally conductive material leading from the outside of your van all the way to the inside. A complete thermally conductive path will lead to cold spots on your interior in the winter, and hot spots in your van in the summer. Thermal bridges occur naturally when your wood walls/ceiling/floor are installed in direct contact with the van’s metal interior.
What materials can be used for as thermal breaks?
To prevent thermal bridging, you will need a thin insulator to use as a thermal break. Remember, your van’s insulation is only as good as its weakest points so splurging on expensive mass insulation will yield you little return if you have a plethora of thermal bridges! For a well insulated camper van you will need to address BOTH conduction and convection.
Thermal Break Material Suggestions:
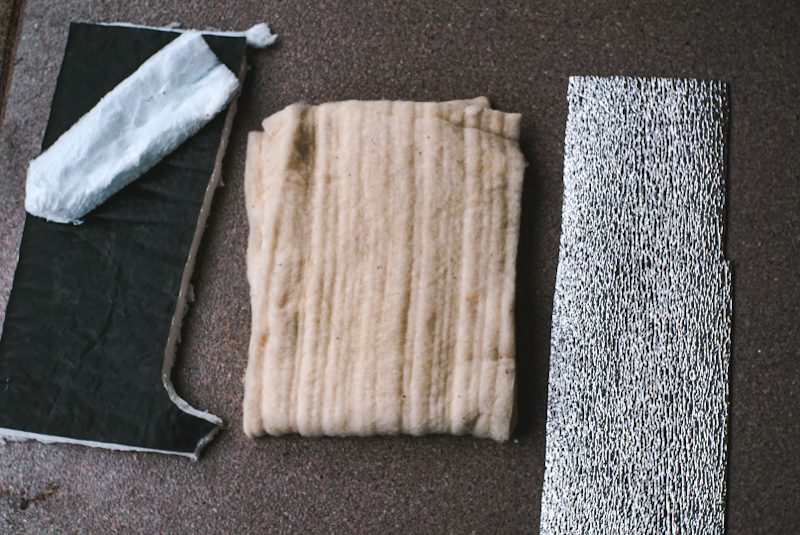
- Closed Cell Foam is the easiest option. This is just a layer of foam surrounded on both sides by foil. You can install it with 3M90 adhesive wherever you want to create a thermal break. For example, you can install it on the backs of wall panels and furring strips where they touch the sheet metal.
- Lizard Skin (Spray ceramic insulation) is more complex, but more thorough. This is applied with a spray gun and you will place a thin layer over your entire camper van.
- Thin Cork Underlayment. Cork is a natural thermal insulator that can work to prevent thermal bridging. If you opt to not use Lizard Skin, this is a good option for your subfloor thermal breaking.

Common Bridging Points to Address with Camper Van Insulation
There are many potential thermal bridging points in a camper van, but here are a few of the most common:
- Van walls where wood is applied directly to the sheet metal
- Van floor where floor braces contact both the subfloor above and metal floor below
- Van ceiling where the ceiling is bolted directly to the metal ribs above
- Aluminum extrusions bolted directly to the van’s sheet metal.
- Wood furring strips, or cabinets, directly attached to vans metal.
Top Rated Camper Van Insulation Materials
Now that you understand how heat enters and leaves your camper van, and the important ways to insulate your rig, let’s move on to top rated camper van insulation materials. We will discuss the following:
- Havelock Wool (or Sheep’s Wool)
- 3M Thinsulate
- Lizard Skin Ceramic and Sound Barrier
- Spray Foam
- XPS Foam Board
- Reflectix
Havelock Wool - our #1 Choice for Mass Van Insulation
Havelock wool (sheep’s wool) is a mass insulation with an R-value of 3.6 per inch. It is excellent as a mass insulator in camper vans for the following reasons:
- Havelock Wool is a renewable, environmentally friendly product.
- Havelock Wool batts are easy to pull apart with your hands and then conform to all the oddly shaped nooks and crannies in your van.
- Havelock Wool is the only insulation that is able to absorb extra moisture and then release it when the ambient air is dry. This is extremely important for moisture mitigation as camper vans will get moisture in the walls.
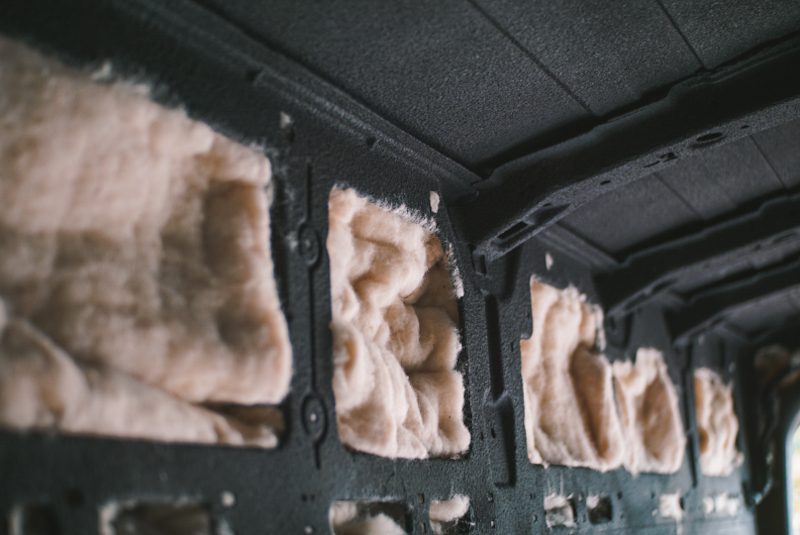
Where do we recommend to install Havelock Wool?
While you can insulate your entire camper van with Havelock Wool, we find it best for stuffing into cavities, gaps, and hollow areas. The batts are easy to pull apart and stuff, especially into tiny holes. However, we find it more difficult to use for walls and ceilings as it is hard to hold up. However, DIY builders like to use twine to hold it in place on walls and ceilings before the final panels are up
How to install Havelock Wool?
Installing Havelock Wool in your camper van is easy:
- For gaps, cracks, and pillars: Simply pull it apart and stuff everywhere you can! It is easy to pull apart as there is no glue, or fillers. We do like to wear goggles for this, though, as it gets everywhere.
- For walls, and ceilings: Start by measuring the depth of the cavities and cut the batts to that exact thickness. You don’t want to over fill behind walls or ceilings! To hold up batts during installation, it is recommended to use string, or jute.
How many batts do you need?
Each box of Havelock Wool covers 100 square feet. On average, most camper vans insulated entirely with Havelock Wool needs 2-4 boxes. You can utilize the chart on this page for a more exact estimate!
Where to Buy Sheep's Wool:
Havelock Wool - $150 per 100 sq ft
2023 note: We are not aware of any other reliable source of sheeps wool at this time. Please let us know in the comments if you find one!
3M Thinsulate - Best Ceiling and Wall Mass Van Insulation!
3M Thinsulate is a synthetic insulation with an R-value of 3.8 per inch (if you purchase the SM600 automotive Thinsulate). With a pile height of 1 3/4″, SM600 delivers a fantastic R-value of 5.2 per layer, and is many places in your van you will install two layers!! Thinsulate comes in 60” wide rolls and can be cut to size for each body cavity you wish to fill. It has a black fabric backing to which the 1 3/4” pile height is strongly adhered to. That higher R-Value comes at a higher price point though, but that doesn’t mean it’s not worth it! Like Havelock Wool, Thinsulate is moisture resistant insulation and is extremely durable. It is tried and true, and also has slight noise insulating properties due to its non-woven sound absorbing fibers.
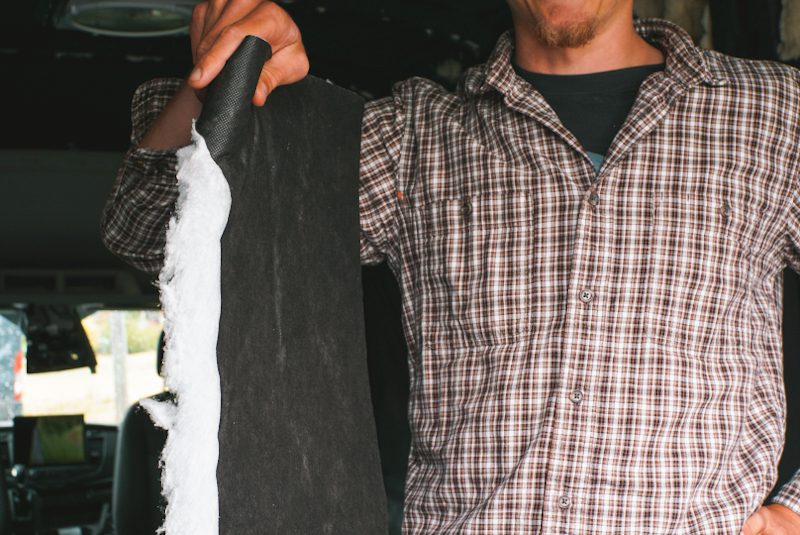
Where do we recommend to install 3M Thinsulate?
3M Thinsulate is the easiest option for walls and ceilings due to its backing that allows for strong adhering with 3M90. However, we find it harder to use for filling nooks and crannies as it is a bit more difficult than Havelock Wool to pull apart.
How to install 3M Thinsulate?
To install 3M Thinsualte in your camper van:
- Start by cutting it to size of the cavity you wish to fill.
- Spray both the sheet metal and the 3M Thinsulate with 3M90 spray adhesive.
- Adhere it up! That’s it.
Some areas, such as your walls, might require 2 layers of Thinsulate.
How much do you need?
Camper vans fully insulated in 3M Thinsulate need anywhere from 40-75 linear feet off Thinsulate. It is best to measure your van, determine where you want Thinsulate insulation, where you do not, and go from there.
Bonus! 3M Thinsulate Camper Van Insulation Kits!
In 2023, CampervanHQ released 3M Thinsulate Camper Van Insulation Kits. These are pre-cut kits that include a diagram for placement and all the pieces you need for the cargo area of your rig: walls, ceilings, panels, etc. These kits do not include any insulation for the cab area or floor.
Camper Van Insulation Kits Currently Available:
- Ford Transit High Roof (EXT or 148)
- Mercedes Sprinter (144 & 170 & EXT)
- Ram ProMaster (136 & 159)
Where to Buy 3M Thinsulate:
CampervanHQ - varies $8 to $9 per linear foot
Amazon - about $9 per linear foot
Lizard Skin Ceramic Insulation - Best for Protecting Against Heat Transfer!
Lizard Skin is a brand of spray on insulations offering both sound control and ceramic insulation coats. While Lizard Skin itself have been around for a while, it is relatively new to the camper van use case. However, as DIY builders continue to see the benefits, it is rapidly growing! We personally used Lizard Skin Sound Control AND Lizard Skin Ceramic Insulation in our second camper van conversion and can speak to its effectiveness. We chose to use Lizard Skin spray on Ceramic Insulation for the following reasons:
- Lizard Skin Ceramic Insulation creates a thermal break everywhere in your camper van. This works to prevent conduction (discussed above) especially on hot days.
- It is environmentally friendly and can be cleaned up with soap and water!
- It is effective at adhering to hard to reach nooks and crannies, and funky geometry which is key for camper vans.
- It is relatively lightweight coming it at .1 pounds per square foot. This added only 75 pounds total to our camper van.
Relevant Specs:
- Weight: .1 pounds per square foot. (75 pounds total in our camper van)
- Coverage: 2 gallons covers 45-50 square feet at recommended 40 mils/1mm thickness
Bonus! Lizard Skin Sound Control for Camper Vans
If you are already going through the effort of taping off your camper van and acquiring an air compressor, you might as well opt for the Lizard Skin Sound Control coat as well. Alternatively, DIY builders will utilize Kilmat, or Noico as a sound deadener. However, using a full coat of spray on sound control is a lot more effective and thorough.
Relevant Specs:
- Weight: .5 lb / square foot (129 pounds total in our camper van)
- Coverage: 2 gallons covers 45-50 square feet at recommended 40 mils/1mm thickness
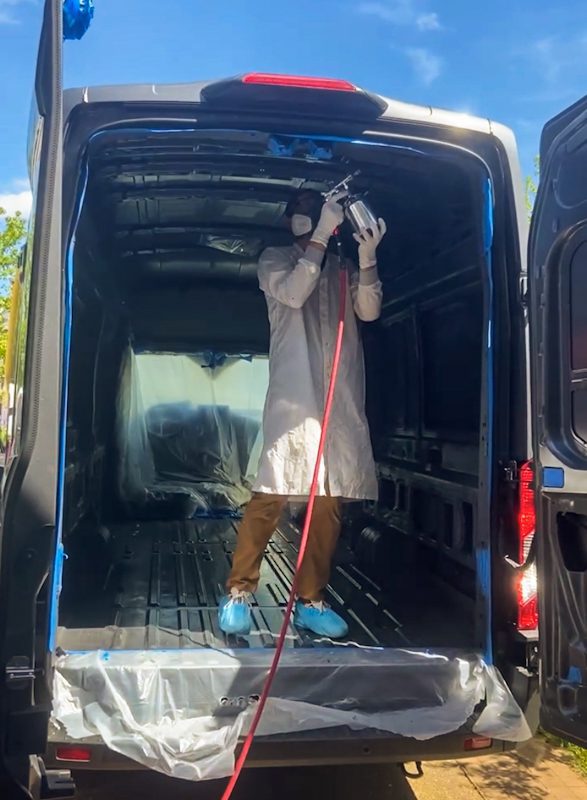
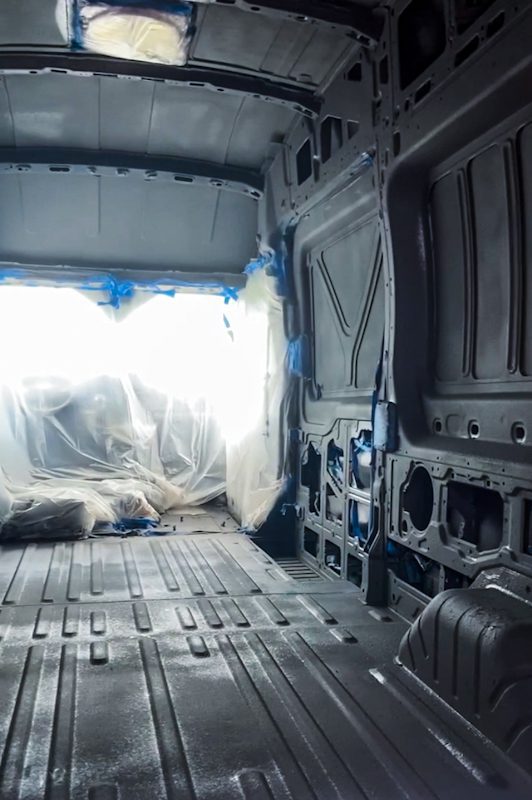
How to Install Lizard Skin in Your DIY Camper Van
We always say that prepping to install Lizard Skin takes more time than actually spraying it on! This was the case for our install. As you can see above, in our camper van, we taped off the cab, and all holes. We recommend using the Lizard Skin specific “Super Pro Spray Gun Kit”. While it looks very intensive, it is actually quite simple. Here is what you will need to do:
- Mask off all areas in your camper van that you do not want Lizard Skin
- Prep your surfaces with a scuff pad and primer
- Prep your air compressor to deliver at 55-70 PSI.
- Apply 2 coats of Lizard Skin Sound Control at 1-2 hours apart. Each coat should be applied uniformly at a thickness of 18-22 mils.
- Wait 24-36 hours.
- Apply 2 coats of Lizard Skin Ceramic Insulation at 1-2 hours apart. Each coast should be applied uniformly at a thickness of 18-22 mils.
Done! Of course this is an overview to show you how simple it is. For a complete and thorough Installation Guide from Lizard Skin, visit here! That guide is easy to follow and will teach you everything you need.
How much do you need?
Similar to the calculations for Havelock and Thinsulate above, you will need to know the square footage that you want to cover. Then, Lizard Skin has a calculator on their website! For reference, we covered our High Roof EXT Ford Transit using 10 gallons of Sound Control, and 12 gallons of Ceramic Insulation.
Where to Buy Lizard Skin:
Amazon (ceramic insulation)
Amazon (sound control)
CampervanHQ (ceramic insulation)
CamperVanHQ (sound control)

Low-E Insulation (Formerly EZ Cool) - for Radiant Heat Transfer
Low-E insulation is primarily a radiant barrier that reflects radiant heat transfer and prevents heat from being absorbed into your van in the first place, especially through your windows. Low-E insulation is a thin closed cell foam barrier with a surface coating of aluminum on each side to give it its low E characteristics, and comes in two general thicknesses: 3 mm and 5 mm. The key to Low-E insulation working is an air gap between the Low-E foil on at least one side. If the insulation is sandwiched on both sides between, for example, between your insulation and your walls, there will be nowhere for the radiant heat to escape to and the conductive heat transfer will become the dominant mechanism of heat transfer – rendering your Low-E layer near useless!
For this reason, we don’t recommend it as a main source of insulation, but it is great for it’s intended use case as window shades. Additionally, Low-E can be effectively repurposed as a thermal break layer!
Using Low-E as a Thermal Break in Your Camper Van
If Lizard Skin Ceramic Insulation is not up your alley, you can utilize sheets of Low-E to prevent thermal bridging. If sandwiched between the van metal and your wall panels, the 3 or 5 mm layer of closed cell foam will act to prevent direct conductive heat transfer through this otherwise unbroken thermal bridge. This should be placed between anything that touches your chassis and modules. Wood and metals are all thermal conductors!
Where to Buy Low-E:
US Energy Products (3mm)
US Energy Products (5mm)
Be sure to get a "closed cell" and a foil - foam - foil roll
Spray Foam - Runner up
Expanding spray foam is a popular method of insulating residential buildings and naturally made it’s way into the van building space as the movement started to take off. Although the R-value was the most impressive of any insulation we found, the installation difficulties, risks, and permanence of it disqualified it as an option for us. We don’t recommend DIY-ing this option as it must be done perfectly. Applying too much spray foam into small van rib cavities can cause the metal to buckle – permanently damaging your van. The job itself is messy, and being a synthetic product it will off gas and definitely isn’t considered an eco-friendly option. Lastly, spray foam is permanent. Once in, it can never be removed. So if you need body work done to your walls/ceiling in the event you ever get into a fender bender, you are out of luck.
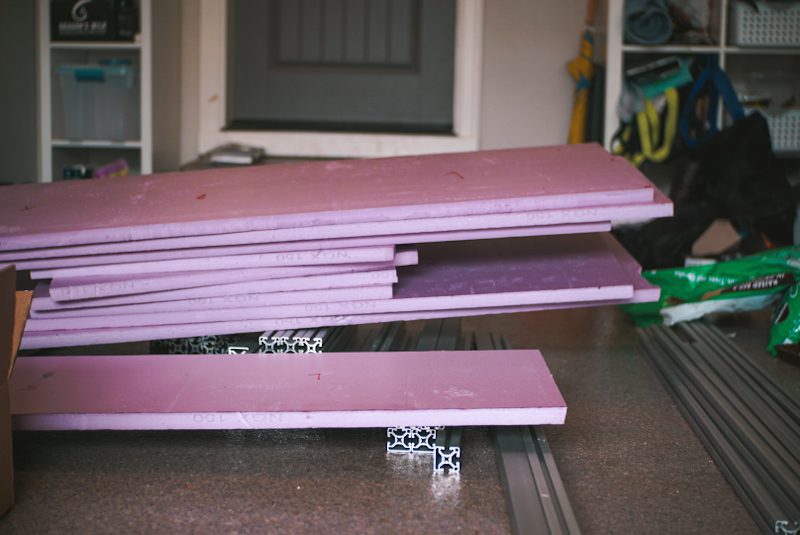
XPS Foam Board - Great for Camper Van Subfloor!
Expanded Poly Styrene (XPS) board – or colloquially called Pink board – is another popular residential insulation used by van builders alike. You can get it at any Home Depot, Lowes, or similarly sized big box hardware store and comes in large 4’x8’ sheets in 1” or 2” thicknesses. This styrofoam board has an impressive R-value of 5-6 depending on temperature, but it’s non-environmentally friendliness pushed us to only use it where it was absolutely best suited: the subfloor! Additionally, it is extremely rigid, making it hard to work into the funky curves of camper van wall.
Despite it not being ideal for a majority of your camper van insulation, it is a fantastic sub floor insulation. You will want to avoid walking directly on it during installation, but beneath a subfloor the XPS foam board provides great structural support to your plywood subfloor. Foam board is fairly easy to work with – with some work you can make clean cuts with a razor blade, but we found a jig saw to be much quicker if you can contain the mess of pink foam dust.
Related Reading
DIY Subfloor Guide
Reflectix - Not recommended
Reflectix is pretty much a cheap version of Low-E insulation. In fact, it technically is a Low-E insulation type, but the aluminum coating is applied to a bubble wrap type material rather than a closed cell foam. These cells easily pop and collapse leaving you will little more that tinfoil. For this reason, it will not prevent thermal bridging and will act only as a vapor barrier. Although popular some years ago and not 100 percent useless, we think the community has come around to the consensus that Reflectix does very little in terms of effectively insulating your van.
Installation Tips and Considerations
After several of our own DIY camper conversions we want to leave you with some things we have learned from the experience.
Weak Points for DIY Camper Van Insulation
There are several areas of your camper van that are going to let in the most heat / cold. These are “weak points” and should be addressed just as much as your walls and ceiling!
1. Windows
Windows are thin and comprised of thermally conductive glass, so any windows in your van building will lose heat in both summer and winter months. This can be minimized by the use of insulated window covers. With window covers, you of course, lose the function of your windows. For this reason, we recommend being sparing in both the number and size of windows you choose in your build layout.
However, for the windows you do have, we recommend double paned acrylic windows for maximum native thermal insulation, and window shades for overnight.
2. Front Cab
The front cab is an area of the van with a lot of weak points as a result of the many windows and uninsulated side doors. If this cab is left open to the rest of your living quarters, the rear of your van will suffer the same fate as the front cab. To prevent this, consider closing off the cab area from the living quarters in back with either a solid pocket door or insulating blanket. Check out our DIY insulated cab divider for inspiration. You could also opt for blackout shades.
Additionally, we purchased professionally made window covers. This is one of the things we truly do not recommend end DIY-ing unless you are confident that you can get them perfect! We tried to DIY our window covers in our first rig to save money, but the time and frustration did not prove effective as they didn’t work well. The material was great but even just the small gaps that I missed with templating ruined the effectiveness.
3. Doors
The rear and slider doors of your van will likely come covered with factory plastic coverings. Remember to remove these, insulate inside these cavities, and put your covers back in place!
Related Reading
Bug Screens (DIY & Professional)
Camper Van Insulation Kits
As DIY camper van conversions gain popularity, more and more products come out to ease the conversion! One of the most recent ones regarding insulation are “insulation kits”. The only ones we have seen so far are Thinsulate. These are pre-cut kits that include a diagram for placement and all the pieces you need for the cargo area of your rig: walls, ceilings, panels, etc. These kits do not include any insulation for the cab area or floor.
Camper Van Insulation Kits Currently Available:
- Ford Transit High Roof (EXT or 148)
- Mercedes Sprinter (144 & 170 & EXT)
- Ram ProMaster (136 & 159)
When should I insulate my camper van?
Insulating your camper van is one of the first steps to your conversion! After planning, of course.
You might like:
Step by Step: How to Convert A Camper Van
Is it neccessary to insulate the floor of a camper van?
Yes! The floor of your camper van will become ICE in the winter months because of the air flow underneath and the sheet metal construction. Every van lifer, no matter where you plan to spend your winters, needs to install an insulated subfloor.
How do you insulate a camper van for winter van living?
Insulating a camper van for winter van living is the same process as any other camper van. Perhaps, just a bit more thorough. Insulation gaps are going to become extremely clear in sub freezing temps, so extra attention must be paid to insulating every single beam, hole, cavity, completely. In addition, you will want a strong heater!
We have a guide dedicated to Winter Van Life.
DIY Camper Van Insulation Summary
As always with our resources, our goal is to arm you with the information you need to make the best educated decision based on your specific needs. The two most important things to keep in mind for van insulation are:
- The two types of insulation to address: mass insulators and thermal breaks.
- Ease / safety of application and use.
Next Up:
Camper Van Raptor Liner Guide
Thanks for being here! Happy building!
Eric + Colby
✉️ Join our mailing list for more content!
🙏🏽 If you are looking for more 1:1 van build help, we are here to help via Consulting or Travel Van Building.
[Start Here] Beginner Guides:


Comments 11
Hi! I’m slightly lost in the order of things. I get that Havelock wool would first go in the nooks and crannies, them 3M Thinsulate in all the cavities and finally the low-E would cover basically everything in one swoop, so what would be left to look at in the end would be a giant aluminum foil-covered box? And then one would install the furring strips before putting in walls, cabinets ans such. Am I getting it right?
Author
Sounds right to me, you will need to cut holes in your low-e to attach the furring strips most likely. For more information on order of ops… https://engineerswhovanlife.com/step-by-step-guide-converting-a-campervan/
What about PolyIso?
https://www.reddit.com/r/vandwellers/comments/yuxiye/a_comparison_of_every_insulation_for_van/#lightbox
Author
We’ve heard such varying reviews on this- mostly about performance in winter with holding up to extreme cold and moisture. However, you can put it in the same category of use case as XPS. Would create weird gaps if used in walls and ceiling, but would be good for sub floor.
In the home building world all of these foams are used on the ground under foundations and that’s where small differences in their tolerance of water becomes more important because in that case they might be sitting in pools of rainwater runoff. They’re all going to get gross, it’s just a question of which retains more R-value in the presence of water.
XPS is the worst option. It’s very similar to EPS foam but it’s blown with a different proprietary process that results in slightly higher R-values than EPS immediately after production, but over time it releases the HFC-134a gas it’s blown with (which is 1400x worse than CO2) and the R-value drops below that of similarly aged EPS. More people have heard of XPS because it is proprietary and has a ton marketing money behind it. EPS has been around forever and anyone can make it so it. There are different studies that show both EPS and XPS being more impervious to water so safe to call that a draw. The way XPS is used in a van makes it even worse because the XPS is inside with you where you just have to breathe all the off-gassed HFC-134a. Not sure if that’s a known health issue but I’d rather avoid it either way.
Polyiso has much higher R-value per inch at normal temperatures so in a moderate climate it would provide the same insulation with less thickness, but below 20 degrees F or so it loses R-value very quickly while EPS’ R-value remains constant and will start to have a higher R-value per inch. Polyiso also loses more R-value in the presence of water but it does have the least environmental impact. EPS and XPS also catch fire easily and burn very readily while Polyiso doesn’t burn with quite as much enthusiasm.
Smart homebuilders insulate on the outside of the home vapor barrier because when your insulation is on the inside you will also have some air flow and thus water vapor getting around the insulation and condensing on the cold vapor barrier. In a van the sheet metal skin is vapor barrier and it’s just not practical to install insulation on the outside of it. So the best option is generally to use an air permeable insulation like you suggest for the walls and ceiling but as you note that doesn’t work for the floor. So it doesn’t matter which type of foam you use, they are all more or less equal vapor barriers and there’s no way you will install them in a way that some air with water vapor doesn’t get under them, so in all cases will be condensation forming under the foam and long term that will lead to mold growth and rust on any unpainted metal. If you open up the exterior walls on 99% of traditionally insulated homes in cold climates you will find the exact same thing, it’s not perfect but in practice the mold trapped in the wall / under the subfloor doesn’t cause problems.
The only way you could try to mitigate that is by taking a similar approach as to walls and ceiling and installing some sort air permeable mesh structure under the foam floor insulation to allow enough air circulation that condensation could later evaporate. The trouble with this is that all the products like this that I’ve seen so far tend to quickly flatten and lose their air permeability. The other issue is that in winter the floor may not warm enough to encourage evaporation for weeks. The walls and ceiling will at least sometimes get direct sun and warm up. However while this condensation will almost certainly be enough to cause ugly mold growth, it’s unlikely to be enough moisture to have an impact on the R-value of any of the insulating foams.
The construction world moves pretty slowly but there is a new product that is graphite infused EPS (confusingly called GPS) which seems to retain all the other benefits of EPS while improving the R-value about 20%.
It’s a judgement call but putting it all together I think if you expect temperatures below 20 degrees F that the graphite EPS is the best overall option for floors.
But if you are sure that you’ll always have temperatures above 20 degrees then I think Polyiso is the obvious best overall option for floors.
Lot of good residential construction building science info can be found on greenbuildingadvisor.com; the materials and the principles are the same, not too hard to adapt most ideas to the van world- https://www.greenbuildingadvisor.com/question/eps-xps-or-polyiso-for-exterior-rigid-foam
Hey there,
Is reflectix good for window insulation?
Thanks
A V
Author
That is one good use case since there will be 1) an air gap and 2) the ability to reflect sunlight.
Thanks for sharing so much cool info!
We are starting, to insulate with thinsulite on the cieling and wool everywhere else. Although Havilock claims additional low-e insul is not necessary, we don’t believe it. The EZ Cool link on your site takes us to a US Energy Products insulation reflective foam that is not the re-branded EZ Cool. We like that it is less than half the price.. Is that link a mistake? If not, is it as good as EZ Cool now rebranded as Low- E?
Thank you,
Larry and Kait
Author
Hello! We have not tested them side by side but it is the brand we used in both our builds to serve as a radiant heat barrier and has worked great. Less important is the brand name, and more important is that it is “closed cell foam” and sandwiched between actual aluminum. Do you mind sharing the link to the comparable one? I am wondering if the thicknesses are different?
Pingback: What Is The Best Insulation For A Campervan? | Justdownsize
Pingback: Material Selection and Designing Insulation – Badasana Experiences: Engineer's Van