
How to Upholster Camper Van Wall Panels Like a PRO!
Installing wall panels is a simple task that can be done after properly insulating your van cavities, installing your windows, and running your pre-wires. There are several different ways to finish these panels; however, we are going to cover what we personally do, along with many professional van builders, and that is upholstered wall panels. We will also cover upholstering our flares, as that is more complex than wall panels.
In this guide we will discuss:
** Disclaimer: This blog post contains various affiliate links that provide a small kickback to us, at no additional cost to you. We truly appreciate your support if you choose to purchase through these! **
Camper Van Wall Panels
A quick note on our van wall panels before we get to upholstering them. In our first van build, we templated and cut our own wall panels using 1/8″ and 1/4″ baltic birch plywood. In our second DIY van build, we were gifted a wall panel kit from Flarespace. While we do love DIY-ing everything, having the panels pre cut, perfectly, was a huge time, and frustration saver.
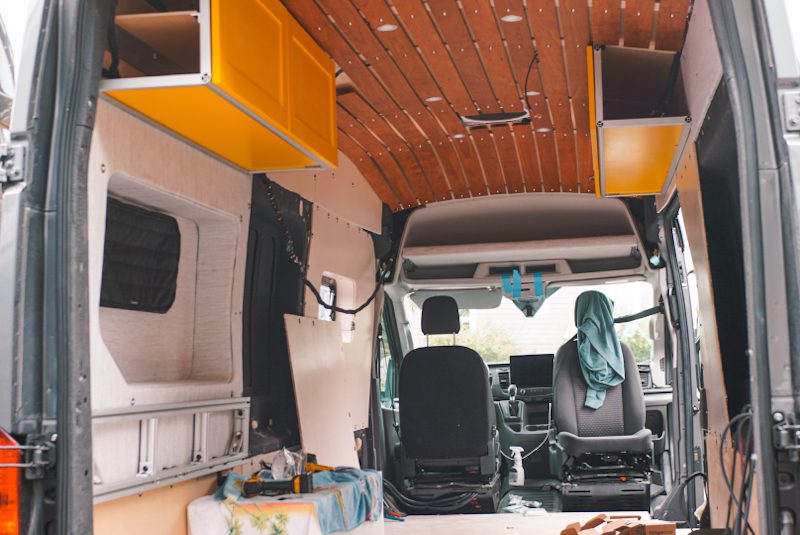
Whether you choose the DIY route, or the wall panel kit route, we recommend pre-installing plusnuts into the holes in your chassis wall. If you do this, by the time you are ready to install your upholstered wall panels, all you have to do is run a bolt through them into the plusnut and you are good to go. See below.
2023 Update! There is now a Template Kit [ Ford, Promaster, Mercedes] available as a middle ground between full DIY and professionally pre-cut panels. If you want to choose your own wall material, this is the route to go.
Materials Needed
The material list for this project is quite simple. You will need:
- Fabric of Choice [see detailed options below, we opted for 12yd. Nassimi Hester Owl Fabric]
- 1/8″ thick PAD-5 Landau Closed-Cell Foam Padding [yardage same as fabric]
- 3M-90 Spray Adhesive [see note below]
- Fabric Grade Scissors
- Utility Knife
- Wall panels cut to size and finished with a coat of polyurethane [see note below]
What is Landau (PAD-5) Foam & Do You Need It?
Landau PAD5 foam is closed cell foam that you can place between your wall panels and fabric for added softness and comfort. More importantly, it is a fine closed cell cross linked polyolefin foam that adds sound vibration and has thermal insulating qualities. While we add this layer on all wall panels, we acknowledge it is an additional step and costs more. At a minimum, we recommend having a layer of landau foam on your bedroom wall panels for comfort!
There are various thicknesses available. For upholstering camper van walls, we recommend 1/8″ thick, also known as PAD-5, Landau foam. We find 1/8″ to be the perfect thickness to provide comfort and insulation without taking up space, and weight.

Upholstery Fabric for Camper Vans Comparison
There are a couple of things to keep in mind when choosing a wall fabric for your conversion van: ease of cleaning, texture, and durability. As of writing this, there are two main players on the market right now for the van upholstery world: Marathon Tweed and Nassimi Fabric. Both are great choices, compare them below, and make your choice!

Marathon Tweed for Conversion Vans
As you can see in the comparison photo above, Marathon Tweed is a thicker “woven” pattern. This makes the fabric less flexible and a bit thicker compared to Nassimi fabric. What brought Marathon Tweed into the van market was its ease of cleaning, stain resistant fabric (also called Duramax), and its professional look. If you see fabric on walls of a van prior to 2021, it is probably Marathon Tweed.
[2023 UPDATE]: CampervanHQ now offers a Marathon Plus product which is Marathon Fabric pre-lined with PAD5 foam (discussed above). If you plan to use PAD5 foam, this will cut your install time in half.

Nassimi Fabric for Conversion Vans
Nassimi Fabric is relatively newer to the DIY van build scene. It was designed and developed to be a high performance fabric that is stain and abrasion resistant yet still soft and supple. What we love most is that the Nassimi team keeps environmental stewardship at the core of their design, especially with developing stain resistant upholstery that doesn’t use the harmful chemistry conventional fabrics do.
Nassimi fabric is a slightly higher price point than Marathon tweed but that comes with a notably tighter weave which results in more refined look and texture.
There are several different material combos and weave patterns, all with their own colors, resulting in about 21 options for Nassimi fabric:
Nassimi Fabric

How Much Fabric Do You Need?
Now that you have chosen the fabric that will work best in your van, you need to order the proper amount. Both types of fabric mentioned above come in rolls 54 inches wide, and you purchase by the linear yard. For example, if you ordered 1 linear yard, you would get a piece of fabric 54 inches wide and 36 inches long (1 foot).
With that, go ahead and measure the wall panels you will be upholstering. When doing this, be sure to factor in a 2-3 in border on all edges. And, be sure to think about wall panels that need more than 54″ of width.
For reference, we used 12 yards for our Ford Transit EXT High Roof cargo van and that was upholstering: the back half of the wall panels, our flares, the foam blobs, a “garage” full length wall, and our headliner shelf. We had some left over, but we would rather have extra than have to order more and 1. wait, 2. potentially have a dye lot difference.
A Note on Spray Adhesive
When prepping for this project, we read in several places that 3M-90 spray adhesive would fail across temperature differences over the years. Because of this, we worked to find folks who did use 3M-90, and none of them reported failures back even years layer. Between that, and the recommendation of where we got our upholstery supplies, we decided to send it and use 3M-90.
However, if this is a concern, as an alternative to 3M90 you can use the following:
- Spray Gun
- Spray Grade Contact Adhesive
- Air Compressor with 1/4″ Female NPT Air Inlet
How to Upholster You Camper Van Wall Panels
Now, the good stuff! Here are the steps to upholster your wall panels.
Step 1: Prep foam and fabric
With your wall panel face up on your workspace, roughly cut a piece of fabric, and 1/8″ PAD-5 landau foam to size. It is important to leave at least 2-3inches of border on all edges of the panel size when cutting the fabric. Do not worry about cutting them perfectly as it is easier to trim once adhesive step is complete.
Step 2: Adhesive foam to wall panel
Sufficiently spray adhesive onto the outward facing side of your wall panel, and the 1/8″ PAD-5 landau foam. Allow them to sit for the time designated on spray adhesive, or until both pieces are tacky to the touch. Once tacky, press 1/8″ PAD-5 landau foam onto the front of the wall panel. Be sure to press, and rub the two pieces together to remove any air bubbles and create a full connection.
Step 3: Trim foam
Remove excess foam around the edges. I find it easiest to do this by flipping the panel over and using a utility knife.
Step 4: Adhesive fabric to foam
Now, repeat step 2, but with the foam and backside of the fabric. Hot tip: when you get a roll of fabric, the backside is facing out on the roll!
Step 5: Trim fabric
Once foam and fabric are adhesive-ed together and smoothed out, we need to trim the fabric. The goal here is to leave a 2-3 inch border on all edges. For this, I recommend using fabric scissors as you will get a cleaner cut.
In addition, we will have to address any curved edges and sharp corners at this point as they need some precuts to help them fold right.
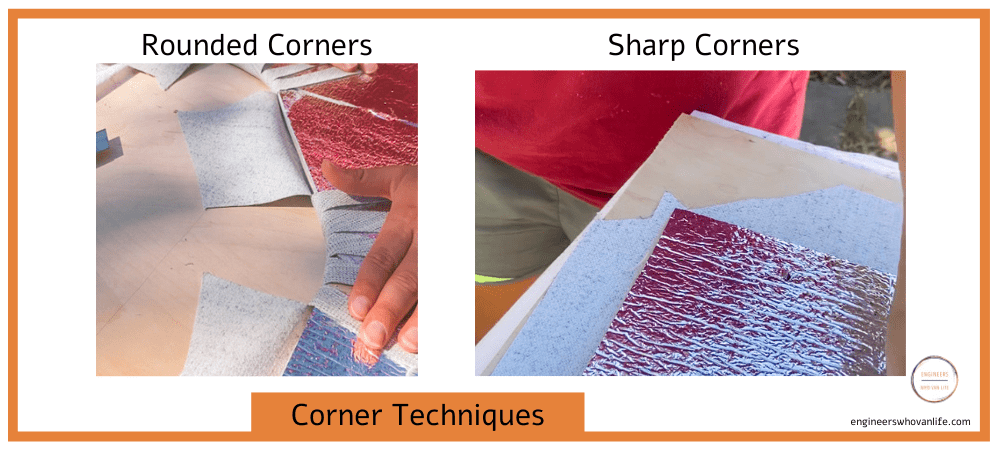
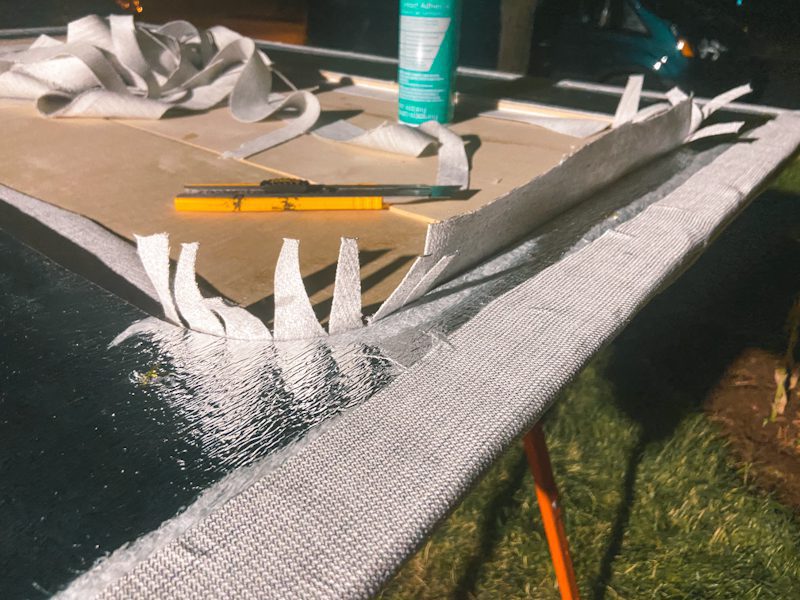
How to Fabric Round Corners
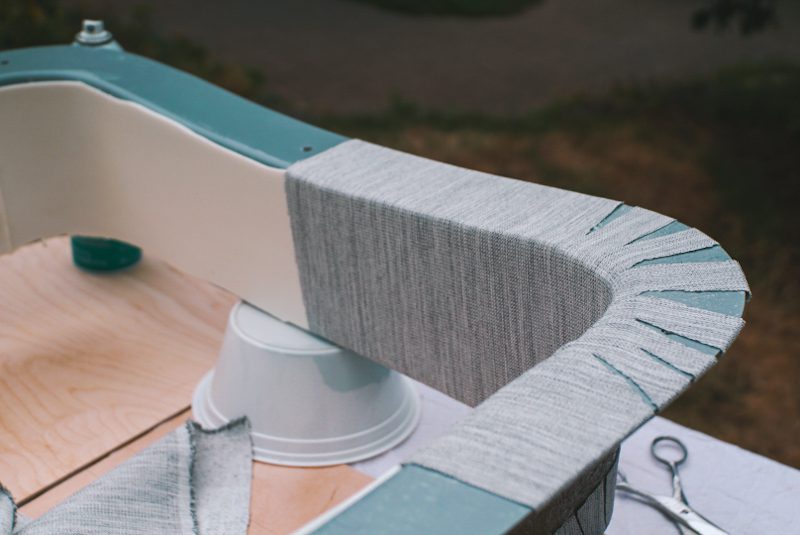
For round edges, you simply need to cut perpendicular lines approaching, around, and leaving the corner. These lines should start 1/4″ from where the fabric folds over the edge of the panel. See photo below.
How to Fabric Sharp Corners
Sharp edges need angled to but then a carrot in the exact corner. See example below as I cannot figure a way to explain this…
Step 6: Adhesive corners and edges
Once the trimming of the fabric is complete, it is time for the final step: finishing the adhesive-ing of the fabric! For this, there are two steps, the edges, and the fold over.
Starting with the edges, you want to spray adhesive the small edge of the wall panel all the way around. Once tacky, begin to pull the border up and onto the edge. This stage creates cleaner sides to your panels.
After edges have been glued, you can spray adhesive 2-3 inches around the entire back border. Once tacky, finish off by laying the fabric down along the back of the panel onto the glue.
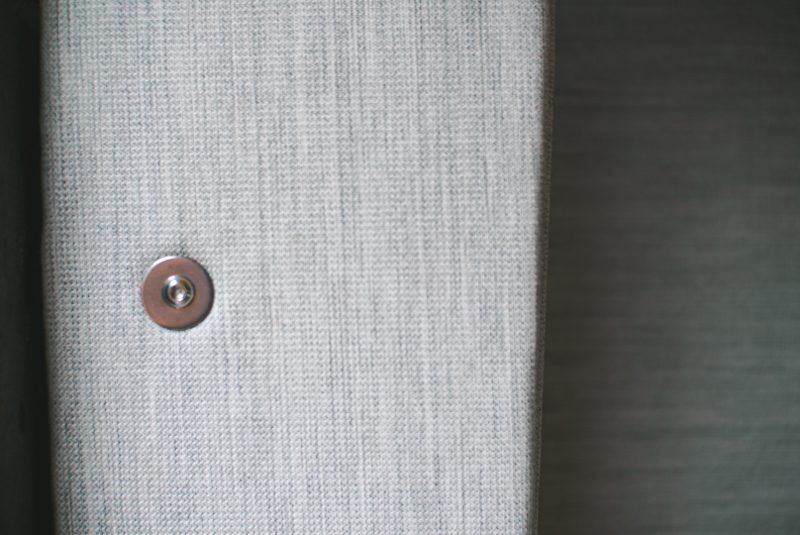
Below, on the inner edge you can see the edge glued, and on the outer edge you can see the edge and the border down.
Finished Upholstered Van Wall Panels
That’s it! Despite the labor of love, we love the look of our upholstered van wall panels. We personally went with the Nassimi Owl Fabric which is what you see in the photos to this guide. We hope you found this guide useful, and as always, we are open for questions!

Other Options for Camper Van Wall Materials
Upholstering wall panels is a common way to finish camper van walls. However, it is not the only option! Depending on your aesthetic you can alternatively choose:
- Tongue and groove panels
- Painted, or polyurethaned plywood
- Carpet
We dive more into depth about installing and finishing camper van walls in this guide.

Thanks for being here! Happy building!
Eric + Colby
✉️ Join our mailing list for more content!
🙏🏽 If you are looking for more 1:1 van build help, we are here to help via Consulting or Travel Van Building.
[Start Here] Beginner Guides:


Comments 2
Thanks for covering the adhesive spray topic. Do you think it would hold on an environment with lows below 15 for 6 months, and below zero for weeks at a time? Thanks!
Author
It is always hard to know.. however, I can say that we are winter chasin van lifers, and adhesive is never ever the thing to fail in our rig 😀