Complete Guide to Building Your Van with Extruded Aluminum
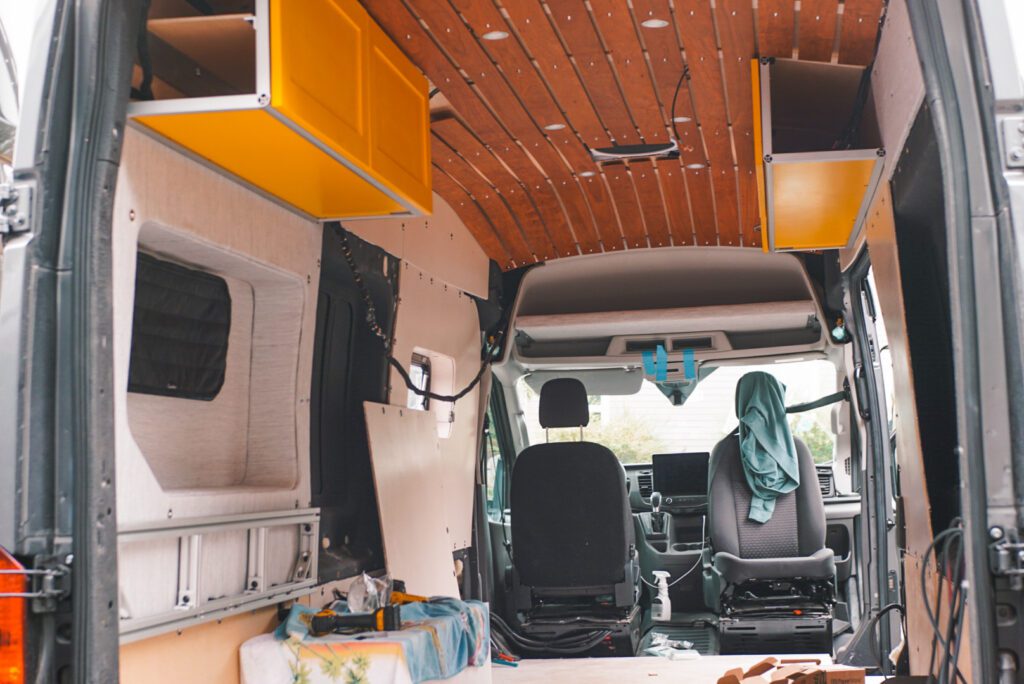
In This Guide:
How To Build a Van with Extruded Aluminum (80/20)
We have completed two of our own camper van conversions with extruded aluminum and have helped countless others via travel van building and consults. The interest in how we have done this has been much larger than we ever thought and this makes us incredibly happy. We built this blog with the purpose of lowering the barrier to entry and providing you with the confidence and skills you need to DIY your own camper van conversion with extruded aluminum.
This particular guide is a complete overview of building vans with 80/20. If it is too dense, we recommend that you start with our 101 Guide to Building a Van with Extruded Aluminum (80/20) or one of our various specific module guides listed below. Happy building!
80/20 DIY Van Build Module Guides:
Below you can find specific step-by-step guides to building modules in your camper van with extruded aluminum. If you are looking for a starter project, the bed system, or upper cabinets are excellent places to begin.
Looking for specific assistance? We offer Virtual Consulting and love talking with our community about building vans with extruded aluminum. One of our more common consults is about reviewing your extruded aluminum designs before purchasing.
** Disclaimer: This post contains various affiliate links that provide a small kickback to us, at no additional cost to you. Thank you for your support. **
What is extruded aluminum (80/20)?
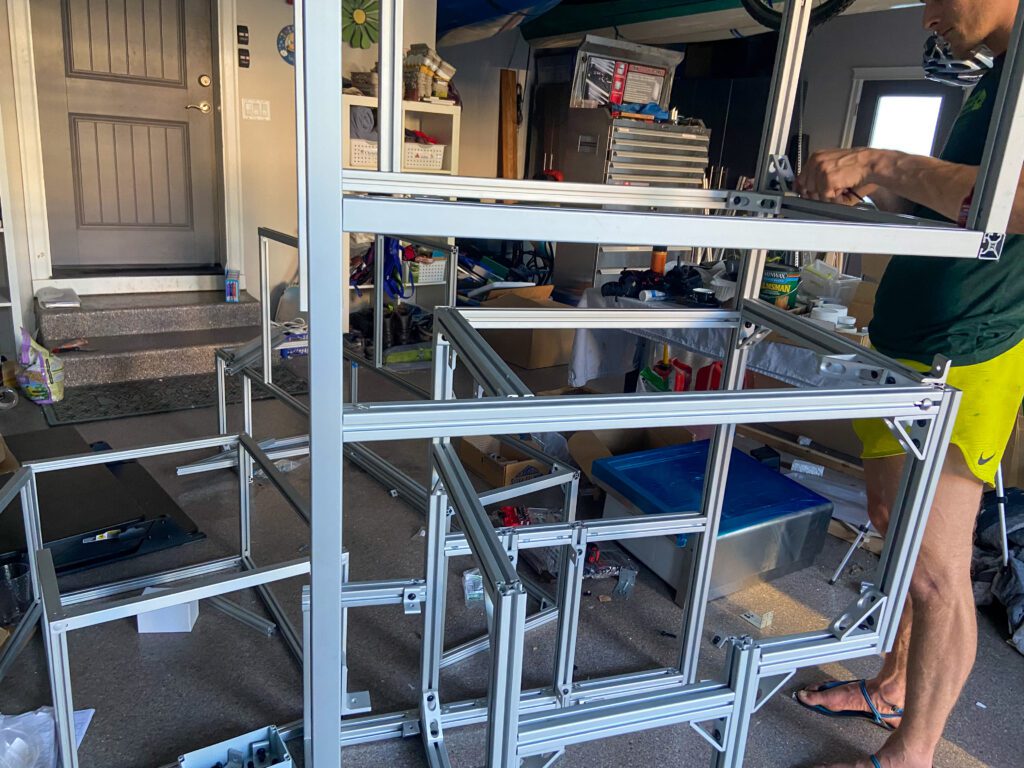
Extruded aluminum is a modular T-slot aluminum building system that can be used for just about anything, not just camper van builds. The aluminum extrusions are simply aluminum heated to a high temperature and forced through dies that extrudes it into specific cross-sectional profiles. Specifically, we utilize T-slot extrusion profiles that allows us to build camper van modules simply with profile lengths, bolts, and t-nuts (shown below and above).
80/20 or Extruded Aluminum? A quick note on nomenclature.
Throughout our guides, we use the term 80/20 and aluminum extrusions interchangeably. This is because in the van building world, 8020 has become the generic name for using extruded aluminum. It is similar to the Kleenex of tissues. We do however, acknowledge that this can be confusing to some as historically extruded aluminum is numbered by it’s width so 20mm x 20mm would be 2020, 80mmx20mm would be 8020, etc.
During our 2 campervan builds we have used both 10 series and 15 series extruded aluminum. Which is another added layer of complexity because those are imperial numbers, not metric (measured in mm). So, all in all, we continue to use “80/20” as the generic term for extruded aluminum. The fact that we happen to chose 80/20 inc as our supplier, ironically has nothing to do with the naming.
Now, on to the fun stuff!
What are the benefits of using 80/20 aluminum extrusion in a camper van build?
In a few words: Lightweight. Strength. Modularity. Removability.
Strength to Weight Ratio of Extruded Aluminum
Aluminum metal has a high strength-to-weight ratio: it is 3x stronger than wood while being 3x as dense as softwoods.. And further, the extrusion profile is an extremely strong structural rendering of that base metal. This means that extruded aluminum is able to bear immense loads with very little flex while weighing in lighter than wood and taking up less space. The best way to think about this is that if you desire the same weight bearing strength from an aluminum extrusions module as a wood one, you can use a much slimmer size of aluminum, or utilize fewer pieces in total. On the same note, while you can make lighter weight wood modules, they are no where near as strong as 80/20 modules at the same weight.
Another caveat is that wood often has knots in it that induce weak points, so the real world strength of wood is even less than proclaimed. When you are working with 70-90 sqft in your tiny home build… space is at a premium. Using 1”x1” aluminum supports rather than a 2”x2” wood supports, for example, nets you more usable space and a sleeker look.
Related Reading: Our Camper Van Conversion Weight Breakdown
Space Efficiency in Your DIY Van Build
So, the structural profile of 80/20 is slimmer and stronger, but what does this mean for a DIY van build? It means this allows walls, galley siding, and supports to be thinner, spaced further apart, or even foregone all together. Being able to forego panels makes one of the most notable weight savings! In our camper van conversion, we used ¼” plywood for all of our galley and cabinet sides that show and we have no plywood at all on the bottom or backs of our modules.
Compare this to building cabinets entirely out of ½” or thicker plywood. That weight adds up quick.
Modularity of Extruded Aluminum Camper Van Builds
Once you assemble the aluminum extrusion pieces of your modules, you can adjust and rearrange them as you see fit with nothing more than an allen wrench set. This modular feature of extruded aluminum is wonderful for van building and even rearranging your camper van layout later on.
Removability of Extruded Aluminum Camper Van Builds
Being able to access every part of your van build including behind walls and cabinets is extremely important for serviceability. Your camper van goes through an earthquake a day living on the road, so we promise something inconvenient will break at some point. We are constantly removing bits and pieces of our van for new additions, or even just to check on our systems and because of the way we constructed our rig with extruded aluminum it is incredibly easy to do so. Again, all you need is an allen wrench set.
Bonus: Lifespan of Extruded Aluminum in a DIY Van Build
Related Reading: Definitive Guide to Tools for Van Building
How does 80/20 aluminum improve the structural integrity of a van build?
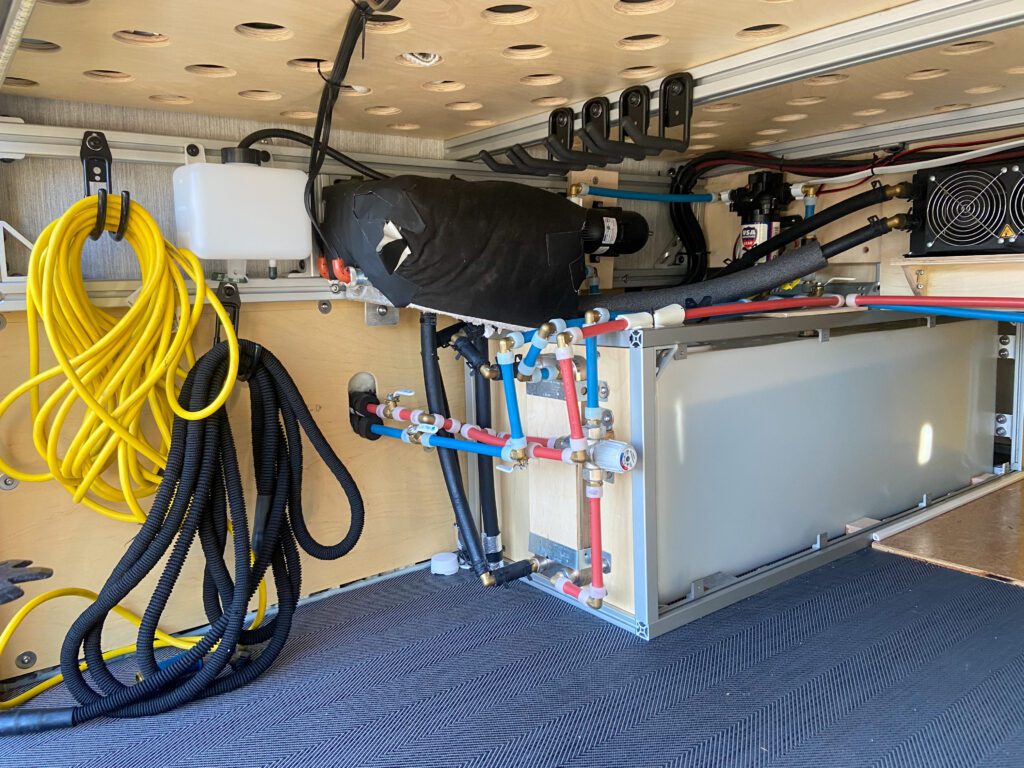
There are several characteristics of aluminum extrusion that improve the structural integrity of your van build compared to wood:
- Aluminum extrusions are not prone to warping, or expanding / contracting with temperature changes. This means your camper van buildout will stay as solid on day 1000 as it was one day.
- Building with extruded aluminum forces you to do things “the right way”. The only way to assemble and secure extrusions is with bolts. This means that you can’t skimp and nail your framing into the wall with nails.
- Extruded aluminum is much less likely to splinter or release in the event of a crash.
- The assembly method for extruded aluminum results in perfectly square modules every time that creates a stronger camper van buildout. This contrast to wood framing that is difficult to square in curved areas like camper vans.
💰 How cost-effective is using 80/20 for a van build compared to other materials?
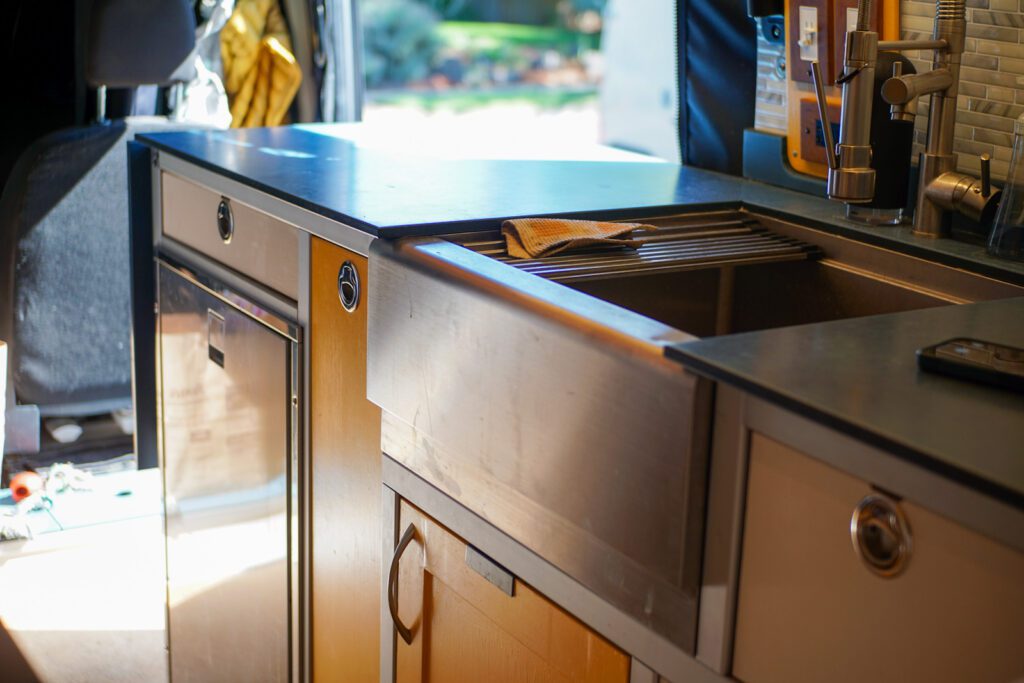
An extruded aluminum camper van build will likely cost more than using wood. Exactly how much depends on a variety of factor such as series chosen, accuracy of planning, and source. As an anchor point, we spent $3,000 in our second conversion van on aluminum, brackets, T-nuts, bolts, and mounting hardware. In our first rig, we spent $6,000.
While extruded aluminum is more expensive than wood, the benefits and longevity of using it might outweigh the cost for you. Aluminum, like wood, is a commodity whose price fluctuates with markets beyond our control. But what is within our control? We share some tips below.
Tips for minimizing extruded aluminum costs
- What percentage of your van build do you use aluminum extrusions for? You don’t have to build all of your modules with 80/20! Starting with just the bed, and upper cabinets, is great.
- Do you use 10 series or 15 series? Comparison below. Hint: most of your van build can be done with 10 series.
- How effectively did you plan your layout? In our first DIY conversion we only bought 8 foot lengths of aluminum extrusions and cut it as we went. This created a lot of waste! In our second conversion, we planned our entire camper van layout with SketchUp and ordered pre-cut lengths. This makes a huge difference.
- How complex are your modules? The simpler your van build layout the less you will need! Small & box-like construction actually uses more profile length than more continuous, longer spans that don’t require frequent supports.
- Where do you source your extrusions from?
- 8020.net is by far the most reputable and has the most extensive options for fasteners. We work with them to provide a 5% discount to our van building community. It should be applied to your cart when you click through any link on our blog.
- Your local Grainger store is a great place to start for the lengths of extruded aluminum, and this saves shipping costs. They do lack on fasteners.
- TNutz.com is slightly cheaper, but has fewer fastener and customization options.
Basics of Building your Camper Van with Extruded Aluminum
Extruded aluminum is commonly referred to as an adult erector set, and that’s not far from the truth. It can be as simple, or complicated as you make it. While the learning curve to building your camper van with extruded aluminum is steeper than building with wood, once you understand the basics, you will be off the races. We promise!
Our Beginners Guide to Building with Extruded Aluminum has you covered with more in depth information, below is a good starting point.
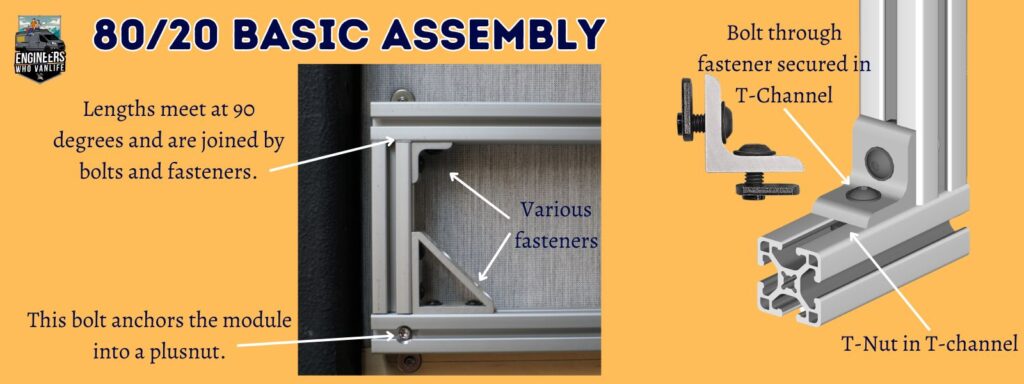
Our Top 80/20 Fasteners for 80/20 Van Building

Above are our 3 most commonly used 80/20 fasteners during our van builds. There are near endless variations of each of these three fasteners, but on a basic level just three varieties will work for 95% of what you would design in a van.
NOTE: When purchasing hardware, be extra sure to double check the compatibility of your profiles and hardware.
- Slide In Economy T-Nuts with Flanged Button Head Socket Cap Screws
- NOTE: 1/4-20 Thread is for 10 series, 5/16-18 is used for 15 series external fasteners such as corner brackets.
- Roll In T Nuts
- Inside Corner Brackets
- 3 Way Corner Connectors
- Anchor Fasteners (drill press needed as these require additional machining)
Inside Corner Brackets

We used hundred and hundreds of corner brackets for our first build. There are both external corner brackets and hidden internal corner brackets. What we love most about this type of 80/20 fastener is the ease of use. This is a great fastening method to begin with as it will allow for infinite repositioning, strong connections, and requires no machining!
Along the same lines of this would be flat plate connectors which also use 2 t-nuts and 2 socket cap screws to connect in parallel as opposed to at a 90 degree angle. Inside corner brackets also come in the 4-hole and gusseted variety (photo below) that are ideal for intense load bearing joints.
A Brief Note on T-Nuts
There are two main types of T-nuts that we use for van building: roll in, and slide in.
- Slide In Economy T-Nuts
- These are the cheapest and slide in to the channels from the ends. These require awareness as you can captivate channels pretty easily rendering it impossible to slide in a t-nut.
- Roll In T Nuts
- These are for hard to reach places and when channels are captivated.
NOTE: If you are using socket cap screw / t-nut combo, we highly recommend using thread locker on your connections when you are finished as they can vibrate loose with all the driving in a van.

Anchor Fasteners
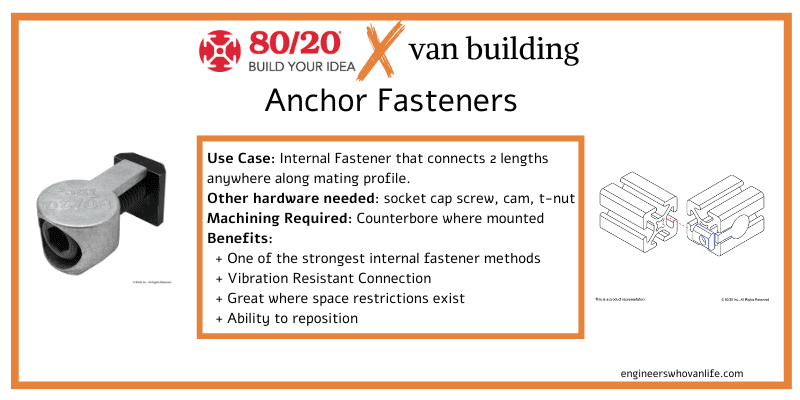
Anchor fasteners are awesome for van building as they provide strong connections that are also vibration resistant. These require machining to counterbore on one of the profiles, but can be adjusted anywhere along the mating profile. Anchor fasteners can be purchased in assemblies simplifying the purchasing process. However, because of the additional machining, we only recommend these if you have a drill press.
3 Way Corners
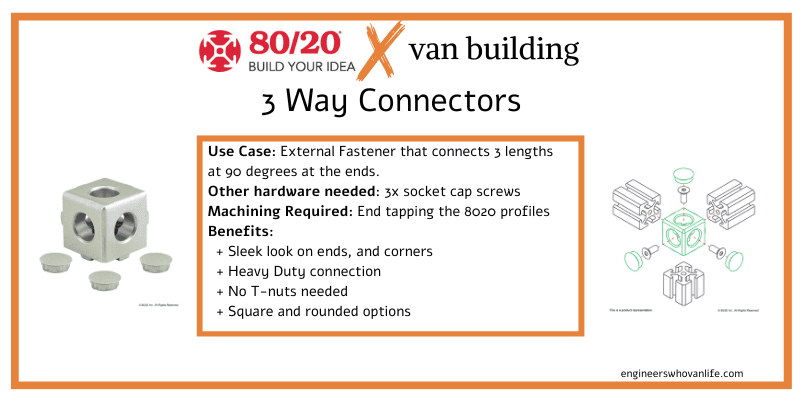
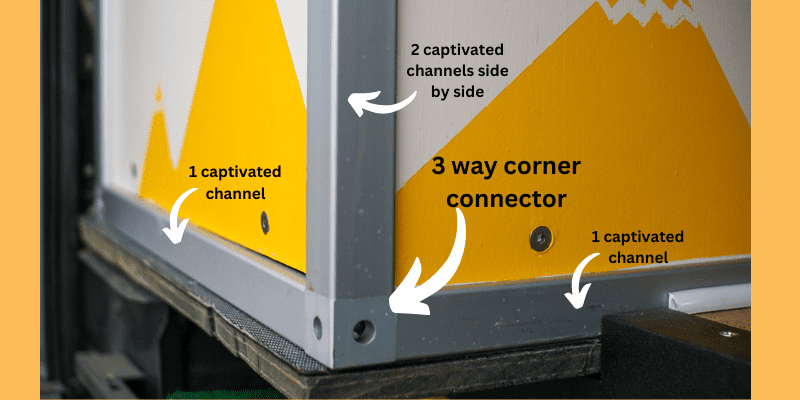
3 Way Corner Connectors simplify the hardware needed compared to other fastener methods. If you know you have three profile lengths coming together, this is a great choice. They provide a beautiful corner finish and come in either square, or rounded corners. Machining is needed to tap the ends of the profile lengths but this can be done with a simple hand tapping set.
Related Reading: Recommended Fasteners for 80/20 Van Building
What series extruded aluminum is best for a van build?
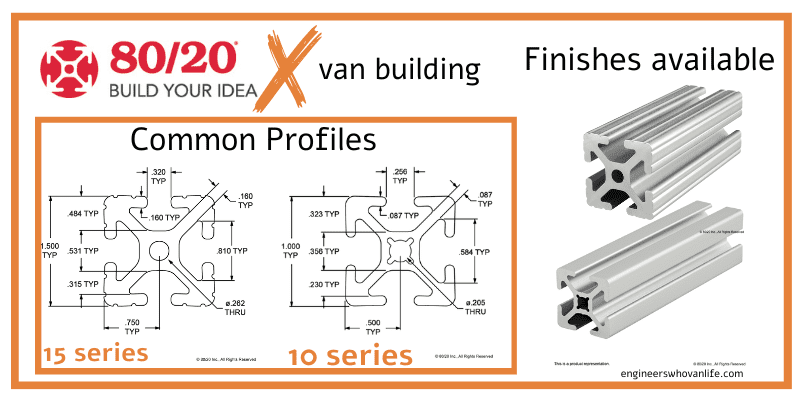
Smaller profiles cost significantly less, but are also not suitable for all load- bearing applications. When considering US based measurement profiles, the two main available profiles are the 10 series and 15 series, which are 1” and 1.5” T- slotted profiles respectively. The 15 series further breaks down into 15 series, 15-Lite, and 15 Ultra-Lite. The 15 series is a solid profile, and the 15 Ultra-Lite is a largely hollow profile with significantly reduced weight/strength, and 15-Lite can be used as a compromise between weight, strength, and cost.
Below is the cross sectional measurements of both series from 80/20. In addition, you can see the finishings available. Any length of 8020 can be purchased in a standard finish (top) or smooth finish (bottom). And finally, you can choose how many T-slots you want. Below is shown with 4 each, but you can do 1 T-slot, 2 T-slots parallel, 2 T-slots adjacent, and 3 T-slots. This improves the finishing look, but, beware that if you don’t have a T-slot, your channel is captivated and you can’t add any fasteners or brackets.
10 Series vs 15 Series for DIY Van Build Applications
10 series is generally used for lighter duty applications such as upper cabinets and shelving, and 15 series-lite for beds, galleys, and seating. During our first van build we opted to only use 15 series-lite in order to simplify our order; however, it was absolutely overkill, heavy, and more expensive.
For our second build we used 10 series for:
- Upper Cabinets
- Shoe Storage Box
- Benches
- Armoire
- Bed System
- Large Galley (you can absolutely build smaller galleys with 10 series)
What tools are needed for an 80/20 van build?
Done simply, there are exactly two tools that will get you through an entire extruded aluminum van build:
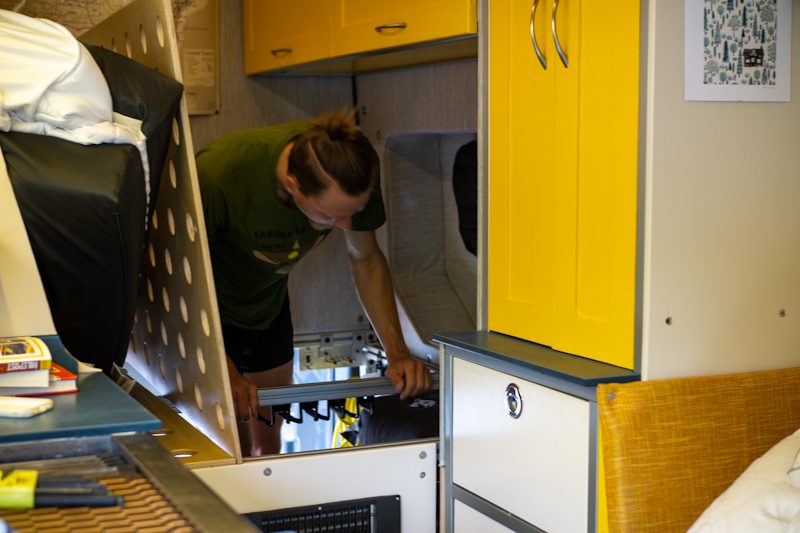
- Miter saw with a metal cutting blade: This can be done one of two ways. Either, you can use your existing miter saw and just a separate blade, or as a higher-level set-up you can get a dedicated metal cutting miter saw with an appropriate blade. The dedicated metal cutting saws have push clamps to hold the aluminum bar in place while cutting and do make life a lot easier.
- Set of allen wrenches: This is the most important tool for your entire 80/20 van build. You may even consider getting duplicates of the most common size you end up needing.
- [Optional] We have a drill press that makes working with 80/20 easier but is not necessary. This becomes especially useful if you are using recessed fasteners.
What are the best practices for cutting and assembling 80/20 for van builds?
There are many ways to put together 80/20 framing members, but the general workflow is the same. If you are of the curious minded, you can dig around for hours on 8020.net’s website to learn more! They have excellent comparison, and inspiration videos.
The workflow of building a van with 80/20 is rather simple:
- Cut, or order 80/20 lengths to the correct length
- Fasten lengths of 80/20 together with internal, or external fasteners and bolts
- Anchor the final module to the floor and the wall. We have found the best way to anchor 80/20 within a van build is with rivnuts, or plusnuts, in the chassis floor, and walls, along with bolts directly through the lengths of 80/20.
- Once finalized, use threadlocker on all bolts.
Can you use 80/20 for a full van conversion?
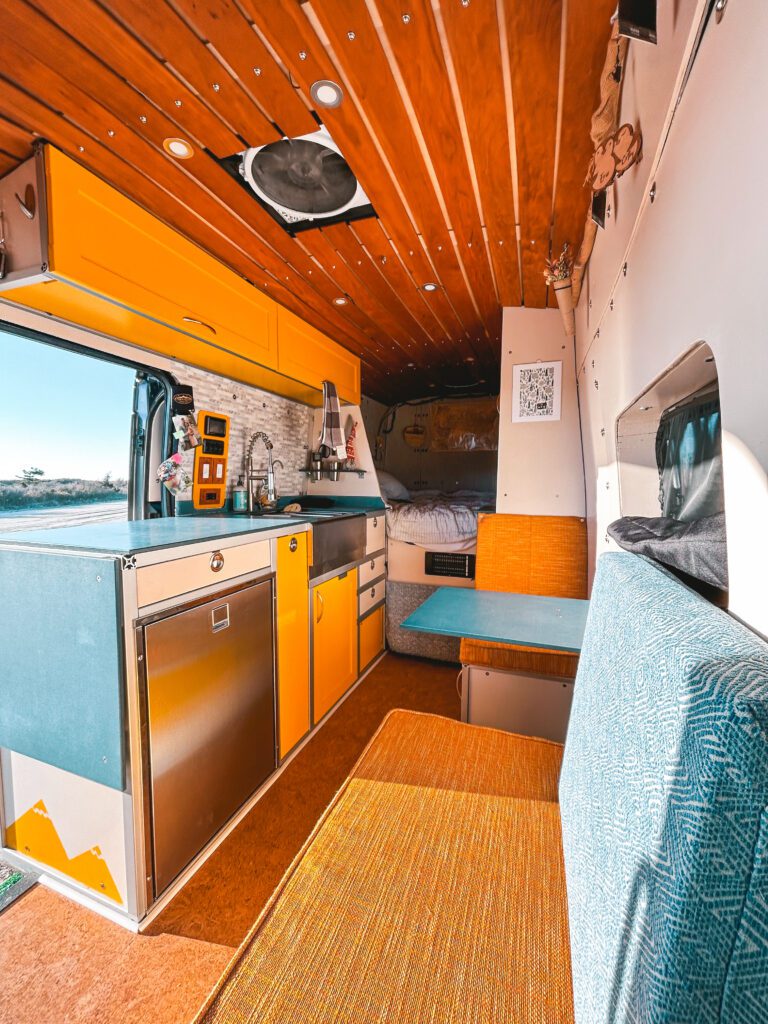
You sure can! We’ve done it twice now. However, it is not necessary, or required. You can gain most of the benefits of building your camper van with extruded aluminum by doing only a few modules. Have you heard of the 80/20 principle? Quite fitting here! The two modules that we recommend as cost effective and simple beginner projects are:
Design Tips for an 80/20 Extruded Aluminum Camper Van Layout
After working with 80/20 in van builds for about 2 years, we have had a heck of a lot of trial and error. We have concluded, the best starting place, and tips, we would give to beginners are:
- Try and only use 3 way corner connectors, flat plate connectors, and 4-hole gusseted corner connectors. These connectors are easy to work with, strong, and cover most use cases.
- Utilize 10 series for most of your modules that don’t bear excessive weight. If you have a bed system, or a really large galley, opt for 15 series lite.
- Plan ahead with SketchUp and order accordingly. Getting lengths pre-cut to size saves an insane amount of time.
- Don’t focus on the fasteners up front. If you make sure your lengths are correct for your 8020.net order, you can order an estimated amount of fasteners and get the rest via Amazon, or Grainger as needed.
Using SketchUp to Plan Your 80/20 Van Build
We use SketchUp to plan our DIY van builds and then extract the parts needed from there. There is a steep learning curve to using SketchUp so we have created a YouTube video that will equip you with everything you need to know to design your camper van layout starting from 0 knowledge of SketchUp.
Final Thoughts + Our Extruded Aluminum Van Build Tour
We truly believe that the perfect camper van starts with strong bones. And, by building with extruded aluminum, you are doing just that. Whether you choose to DIY your full camper van with 80/20, or only opt for a bed system, you will not regret it.
Looking for inspiration? Here is a full tour of our extruded aluminum camper van:
Recommended Next Reading:
80/20 DIY Van Build Module Guides:
Below you can find specific step-by-step guides to building modules in your camper van with extruded aluminum. If you are looking for a starter project, the bed system, or upper cabinets are excellent places to begin.
Looking for specific assistance? We offer Virtual Consulting and love talking with our community about building vans with extruded aluminum. One of our more common consults is about reviewing your extruded aluminum designs before purchasing.
Bonus! Professional 80/20 Camper Van Galleys
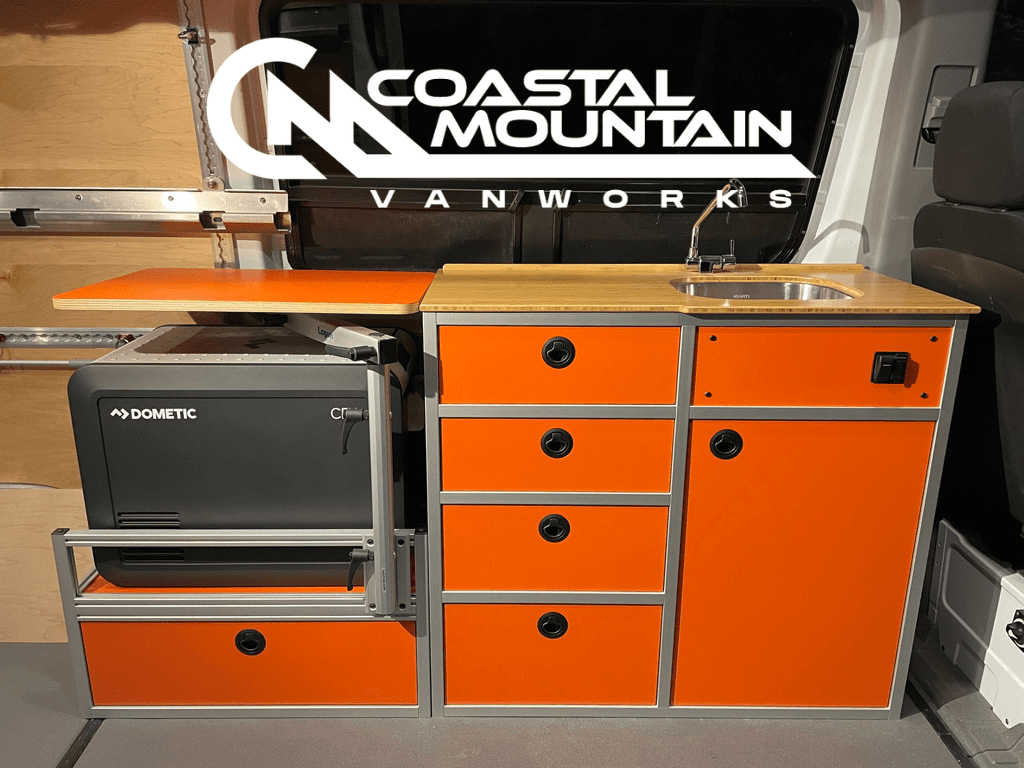
If we’ve convinced you to use extruded aluminum in your camper van, but you feel overwhelmed with the larger modules like kitchen galleys, we have a solution for you! Coastal Mountain Van Works offers fully built and assembled modular camper van galleys made with extruded aluminum.
We met Hugh, Coastal Mountain Van Works owner, at a camper van expo. He has 25 years of cabinetry experience that translates beautifully to his camper van galley work!
Thanks for being here! Happy building!
Eric + Colby
✉️ Join our mailing list for more content!
🙏🏽 If you are looking for more 1:1 van build help, we are here to help via Consulting or Travel Van Building.
[Start Here] Beginner Guides:






Comments 12
Hi Colby and Eric,
Thank you for the incredibly informative guide on building with 80/20 aluminum extrusions! I am planning an offroad camper van build and am very interested in using 80/20 for its structural benefits. However, I prefer a seamless, wooden finish without visible aluminum edges.
Could you provide some insights or tips on how to completely hide the aluminum frame with wooden panels or other materials? Specifically, I am looking for methods to attach the wooden panels securely while ensuring the aluminum remains hidden.
Thank you for your help!
Author
Hello Bastian! Sounds exciting! You can check out this guide: https://engineerswhovanlife.com/fastening-panels-to-8020/ , specifically the “overlay” panels to hidw the aluminum.
Great guide. You have an image 8020 Basic Assembly and in that image an arrow going to “this bolt anchors the to the plusnut..” just curious did you drill that out with your drill press? Would you recommend that method over using an L bracket to secure to the van floor/walls? I don’t have a drill press for reference and if I need to drill through the 8020 it would be clamping it down to a table and using a standard drill (probably not ideal). Also – what bolts are you using here to go into the plusnut? Are they directly from 8020? Grade?
Thanks!
Author
Hi Brad, great question! We did have access to a drill press for that particular mounting. However, we have also mounted modules in the way you suggested with L-brackets. For example, if you scroll to “securing the shower bench to the chassis”, you can see where we did this. You can absolutely go either way, just be absolutely sure to use a thread locker and maybe some extra mounting points.
Regarding bolts – for all the assembly of the modules, we did use 80/20 FBHSCS. But for use with the plusnuts, we used stainless steel bolts. As long as they are marine rated grades they are fine.
No mention of how you plan to protect against galvanic corrosion? I read this whole thing hoping to gain some insight. It takes three to five years for ambient moisture to eat through a 1/4” 1080 steel fastener between aluminum and steel.
Are you using brass or nickel screws when attaching to the van body? Or sacrificial screws? Or is your van rusted out already and you don’t care?
Author
All steel bolts that you are referring to are coated in zinc which acts as corrosion barrier.
Very helpful primer, thank you very much! I’ve used 80/20 on some small projects but just ordered a van and this was SUPER helpful.
Author
That’s awesome, enjoy!!!
Thanks for all the very informative and inspirational guidance on 8020. I am planning to use it on an camper build where the living space exterior walls, ceiling, and floors are nade from FRP sandwich panels with an insulation core. I understand wood can be embedded in the panels for extra strength where attachments to the panels are anticipated. Is it sufficient to glue the 8020 as an anchoring and attachment method or is screwing and or bolting recommended ?
Author
Hey there! Glad you found it useful. We would recommend bolting wherever possible. A lot of rattling goes on when you drive a campervan and I would worry glue would come loose.
It’s spelled “aluminium”.
Author
Haha where are you from?