
Camper Van Flares: Everything You Need to Install and Paint
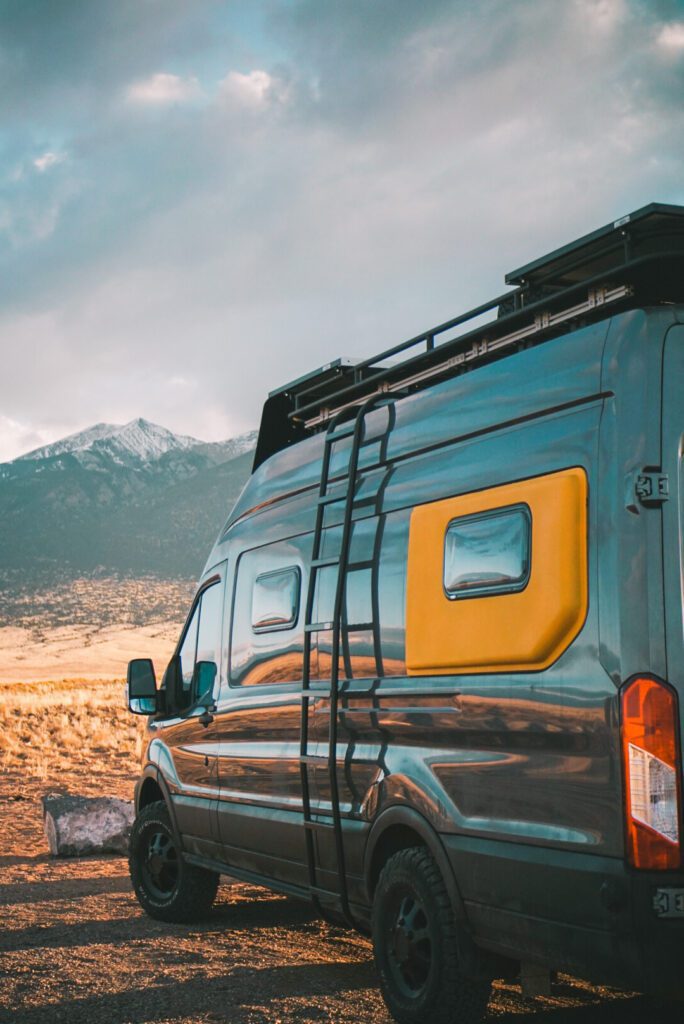
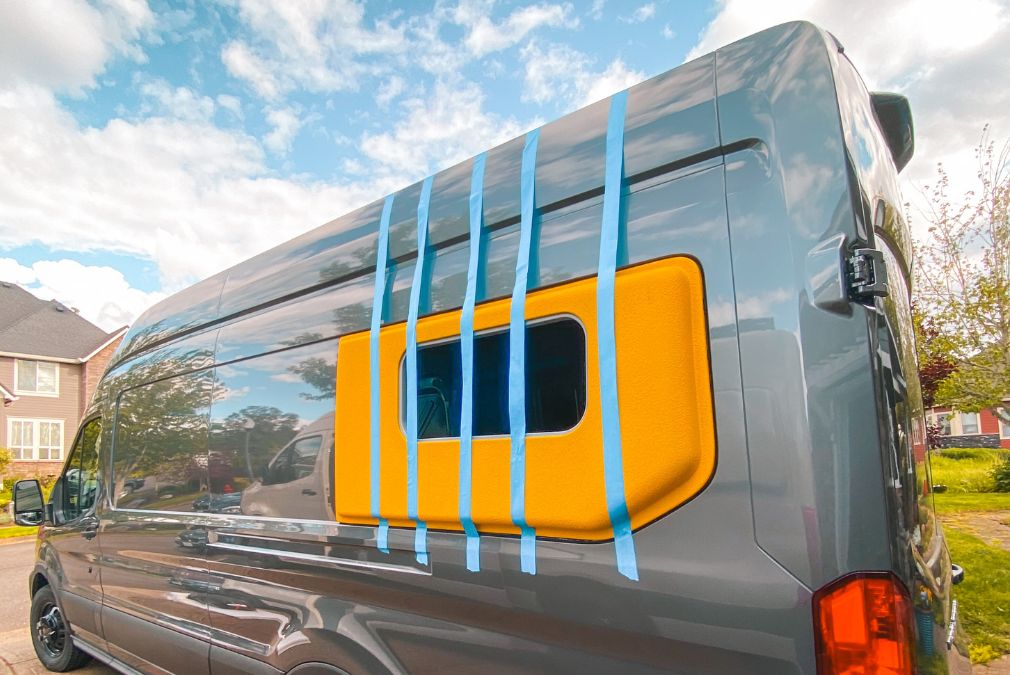
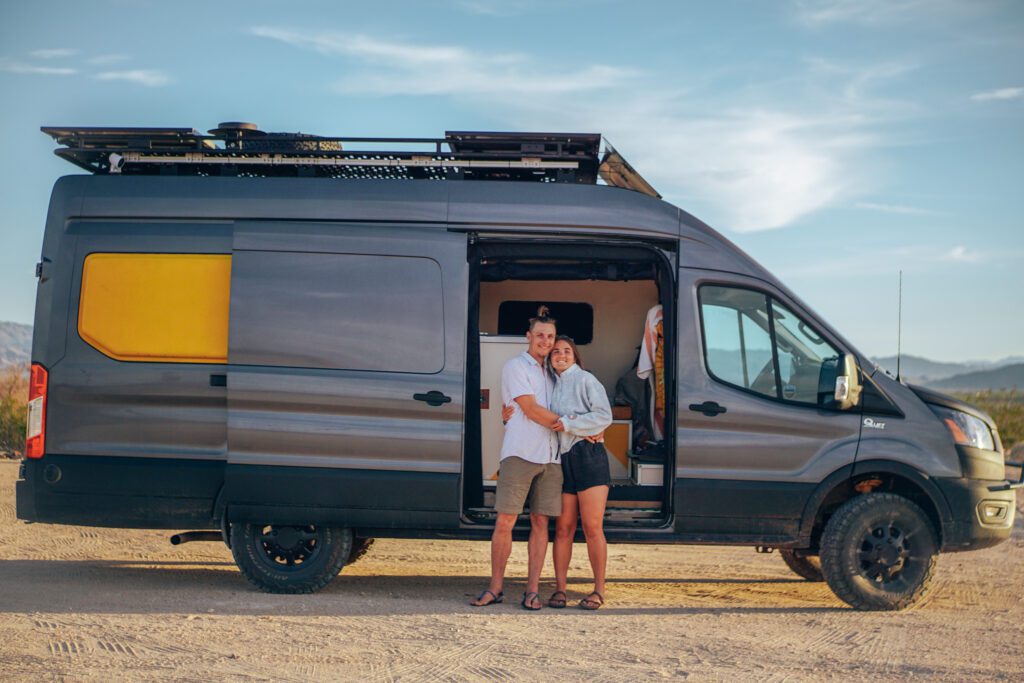
The bright yellow raptor liner-ed bump out on the back of our camper van is a “flare”. While flares are not mandatory for a camper van conversion, they are often opted for as the allow you to sleep “sideways” in the back of your camper van.
In this guide, we will dig into:
- The basics of what Flares are
- How they expand the living space in your camper van
- And how to finish and install them. Spoiler alert, they don’t have to be as bright as ours are!

** Disclaimer: This blog post contains various affiliate links that provide a small kickback to us, at no additional cost to you. We truly appreciate your support if you choose to purchase through these! **
What are Flares?
Flares are “bump outs” to the side of your camper van that give you extra width in the back quarter to third of your camper van. They are most often used to allow you to put your bed sideways and open up floorspace. However, companies like Flarespace are coming out with more versions like these Mega Flares that give you more living space across the entire van, not just the back. Below you can see what our Flares look like, we have the Flarespace Ford Transit 148″ EL flares with one window.
Flares are easy to install as you simply cut out the sheet metal panel and install the fiber glass bumpouts.
How Much Width do Flares add to your Camper Van?
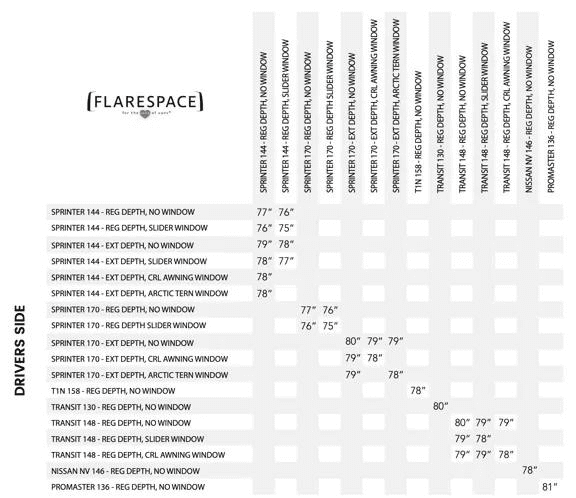
The extra width that camper van flares add varies on two factors: what chassis you have, and if you opt for a flare with a window installed (more on this next). Below we will drop Flarespace’s official chart to help you figure out how much width you can gain in your circumstance! We personally gained about 2-5 inches (varies across) because we got one flare with an awning window.
Should you DIY Install Your Camper Van Flares?
On top of the cost of camper van flares, you can pay an additional $3,000-$5,000 to have them professionally painted and installed. However, you are on a DIY van building and website and we are here to tell you that if you can install a window comfortably in your camper van, you can absolutely DIY install your set of flares! In fact, flares tend to have a larger margin of error than windows, or fans do. Follow along the rest of this guide, and you will be successful.
Should you get a window in your camper van flare?
Short answer, yes.
Long answer: After converting two campervans, we have cut countless holes in our rigs. Flares have the option of having a window already pre-installed *perfectly* so to us, it is a no brainer to get at least one flare with a window. We will note though, that if you are going to get a window, you will lose the extra depth that the flare provides at the window area.
A less important note: Flarespace flares come with hands down, the BEST window shades, for free. We LOVE them.

Tools Needed To DIY Install Camper van Flares
To DIY paint your flares (optional):
- Coarse Scotch-Brite pad
- Tintable Raptor Liner Pack (we used a little under 4 qts)
- Solvent Based Automotive Tint, of your color choice
- 6 horsepower air compressor that can generate 150 psi line pressure (you can rent at Home Depot)
- PPE (for when you are spraying the paint)
- Mineral Spirits
- Lacquer Thinner
To Install Your Flares:
- A buddy (no link.. sorry :D)
- Nibbler
- Drop Cloths
- Painters Tape
- Step Bit
- Drill
- Scotch-Brite Pad
- Belt Sander, or foam sanding pad
- Rustoleum Primer
- High Force Caulk Gun
- Lint Free Cloth
- Mineral Spirits

How to Install Camper Van Flares
Okay! Now, what you came here for. Below are the steps to DIY install your camper van flares!
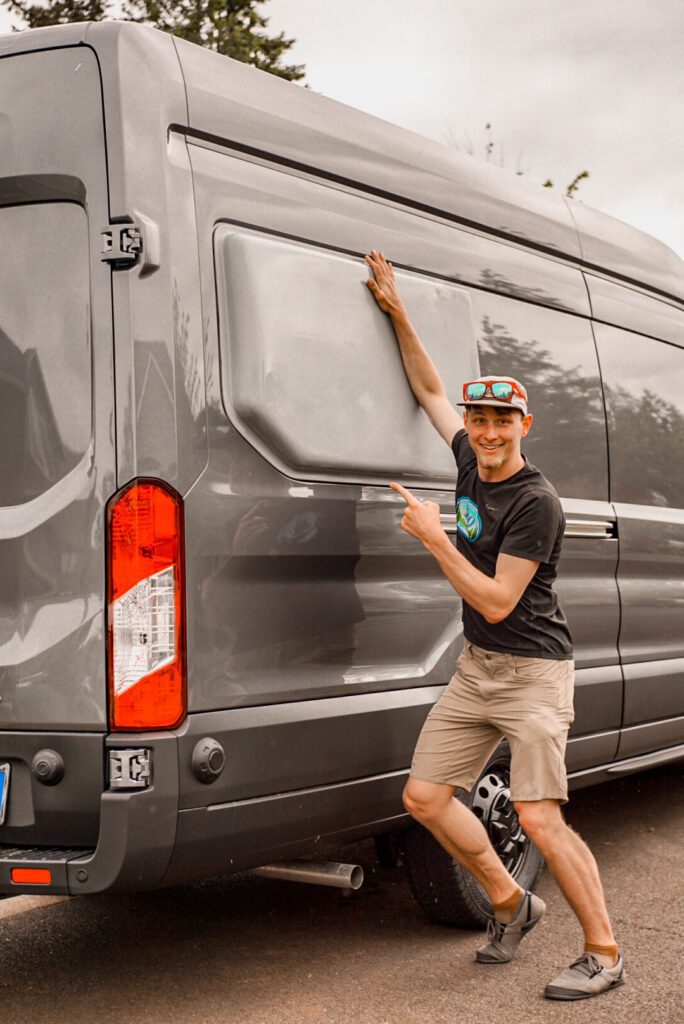
1. Test Fit Your Flares
The very first step (to most DIY projects) is to test fit your flares. To do this, simply press the unfinished flare on the outside of your van to make sure it fits inside the panel lines. This is just to make sure you have the right flares before cutting into your chassis, or painting them.
2. Paint your Flares
Your flares will come unfinished and you get to chose your own adventure on how to finish them. You can either DIY it, or get them professionally painted. Details on each below.
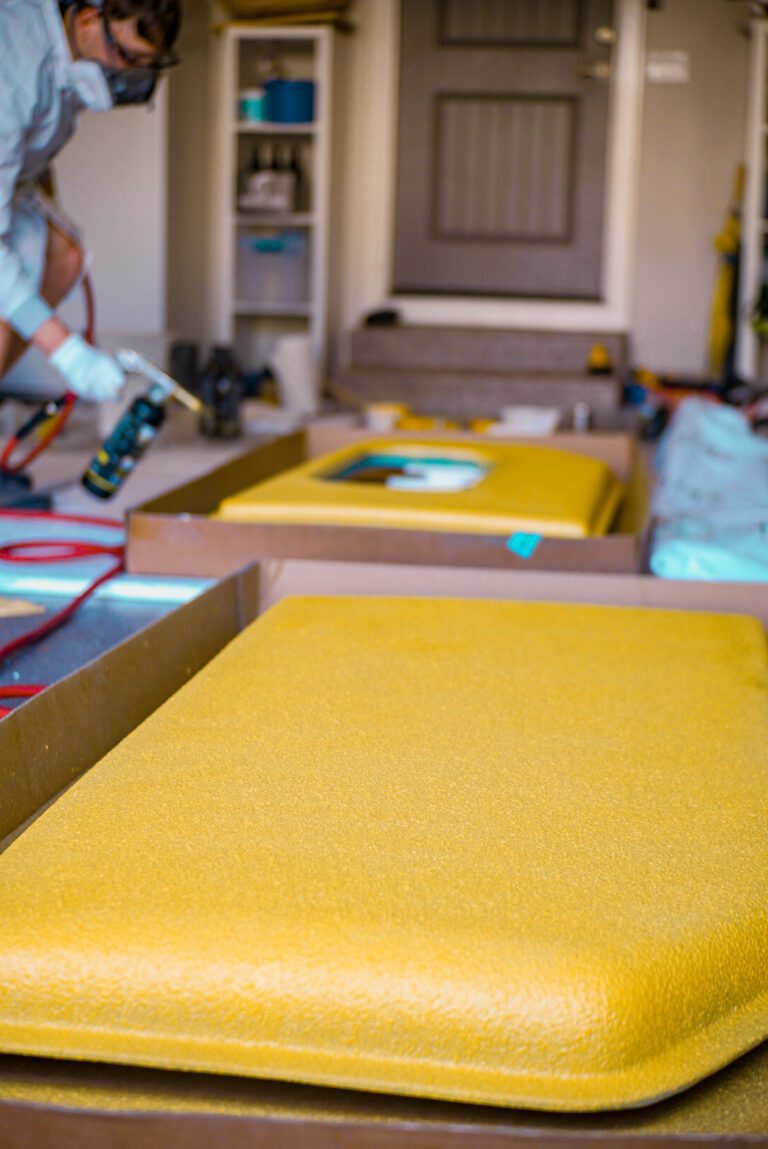
Option 1: DIY Paint Job
We DIY-ed our flares (if you couldn’t tell by the bright yellow raptor liner). This option is much cheaper and allows you to get creative! Our directions below will be for using raptor liner (or truck bed liner). We like this option because it is more durable than standard paint and your flares are the widest part of your van so they will be hitting branches and trees more often.
- Go to any hardware store and pick a color swatch.
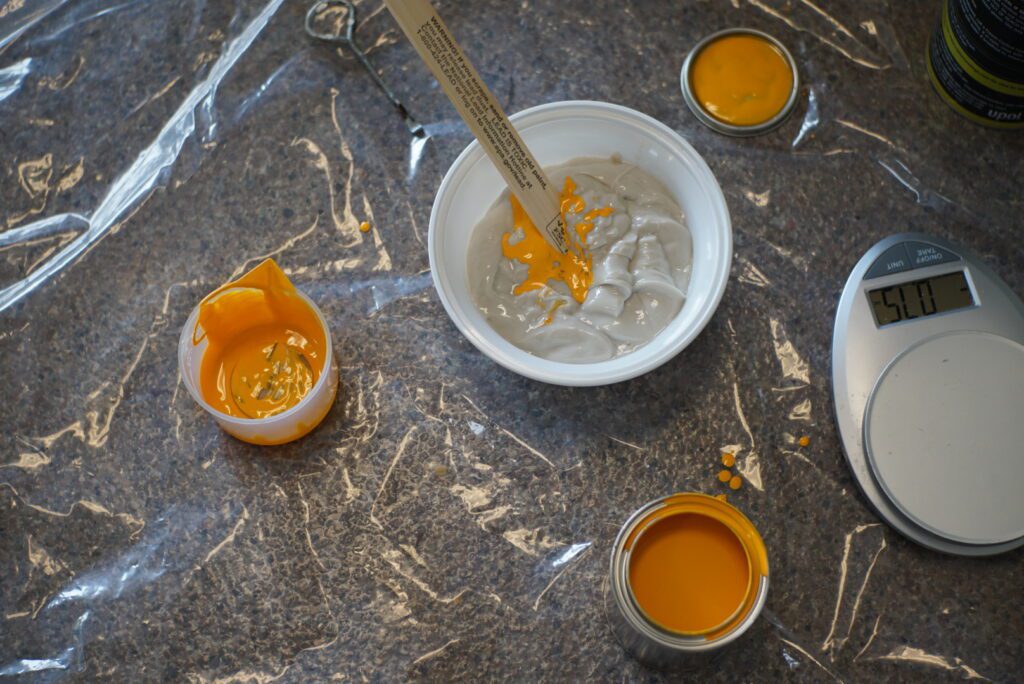
- Take the swatch to an automotive paint department (Napa is where we went), and have them mix you a solvent based automotive tint. We got one pint.
- Get a Tintable Raptor Liner pack (4 quarts should do).
- Get, or rent, an air compressor and hose. You will need a 6 horsepower air compressor that can generate 150 psi line pressure. Pressure should be set between 45-60psi during your application.
- Scuff your flares with a coarse scotch pad. Be extremely thorough and get every square inch to ensure the strongest possible bond of paint to flares.
- Wipe with mineral spirits and a lint free cloth to get the debris off.
- Set up your work area. This should be a well ventilated space, with ample drop cloths coverage to catch aerosolized droplets. Additionally, prep your PPE: goggles, respirator, disposable gloves, and long sleeved clothes that can get dirty.
- Mix your raptor liner: 24oz tintable base + 2.4oz solvent based auto tint + 8 fl oz. hardener. Shake for 2 mins. Follow ratios on the raptor liner pack.
- Get on your PPE and begin spraying your flares! We did two coats with at least 24 hours between coats. Coats will be fully cured after 7 days, and shouldn’t be exposed to water in the first 72 hours.


Option 2: Professional Paint Job
You can also have your flares professionally paint matched so that they blend perfectly with your chassis color. This is pretty straight forward. Costs can vary by location, but expect it to be around $1,000.
3. Check the Weather ⚡️
Once your flares are painted and ready to go, you can begin the DIY install! You should look at the weather and be sure to find a dry 2 day window. The sealant used to hold the flare in place requires a minimum of 30 hours to cure, but can take longer if it is colder.
4. Prep Your Space
Over the next few steps, you will be cutting through metal. For this reason, you should prep your space accordingly to capture metal shavings. We like to use painters tape and drop cloths, and sometimes magnets.
5. Cut Away the Interior Ribs
There are sub ribs on the inside of the window stamp often just loosely adhered with foam. These should be individually cut first so that the Nibbler (below) has room to move freely. See photo below.
Why a Nibbler?
For this project, we recommend using a Double Cut Metal Shear, also called a Nibbler. This will be much cleaner, and easier to handle than a jigsaw.
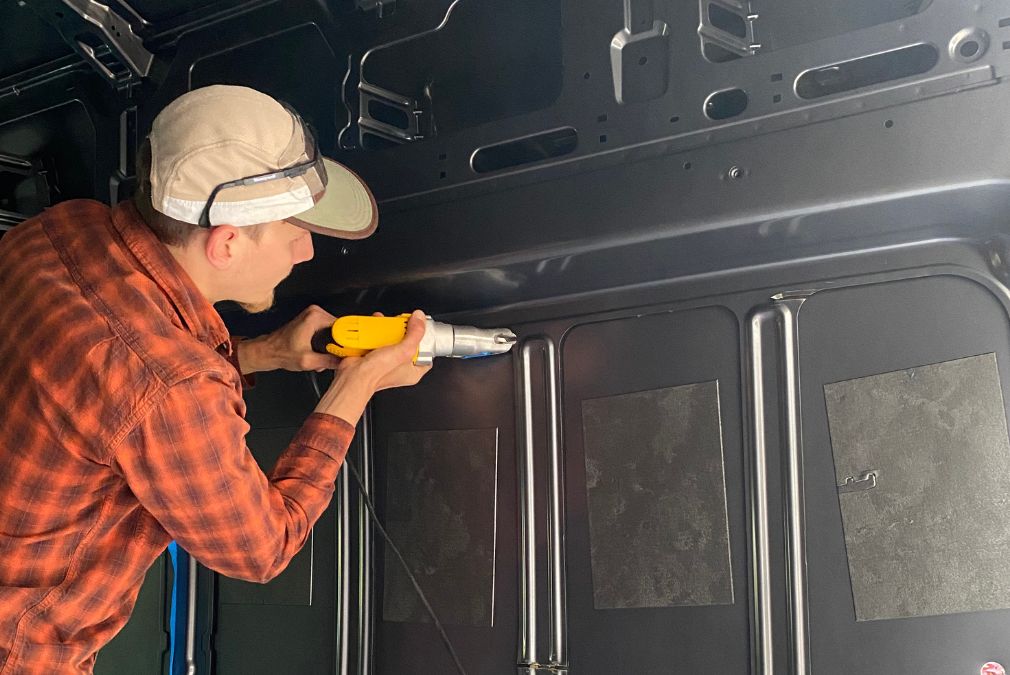
6. Cut Out Side Panels
Use a step bit to drill a hole large enough to start the Nibbler. Working from the inside of the van, use the Nibbler and follow the OEM window stamp line from bottom to top to ensure the panel doesn’t fold down on itself as you near the end of the cut. Don’t worry about getting a perfect line, the flare trim ring sits slightly inside of the window cutout and can always be trimmed more later.

7. Sand Any Burrs Down
Using a belt sander, or coarse grit sandpaper on a foam block, thoroughly de-burr along the entire cut line.
8. Apply Rustoluem to Exposed Metal
As with any metal cuts on your camper van, coat generously with rustoleum primer to avoid rusting behind your walls. Never hurts to apply two coats 😉
9. Scuff Glue Area with Scotch Brite pad
You will get the best adhesion possible between the sealant and the van sheet metal when the van’s paint is scuffed. Staying within the lines of exactly where the sealant will sit, thoroughly scuff the paint with your scotch brite pad or medium grit sand paper and wipe clean with some more mineral spirits to ensure a clean bonding surface.
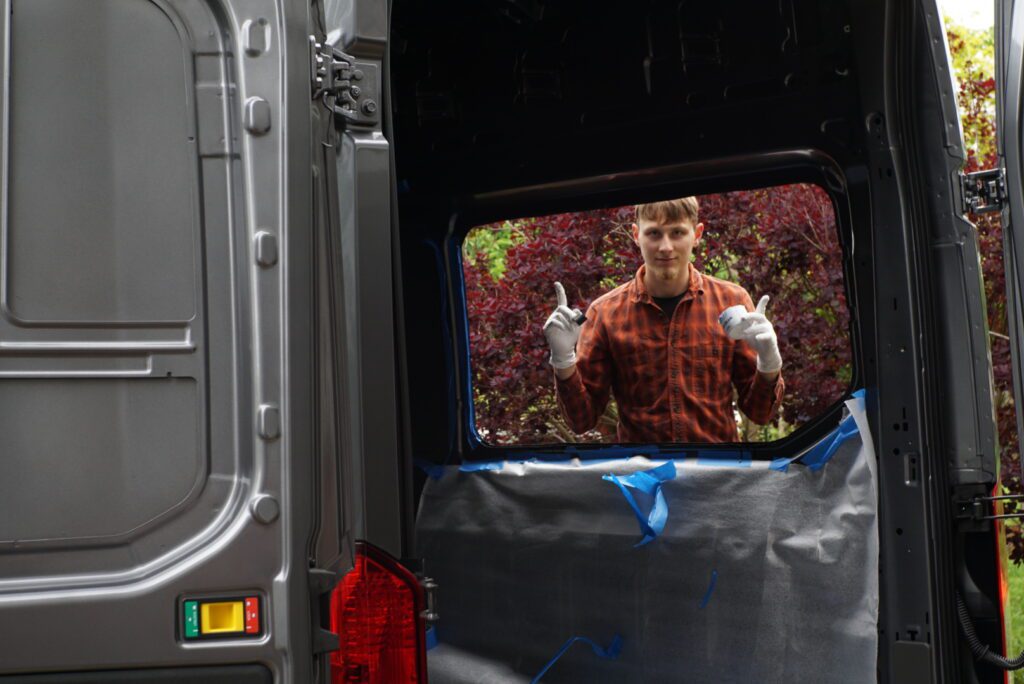
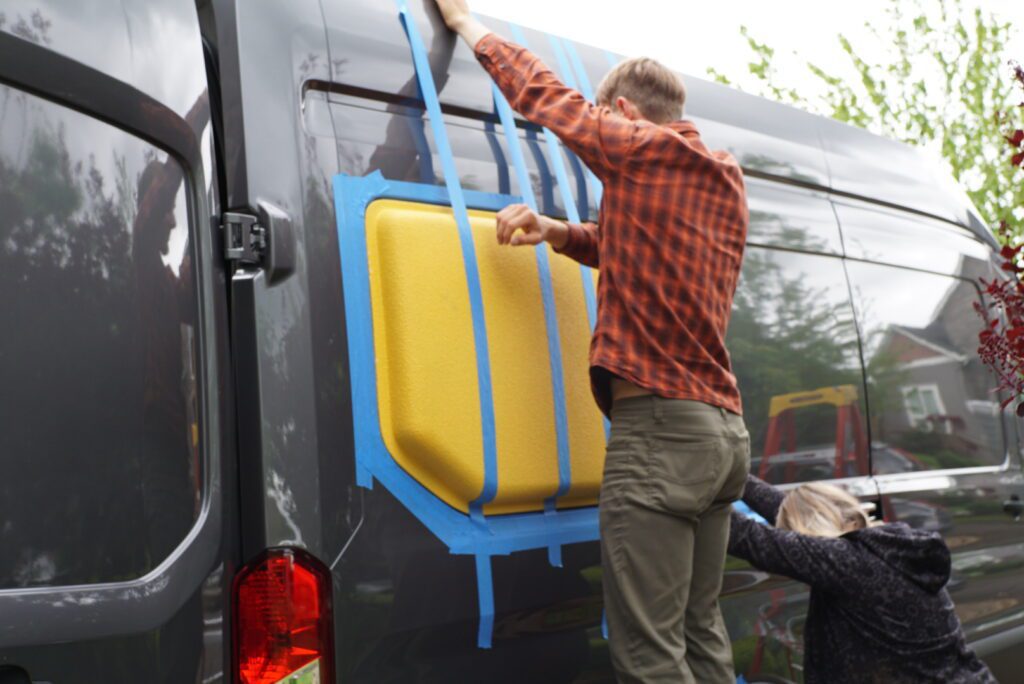
10. Prep Tape for Holding Flare in Place
Flarespace recommends “gaffers tape” for holding the flare in place while the sealant cures. However, we have personally witnessed that go wrong when installed in direct sunlight and heat. The gaffers tape can leave a residue if left for too long in direct sunlight. Instead, we found blue painters tape to be plenty strong and it doesn’t leave residue.
Using 5-8 full lengths of tape, anchor them at the top of the window cutout and fold them up out of the way so when you press the flare in place you can quickly and easily pull each tape length down and in place. Additionally, you can apply some painters tape to the outside perimeter of the flare cutout such that you don’t accidentally smear the black sealant anywhere on your van when positioning the flare. See below.
11. Apply Sealant to Flare
Using you high pressure caulk gun, apply one full tube of the provided sealant to the inside edge of the flare. Make sure that your caulk bead is even and continuous around the perimeter to ensure a completely water tight seal when you press the flare into place. The provided sealant is very viscous and takes a fair bit of pressure to squish down into place which is why it is so important to get your bead even and continuous around the perimeter.
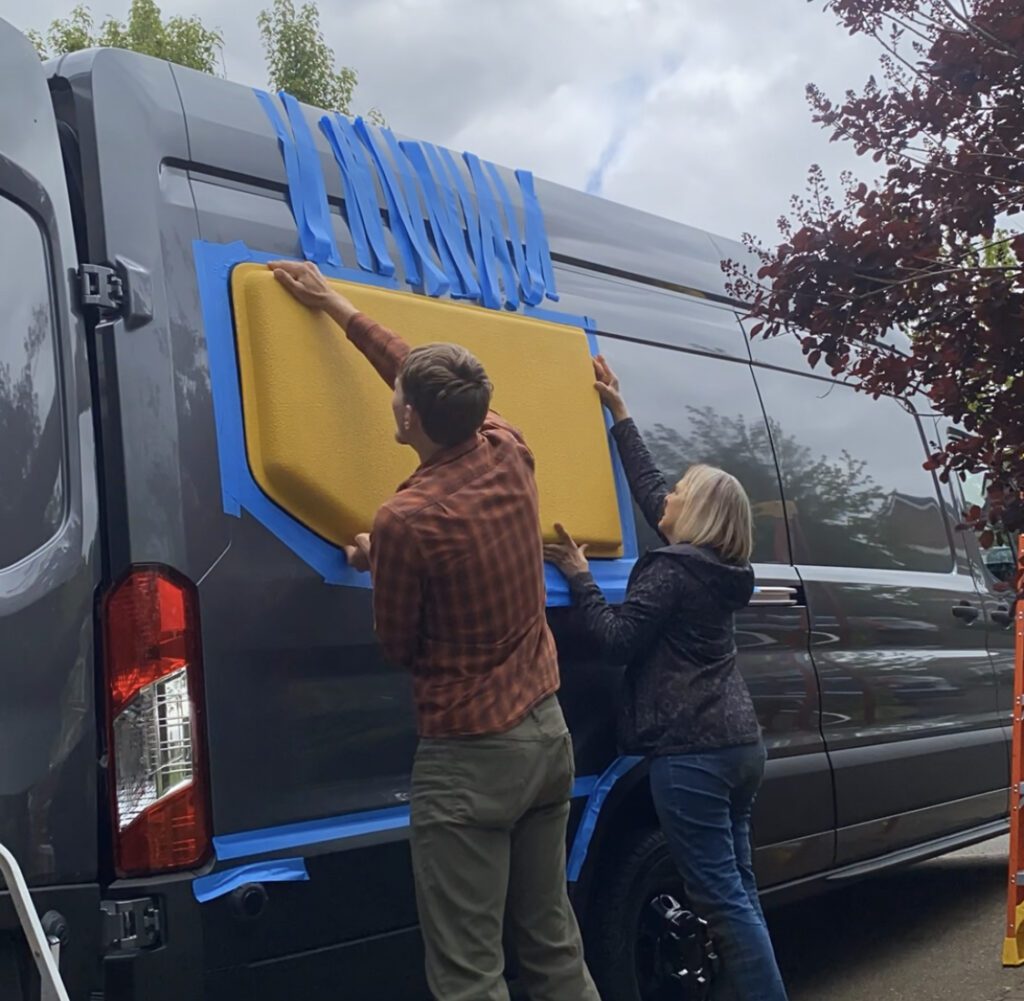
12. Press Flare On
Here is where you will need your best van building friend! The flare is bulky and awkward and setting the flare exactly in place the first time will ensure you do not smear the applied black sealant anywhere you do not want it. Have one person on each side of the flare and align the flare so there is equal gap between the flare and the window cutout area on all three sides (top, bottom, and rear). Firmly press the flare into place and have one person hold the flare from the center to ensure it does not sag or move. Have the other person peel down each length of tape so they are holding the flare in place for the sealant to cure.
13. Allow the Sealant to Cure for 48 Hours
The sealant requires at least 30 hours to cure, but can take longer if the weather is cool out. For that reason, we always ere on the side of caution and you should allow 48 hours for your sealant to cure. During this time you should NOT allow the flare to get wet. If you have a space to park inside that is optimal, but otherwise check the weather forecast to make sure no rain is coming. If you already set your flare and rain appears in the forecast, cover the flare area with plastic sheeting so it stays dry while curing.
Additionally, you should not drive the van during the period.
Finishing Your Flares
The hard part is done! Now, we will move to the interior of your camper van to finish the inside of your flares. There will be 2 things: the interior of the flare piece you just installed and trim rings.
For the interior of the flare, we personally added a layer of Landau PAD5 closed cell foam and fabric to match our walls.
For the trim ring and wall panel, we upholstered ours with Nassimi Fabric and LOVE how cozy and smooth it turned out. We have an entire guide dedicated to that, so we will leave it at that.

Trim Rings
Trim rings are the (often fiberglass) piece that goes on the inside of your chassis to carry the wall cavity into your flare seamlessly. Some people DIY these. However, we personally used the Flarespace fiberglass trim rings so we knew they would be perfect. See photo below. Their trim rings come in standard variety, and high tech variety. The high tech trim rings simply come with 2 touch LED lights, which add nice lighting to the interior of the flare.
We cannot speak to DIY-ing your trim rings in depth; however, you will need to frame the shape of the flare and carry it into your wall.


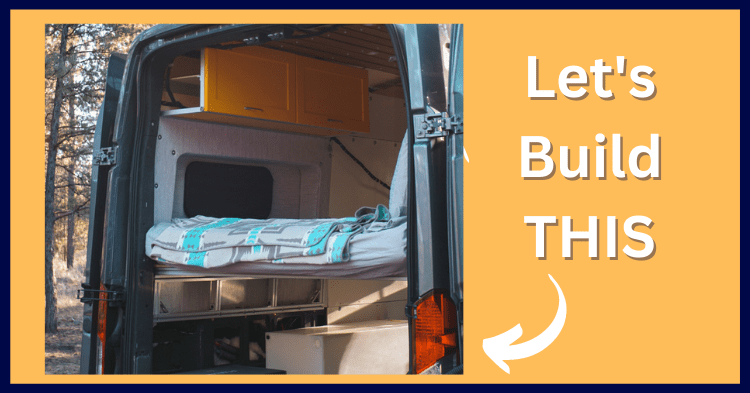
How to Build a Bed System in Your Flares
Now that you can sleep sideways, you need to figure out a bed system! Below we will link our schematic for a simple, lightweight, space efficient, and durable bed system with extruded aluminum.
We think an 80/20 campervan bed system is a great decision even if you do not choose to build your entire camper van with 80/20. This is a very simple project that will open up your garage space greatly.
Thanks for being here! Happy building!
Eric + Colby
✉️ Join our mailing list for more content!
🙏🏽 If you are looking for more 1:1 van build help, we are here to help via Consulting or Travel Van Building.
[Start Here] Beginner Guides:


Comments 6
In this and the upholstery guide, you mention covering upholstering your flares but I can’t seem to find the section, is there another guide?
Author
You can follow the tips here! https://engineerswhovanlife.com/upholstered-wall-panels/
Hi! This guide is so helpful, thank you! Did you upholster your flares before installing them?
Author
Yes!
A note about the automative paint tint, I got my swatch today from the hardware store like suggested and the paint mixer at NAPA said it wouldn’t be possible (or we could try to get close for $300+). Instead we decided to pick from one of his swatches. It might be worth mentioning in the guide so folks don’t get attached to a color and then have to make a different game time decision, I spent over an hour at NAPA going back and forth trying to re-imagine what I wanted my flares to look like. Gonna start the painting process tomorrow!
Author
Thanks for sharing, thats really good advice. Good luck with the install!