Optimizing Space in Your Camper Van with a Headliner Shelf
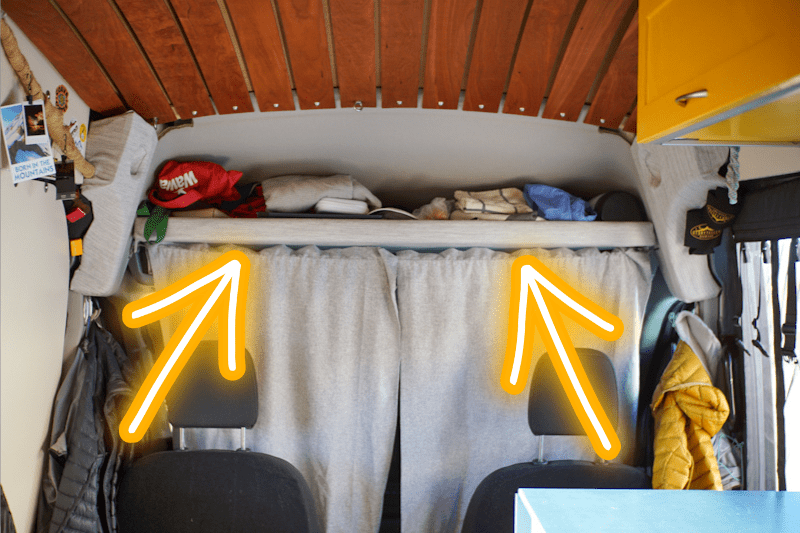
The goal of any camper van conversion is to utilize every bit of space efficiently. A headliner shelf, or an overhead cab shelf, is the perfect solution for optimizing otherwise dead space in your camper van. And, trust us, when we tell you that space is valuable storage space for things like blankets, jackets, outdoor rugs, and other things that don’t have an obvious home in your camper van.
In this guide we will discuss the most cost and time efficient way to install an overhead shelf: using the DIY Vancillary Overhead Shelf kit. While you can also completely DIY a shelf without this kit, at the kit cost of ~$125, the time spent on templating and cost of materials may not be worth it. Throughout this guide, we will make the directions agnostic to which method you choose!
** Disclaimer: This blog post contains various affiliate links that provide a small kickback to us, at no additional cost to you. We truly appreciate your support if you choose to purchase through these! **
Why do you need an overhead shelf in your camper van?
Unlike most of the space in your camper van, a headliner shelf is pretty much the only way to utilize otherwise dead space space in headliner area. It is also some of the simplest storage to build as you only need the shelf bottom, not sides and a top. Additionally, you can complete this project in less than a day which can serve as a confidence boost during a complex van build. Swivel seats are also a simple “confidence boosting and worth it” install!
Vancillary Headliner Shelf DIY Kit Overview
Vancillary currently offers DIY headliner shelf kits for Ford Transit and Mercedes Sprinter vans. These kits comes with:
- Custom cut brackets
- Hardware
- A template for cutting the actual shelf
If you have a different rig, you will need to get a little creative, but the concept is the same: brackets mounted to existing handle points, and shelf resting on brackets.
10% off your Vancillary order with code: EWVL
Mercedes Sprinter
DIY Headliner Shelf Kit
Ford Transit
DIY Headliner Shelf Kit
How to Install a Headliner Shelf in a Ford Transit or Sprinter Van
The actual install of the headliner shelf is simple and will take no more than a day. However, let’s first discuss a few considerations like tools needed and install requirements.
Install Requirements
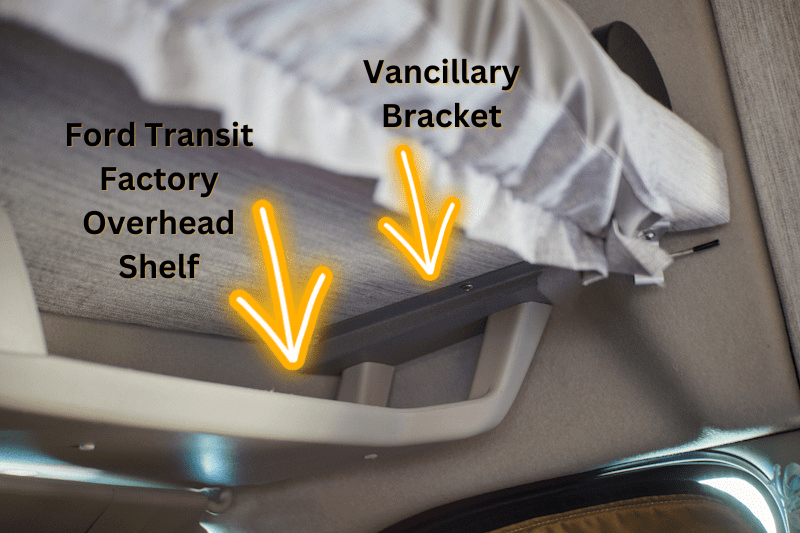
The Vancillary DIY Headliner Shelf Kit works for Mercedes Sprinter Vans 2007+ and Ford Transit 2015+. However, for Ford Transit vans you must have the factory overhead shelf as that is what the brackets will attach to. See photo of our van below.
Tools Needed
- Brackets for your respective chassis
- US allen wrench / hex key set
- US socket wrench set
- 6x 1/4-20 bolt assemblies (lengths vary depending on shelf thickness)
- These come with the Vancillary DIY kits
- Vancillary Shelf Template (or your own!)
- Minimum of 5′ x 3′ plywood for shelf cutout (we recommend 3/8″ Baltic Birch- see Campervan Weight Savings Guide)
- Jigsaw for cutting out the shelf
- Optional fabric + 3M adhesive, or paint, for finishing your shelf
1. Bracket Install for Your Headliner Shelf
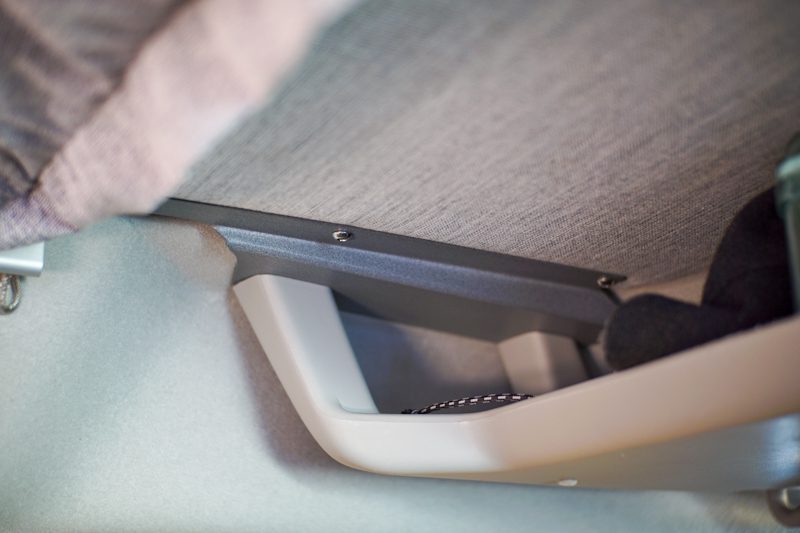
The first step of mounting your headliner shelf is to mount the brackets. The install of Vancillary brackets is simple and uses all OEM parts in your camper van for mounting to. See your respective guide for in depth instructions and photos.
Ford Transit
Headliner Shelf Install Guide
Mercedes Sprinter
Headliner Shelf Install Guide
10% off your Vancillary order with code: EWVL
2. Shelf Templating and Construction
Next up: the headliner shelf. The best part about the Vancillary headliner shelf kit is that there is no need for cardboard templating as it includes a “to-scale” paper template to trace onto your shelving material for both the shelf and front flange.
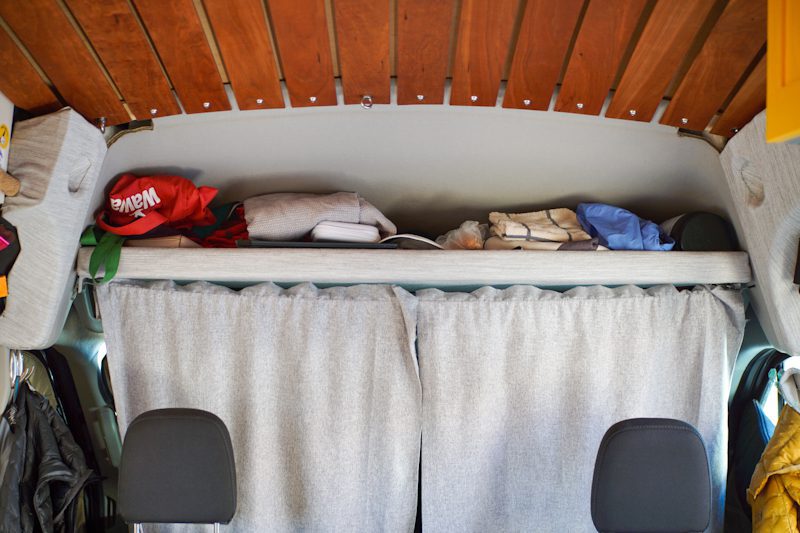
Once you’ve traced both pieces fully, cut them out with your jigsaw. Then, sand down, and remove any burrs from the edges before assembling the pieces with wood glue, and finishing the shelf with paint, or fabric of choice. Below, you can see where we used Nassimi Fabric for a softer finish.
For Mercedes Sprinter vans, you have the option to buy an aluminum CNC cut shelf instead of creating your own.

3. Final Assembly
The assembled shelf should rest perfectly on the installed brackets. Align and drill the 3 holes on each side of your shelf and secure with your bolt assemblies. Pro tip: use nylock nuts since your camper van will resist an earthquake a day on those forest roads!
Camper Van Headliner Shelf Final Thoughts
In our opinion, a headliner shelf enables a huge improvement with little effort and should be in all camper van builds. It is on par with the simplicity of swivel seats which open up your layout beautifully! As always, let us know if you have questions, or need clarifications, in the comments. Happy building!
If you found this blog post useful, you might be interested in:
Thanks for being here! Happy building!
Eric + Colby
✉️ Join our mailing list for more content!
🙏🏽 If you are looking for more 1:1 van build help, we are here to help via Consulting or Travel Van Building.
[Start Here] Beginner Guides:


