Extruded Aluminum Van Build Basics
Converting your campervan with extruded aluminum (also known as 80/20) is an excellent decision. Extruded aluminum is:
- Lightweight
- Incredibly strong for its size
- Functional
- Expansion and Contraction Resistant
- And, long lasting.
Additionally, using extruded aluminum for your van build, instead of the more common, wood, will reduce moisture issues, and save space. We have completely DIY-ed two campervans with extruded aluminum and have also written several guides to doing so yourself.
This specific guide is meant to serve as a “101” or starting point for you to dip your toe into DIY extruded aluminum campervan buildin with just the basics.
Further Learning
While this guide is aimed at getting you comfortable with the idea of working with 80/20 in your next camper van conversion, we also have more specific, in-depth guides that you might find useful.
80/20 DIY Van Build Module Guides:
Below you can find specific step-by-step guides to building modules in your camper van with extruded aluminum. If you are looking for a starter project, the bed system, or upper cabinets are excellent places to begin.
Looking for specific assistance? We offer Virtual Consulting and love talking with our community about building vans with extruded aluminum. One of our more common consults is about reviewing your extruded aluminum designs before purchasing.
** This post contains various affiliate links that provide a small kickback to us at no extra cost to you. We appreciate the support if you choose to purchase through them!**
But first, Is it Extruded Aluminum or 80/20?
Throughout our guides, we use the terms 80/20, extruded aluminum, and aluminum extrusions, interchangeably. This is because 80/20 has become the generic name (think “Kleenex”) for using extruded aluminum, especially in the DIY van building world. We do however, acknowledge that this can be confusing to some as historically extruded aluminum is numbered by it’s width so 20mm x 20mm would be 2020, 80mmx20mm would be 8020, etc.
During our 2 campervan buildouts we have used both 10 series and 15 series extruded aluminum. Which is another added layer of complexity bc those are imperial numbers, not metric (measured in mm). So, all in all, we continue to use “80/20” as the generic term for extruded aluminum. The fact that we happen to chose 80/20 inc as our supplier, ironically has nothing to do with the naming.
Now, onto the fun stuff!
Where to Buy Extruded Aluminum
Sourcing extruded aluminum is not as straightforward as sourcing wood at your local shop is so we figured this was a good place to start. There are a couple of different scenarios that will lead to various places to source the extruded aluminum and connectors your need for your camper van build.
If you can semi plan ahead: 8020.net (first choice)
Personally, we planned our entire 80/20 van build ahead using sketchup and then made one massive order from 8020.net. We, of course, missed a few connectors, and bolts, so also ended up making a few orders from Amazon.
We find the price from 8020.net to be reasonable, and the quality to be extremely high. Being confident in the the quality and accuracy of our order was important to us. The only downside here, and why we recommend you to plan ahead, is that shipping times can vary.
Additionally, the team at 80/20 inc loves seeing extruded aluminum DIY van builds so they have shared a 5% off link with us for our blog. It will be applied directly to your cart when you click through any link on this blog. Please let us know if you have issues!
When you miss a few items: Amazon
Even though we planned pretty darn well, we missed items. Specifically, we missed connectors and bolts. For this scenario, we recommend Amazon due to speedy shipping times. The cost is not too much higher than 8020.net + shipping. Below we will list some things we found ourselves needing from Amazon:
If you want to pick up in person: Grainger
If you want to save on shipping costs and have a local Grainger, that is a great place to source (most) extruded aluminum you will need. Though, they do not have everything! We found they have standard profiles and lengths, but not all connectors and fasteners we needed. Off to Amazon for those!
Basics of Extruded Aluminum (80/20) Campervan Building
The first time that we built out a campervan with extruded aluminum, we were quite overwhelmed with HOW it was going to work. It is not a hammer and nail job. However, once you distill it down to some basics, it becomes quite simple.
Extruded aluminum modules are built with 3 things:
- Extruded aluminum profile lengths
- Connectors
- Bolt/t nut combos
Importantaly, extruded aluminum has “t channels”. T-nuts slide into these channels and then bolts go through a connector into the t-nut to hold everything in place.
Let’s dig into profiles and connectors a bit more.
80/20 Profile Types
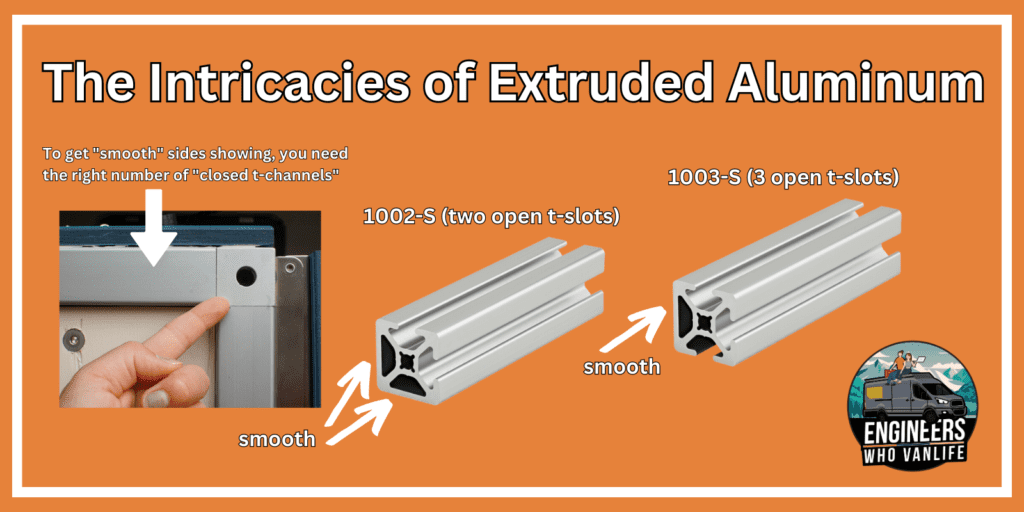
Extruded aluminum profiles come in smooth, and non-smooth. From there, you can purchase lengths that have X number of open channels. An open channel allows you to add a bolt and t-nut combo. For beginners, we recommend having 4 open channels just so you don’t have to worry about captivated channels.
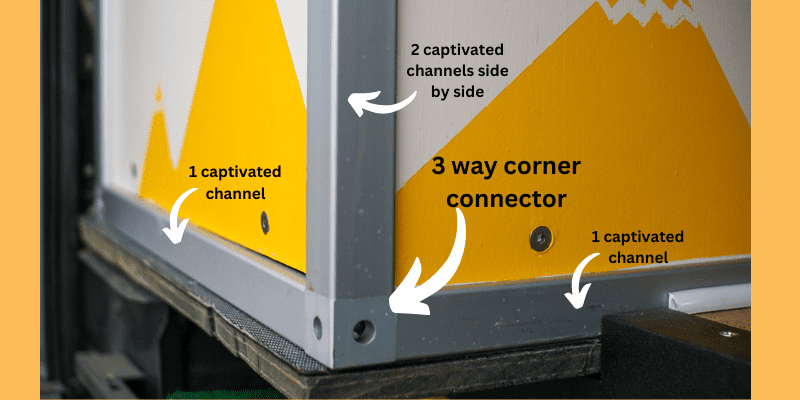
Personally, we did do the maths of calculating how many captivated channels we could have (on our second van build!). You can see below how a module looks if you can plan ahead and have the outward facing side be captivated.
80/20 Connectors and Fasteners
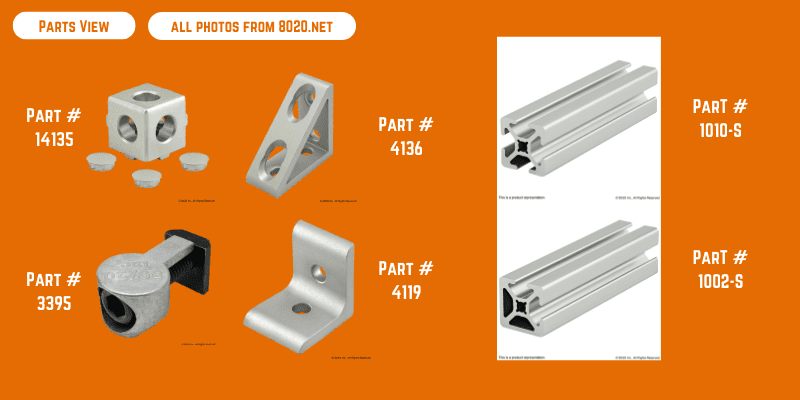
Connectors (or fasteners) are how you connect extruded aluminum lengths to turn lengths into campervan modules. The most common, and easiest, connector to use is an external two hole corner bracket. We built our entire first campervan with these! You can also extend these to 4 hole, or even gusseted, for some added strength for larger modules. These are great because they don’t require machining adjustments.
We personally came to love 3 way corner connectors in our second campervan conversion. They do require basic end tapping of all lengths that are being connected but this can be done with a simple hand tool. We like these connectors as they leave the corners empty for a full panel covering. This connector is shown above.
You can truly go on an endless deep dive on fasteners on 8020.net and find one to meet any specific need you have. To make things simple for now, we would recommend gusseted, or two-four hole corner bracket for everything hidden, and 3 way corner connectors for anything showing.
80/20 Hardware
Bolts and T-nuts. That is all the hardware that you will need to know (mostly) to work with extruded aluminum. T-nuts go into the channels of the extruded aluminum profile and the connector is secured via a bolt though the connector and into the T-nut.
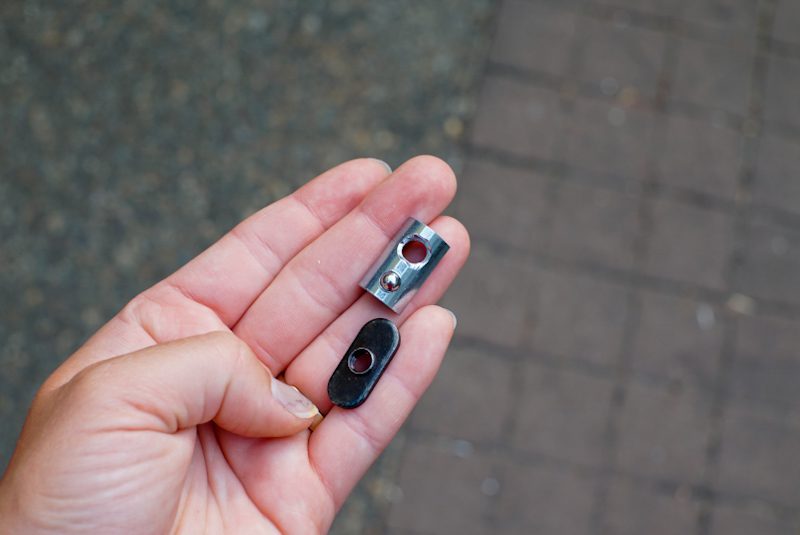
There are two types of T-nuts, shown below. Roll in and slide in. Roll in T-nuts (top, silver) are more expensive but offer more forgiveness in that if you forget to insert them into a channel and it becomes captivated, you can roll it in. Slide in t-nuts (bottom, black) are cheaper, but need to be “pre loaded” into channels before constructing.
How to Plan a 80/20 Camper Van Build
Designing your camper van in a 3D software is the BEST way to plan ahead and buy the right lengths of extruded aluminum. We recently put together a YouTube video dedicated to just that: going from zero to 100 using SketchUp specifically for camper van building.
Additionally, if you are interested more generally in how to plan a camper van buildout, check out our eBook: Planning a Camper Van Layout Like a PRO!
Anchoring Extruded Aluminum to Your Campervan Chassis
Anchoring your modules to your campervan is extremely important. We like to anchor ours to both the floor, and the walls. Here is how we do it:
Wall anchoring
To anchor our modules to the walls, we use plusnuts and bolts. We run bolts through corner brackets attached to modules. See below:

Floor Anchoring
Anchoring modules to the floor is a bit more complex but a similar concept. The easiest option would be to anchor the modules into L-track that runs along the floor. L-track is a really great option with lots of utility in a campervan.
Alternatively, you could pursue a similar concept to the wall anchoring (with the corner brackets). However, if you go this route, we recommend lag bolts into the floor rather than plusnut and bolt.
Bonus Extruded Aluminum Campervan Building Guides
If you have read any of our other guides, you know we get really in depth, really quick. So in an effort to restrain ourselves and keep this is a guide to get started, we are going to leave links and brief intros to our other 80/20 campervan building guides below that you can use to continue your journey.
Extruded Aluminum Van Build Deep Dive
If this guide left you intrigued about building a camper van with extruded aluminum, head right on over to our more in depth, and complete guide to working with extrude aluminum.
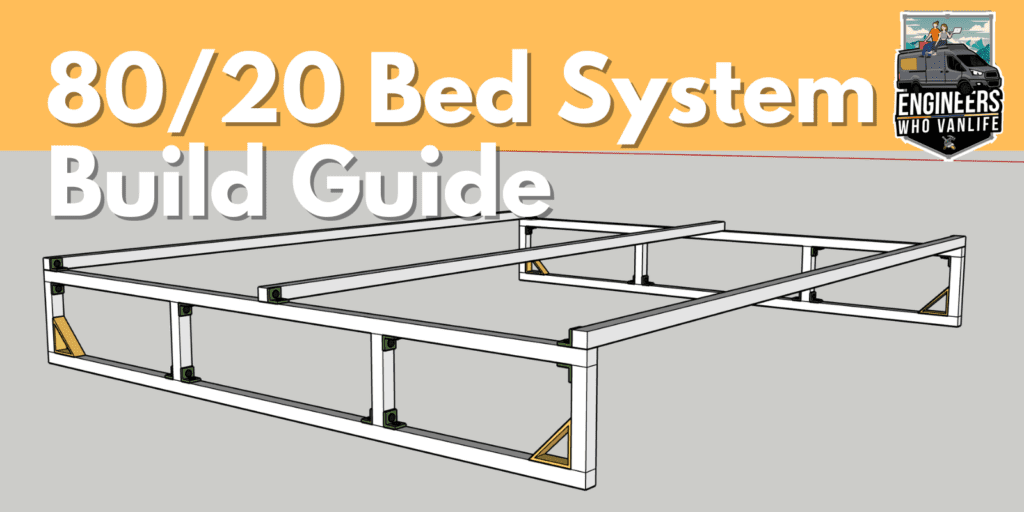
80/20 Campervan Bed System
A bed system is the PERFECT starter project for working with extruded aluminum. Not only does it use simple materials, but the construction is straight forward. An 80/20 campervan bed system is lightweight, space saving, and durable.
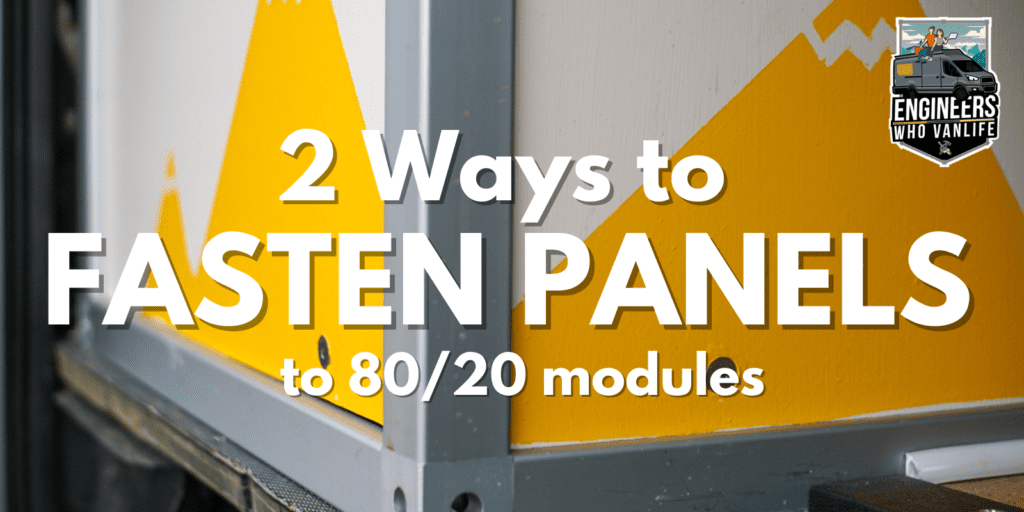
Fastening Panels to 80/20 Modules
There is a bit of a mindset shift when it comes to adding panels to cabinets, galleys, and drawers. You can’t simply hammer some nails into them. Instead, you have to utilize specific connectors and hardware (shocker!). In the below guide, we share everything you need to know.
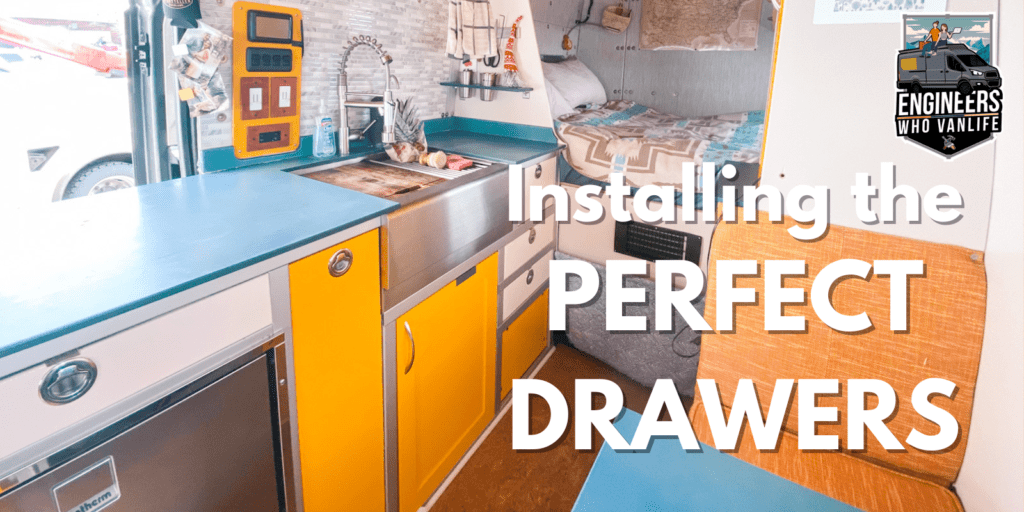
80/20 Campervan Drawer Guide
We absolutely love the strength of drawers we have built with extruded aluminum in our campervan. In the below guide, we dive into the nitty gritty of doing this yourself: latches, slides, construction, and more.
80/20 Shower in a Bench Schematics
In our second rig, we built a shower in a bench. It absolutely saves us during the winters we spend living in the snowy alpine. We LOVE that we can shower, but don’t lose precious space. In the below guide, we break down the schematics and parts of our shower in a bench.
80/20 Upper Cabinet Build Guide
Do lightweight, slim, but strong upper cabinets sound like a good idea for your campervan? Well, perfect, because we have got your covered! Upper cabinets are an excellent starter project for building with extruded aluminum.
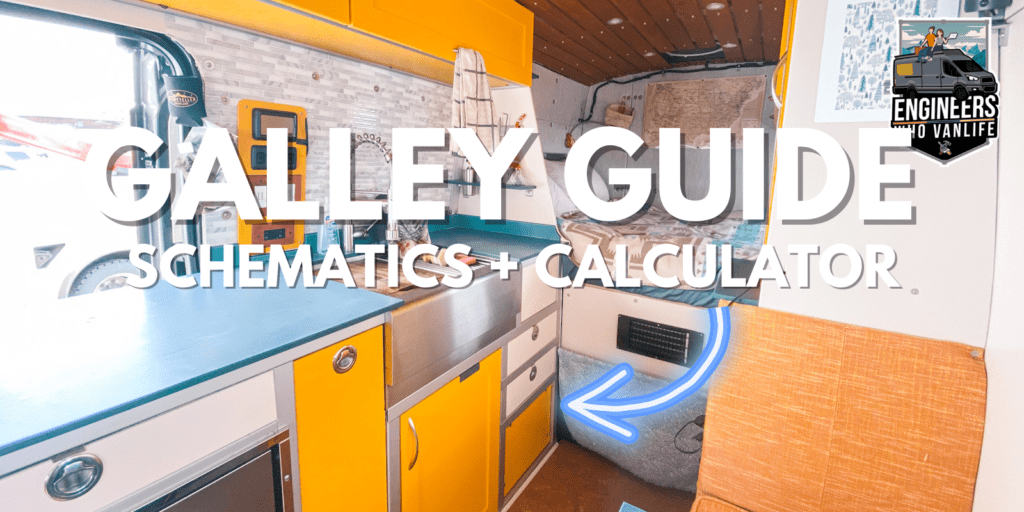
80/20 Galley Module Calculator + Build Guide
In our opinion, galley modules for campervan builds can get the most complex. We built a calculator and drew up some schematics so you can have a good starting point. And, so that you can understand the basics of constructing one.
Thanks for being here! Happy building!
Eric + Colby
✉️ Join our mailing list for more content!
🙏🏽 If you are looking for more 1:1 van build help, we are here to help via Consulting or Travel Van Building.
[Start Here] Beginner Guides:







Comments 4
Any vans for sale and the cost?
Any vans for sale?….what do they cost?
Have you e.g. attached any aluminium framing to the ceiling/ceiling ribs?
Thanks
Author
Hello! Yes! You have a few options for that. I would start by looking at our upper cabinet guide that shows how we do it.