Why Camper Van Conversion Weight Matters
The considerations of your camper van conversion weight is a technical undertaking, but also a topic that impacts your vehicle’s safety and so should not be taken lightly. Your camper van chassis is built to tested specifications and exceeding those can not only cause excess wear and tear on your vehicle, but also affect acceleration, braking and stopping distance, and overall handling.
The thing about a tiny home on wheels, is that well.. it is on wheels. While you do want your camper van to be beautiful, it also needs to be SAFE as it is not only your car, but also your home.
Read on for our detailed camper van conversion weight breakdown and considerations that you can apply to your van build.

** Disclaimer: This guide contains various affiliate links that provide a small kickback to us at no additional cost to you. Thank you for your support! **
Terms to Know for Campervan Conversion Weight Ratings
Ultimately, what every van builder is after is to maximize the amount of cargo they can safely carry in their camper van. To best understand that, let’s first go over some definitions.
Gross Vehicle Weight Rating (GVWR)
“Gross Vehicle Weight Rating” (GVWR) is the maximum weight that your van can weigh fully loaded. Each manufacturer will list a maximum weight rating for your van’s class, and it will vary slightly depending upon the chosen options. Here is a grid of the three major van manufacturers and their listed GVWR. For each manufacturer, I looked at the long wheel base and high roof varieties with standard equipment.
| Chassis | 150 | 250/2500 | 350/3500 | 350 HD SRW | 350 HD DRW |
| Ford Transit | 8670 lbs. | 9070 lbs. | 9500 lbs. | 9950 lbs. | 11000 lbs. |
| Mercedes Sprinter | - | 9050 lbs. | 9990 lbs. | - | - |
| Ram Promaster | - | 8900 lbs. | 9350 lbs. | - | - |
* Mobile Users: you might need to scroll the table to the right.

Curb Weight
The “Curb Weight” is the weight of the empty chassis when it is delivered from the factory, but does take into account full levels of all fluids and fuel. Below are the corresponding curb weights of camper vans from the same three common manufacturers. For each manufacturer, we looked at the high roof, long wheel base non-extended varieties is keep comparisons as relevant as possible to most van lifers.
* NOTE: These numbers vary by source. Be sure to check your chassis specific information. For example, our Ford Transit 350 only had a curb weight of 5,664 lbs. not the 5740 lbs. we found in documentation.
| Chassis | 250/2500 | 350/3500 |
| Ford Transit | 5617 lbs. | 5740 lbs. |
| Mercedes Sprinter | 5600 lbs. | 5721 lbs. |
| Ram Promaster | 4890 lbs. | 5090 lbs. |
Total Payload
“Total Payload” is is amount of weight you can add to your camper van chassis in either cargo or buildout materials. The total rated payload can be found with the following formula.
Payload = GVWR – Curb Weight
| Chassis | 250/2500 | 350/3500 |
| Ford Transit | 3453 lbs. | 3760 lbs. |
| Mercedes Sprinter | 3450 lbs. | 4269 lbs. |
| Ram Promaster | 4010 lbs. | 4260 lbs. |
For conversion vans, you can break payload down Into two categories: conversion payload, and cargo payload. “Conversion Payload” is defined as the permanent fixtures you put in your camper van, also known as your van buildout weight. This amount will remain fixed once your build is finished. “Cargo Payload” will include “you and your stuff” and will be a variable target.
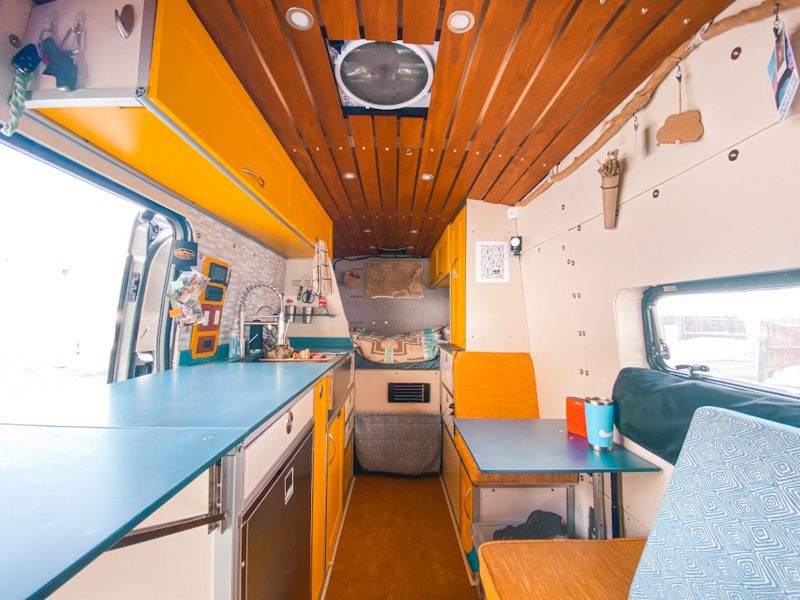
Conversion Payload
The conversion payload is the weight of your campervan buildout. As a DIY van builder, this is the key piece of the conversion to control and what we will spend the majority of our time discussing. At the end of this guide, you can find a detailed breakdown of our conversion payload.
Cargo Payload
The cargo payload is ultimately what we want to preserve as DIY van builders. The only way we do that is by minimizing the conversion payload as mentioned above. The available cargo payload can be found with the following formula.
Cargo Payload = GVWR – Curb Weight – Conversion Payload
Cargo payload includes the weight of all passengers, onboard water, all of your clothes, cooking gear, sports equipment, and other personal and removable items. As a rule of thumb, you should shoot to leave at least 1,000 lbs of cargo weight when planning your van buildout. Your individual needs may vary, and leaving room for more is always better, especially if you are a gear junkie like us…

Weight Considerations for your DIY Camper Van Conversion
Before we dig into the weight breakdown of our camper van conversion, we’d like to share a few general considerations:
- If you’re in the buying phase of pursuing your van dreams, make that sure you select a van with the appropriate amount of payload to suit your needs. In general, 250/2500 vans are best suited to more minimal / weekender van builds, and 350/3500 vans and their heavy duty / dually counterparts are best suited to full timer van builds. Of course, this can vary if you have a place to store your things seasonally, or not.
- Run a comprehensive weight estimate of your van build BEFORE you start. We put a lot of time and effort into Rover’s full weight breakdown at the end of this guide so that you can use it as a template. Cutting weight will mean a combination of selecting lightweight build materials, and sometimes forgoing things altogether in the name of weight savings. Better to know this sooner than later! As with camping gear, the lighter a product option is, the more expensive you can expect it to be – and the fewer compromises you’re willing to make, the more money you will have to spend on premium, lightweight components.
- When your build is all done, the best thing you can do is take it to a CAT scale and get it weighed. If you ever plan to re-register your camper van as a class B RV, then you will need a certified weight slip of your build weight BEFORE you load it up will all your stuff.
- Once your van is all loaded up for the first time, it’s a good idea to go back to the CAT scale and weigh it again to ensure you are under GVWR. If you end up a tad over GVWR, consider dropping some of the heavier cargo you threw in.
Our Camper Van Conversion Weight Breakdown
Rover is our DIY, T-350 2022 Ford Transit van. He has a high roof, is a long wheel base extended, has a curb weight of 5,664 lbs and a GVWR of 9,500 lbs. This means that his Total Payload Capacity is 3,836. Below, we break down the weight of the conversion and our cargo. Then, we will compare the cost of all our premium lightweight upgrades with their heavier/cheaper counterparts to help you determine which weight saving measures were most worth the money.
| Symbol | Van Build Classification |
| ⚡ | Electrical System |
| 💧 | Water System |
| 🚐 | Exterior / Bones |
| ❄ | Insulation |
| 🔨 | Interior |
| 🛋️ | Appliance |
* Mobile Users: you might need to scroll the table to the right.
Conversion Weight Breakdown
| Item | Weight | Relevant Info | |
| 🚐 | Ford Transit148 EXT High Roof- Base Van | 5,664 lbs. | |
| 🚐 | Safari Roof Rack | 180 lbs. | |
| 🚐 | Nudge Bar | 20 lbs. | |
| 🚐 | Side Ladder | 18 lbs. | |
| 🚐 | Quigley Q Lift | 100 lbs. | Van Galley Guide |
| 🚐 | Flares | 40 lbs. | DIY Flare Install Guide |
| 🚐 | Flare Trim Rings | 20 lbs. | DIY Flare Install Guide |
| ⚡ | LieFePO4 Batteries ** | 161.6 lbs. | Van Electrical 101 |
| ⚡ | 3000W Inverter | 48 lbs. | Van Electrical 101 |
| ⚡ | 2x 370 Watt Solar Panels ** | 88 lbs. | Van Electrical Guide |
| ⚡ | 2x MPPT Solar Charge Controller | 5 lbs. | Van Electrical 101 |
| ⚡ | 2x DC to DC Chargers | 6 lbs. | Van Electrical 101 |
| ⚡ | Wires + Switches + Smaller Electrical Components | 25 lbs. | Van Electrical Guide |
| 💧 | 36 gallon water tank | 20 lbs. | Van Water System Guide |
| 💧 | 16 gallon under carriage grey tank | 15 lbs. | Van Water System Guide |
| 💧 | Hydronic Heating System | 40 lbs. | |
| 💧 | Stainless Steel Shower Pan (30"x20") | 45 lbs. | Shower in a Bench Design |
| ❄️ | Lizard Skin Mass Sound Deadener (~10 gallons) | 128.7 lbs. | Insulation Guide |
| ❄️ | Lizard Skin Mass Ceramic Insulation (~12 gallons) | 74.52 lbs. | Insulation Guide |
| ❄️ | Havelock Wool (~4 bags / 100 batts) | 100 lbs. | Insulation Guide |
| ❄️ | 3M Thinsulate (26 linear feet) | 20 lbs. | Insulation Guide |
| 🔨 | Wall Panel Kit | 225 lbs. | |
| 🔨 | Paperstone for all counters ** | 130 lbs. | Van Galley Guide |
| 🔨 | Cherry Ceiling Planks | 30 lbs. | |
| 🔨 | Coosa Subfloor ** | 120 lbs. | Subfloor Guide |
| 🔨 | 2Tec2 Floor ** | 52 lbs. | Subfloor Guide |
| 🔨 | Cork Top Floor | 20 lbs. | |
| 🔨 | DIY Overhead Headliner Shelf | 20 lbs. | |
| 🔨 | Shower in a Bench Module (80/20+plywood) | 25 lbs. | Shower in a Bench Design |
| 🔨 | 2x Upper Cabinets | 50 lbs. | 80/20 Upper Cabinet Guide |
| 🔨 | Armoire + Water Tank Restraints + Bench | 175 lbs. | 80/20 Build Guide |
| 🔨 | Main Kitchen Galley + Sink + Faucet | 250 lbs. | 80/20 Galley Schematics |
| 🔨 | Garge Gear Wall Plywood + Hardware | 60 lbs. | |
| 🔨 | Shoe Storage Module | 30 lbs. | 80/20 Build Guide |
| 🔨 | Bed System Supports | 45 lbs. | 80/20 Lightweight Bed Design |
| 🔨 | Plywood for Bed Platform | 50 lbs. | 80/20 Lightweight Bed Design |
| 🛋️ | 2x Scopema Swivel Seats | 64 lbs. | |
| 🛋️ | Isotherm Cruise 130 Fridge | 70 lbs. | |
| 🛋️ | 2 x Maxx Air Fans | 40 lbs. | |
| Subtotal: | 8270 lbs. |
** Everything with ** was a consious choice we made to save weight. In the table below we compare our choice with a cheaper, but heavier alternative. Along with the cost per pound of weight saving so that you can better understand our logic.
Cargo Weight Breakdown
| Item | Weight |
| Two People | 338 lbs. |
| Full Water Tank (32 gallons fresh water) | 256 lbs. |
| 2x skis, boots, ice axes, avalanche gear, ski gear | 80 lbs. |
| Clothes | 100 lbs. |
| Shoes | 20 lbs. |
| Backpacking gear | 100 lbs. |
| 6x empty backpacks | 20 lbs. |
| Fly fishing gear | 25 lbs. |
| Composting Toilet + Material | 25 lbs. |
| Flarespace Baja Mattress | 30 lbs. |
| Ice Skates + Sticks | 15 lbs. |
| Cookware + Plates + Silverware + Coffee stuff | 60 lbs. |
| Food average | 40 lbs. |
| Daylodge Awning | 15 lbs. |
| Starlink + Peplink (Internet gear) | 20 lbs. |
| Electronics: laptops, camera, drone, etc | 30 lbs. |
| Subtotal: | 1,174 lbs. |
Total Weight Breakdown
| Base Vehicle | 5,664 lbs. |
| Conversion Weight | 2,606 lbs. |
| Cargo Weight | 1,174 lbs. |
| Total Weight (at full water and gas tank which is rare) | 9,444 lbs. |
* Mobile Users: you might need to scroll the table to the right.
Lightweight Van Build Materials Discussed
Above, we denoted a few things with **. Those were conscious items we chose to save weight. However, in order to make this more fun, we are going to compare those options with cheaper options and do an analysis of cost / pound saved.
First, in the table below we will do this calculation, then in the following sections we will dive into each comparision and discuss if we think it was worth it.
| Our Choice | Alternative | Alternative Weight | Weight Savings | Cost / lb. |
| 540 ah LiFePO4 Batteries (30 lb/100ah) | 1000ah AGM Batteries | 127.9 lb / 100 ah usable energy | 98 lbs / 100 ah usable energy | $4.49 |
| 2Tec2 Top Floor (9.9 oz / sq ft) | LVT ("click lock") | 26.7 oz / sq ft | ~1 lb / sq ft | $7.43 |
| Paperstone Counter (3.25 lb / sq ft) | 1.5" Butcher Block | ~ 5.5 lb / sq ft | ~ 2 lbs / sq ft | $5.18 |
| 2x370W Residental Solar Panels (11.9 lb. / 100W) | Renogy 100W | 14.1 lb / 100W | 2.2 lbs / 100W | $2.27 |
| Coosa Subfloor | Our DIY Subfloor | 19.1 lbs total | $118.77 |
Lithium vs. AGM Batteries
Our Weight Savings: 530 lbs.
Worth it? YES
We believe that the #1 swap to make in your DIY camper van build to save weight is choosing LiFePO4 batteries instead of AGM batteries. In fact, there are much more than weight savings to be had with this choice.
2Tec2 vs. LVT Top Floor
Our Weight Savings: 88.2 lbs.
Worth It? Yes
This swap doesn’t seem like much weight wise; however, 1 lb. / sq ft over 70-80 sq ft really adds up. Additionally, we used LVT in our first build and it did not hold up well to wear and tear. This swap was worth it in our opinion.
Paperstone vs. Butcher Block Counters
Our Weight Savings: 80 lbs.
Worth it? Yes but something like Corian may be easier to source.
Not only is Paperstone much lighter than Butcher Block; but, it also doesn’t require maintenance and doesn’t crack / warp like butcher block is known for. We would 100% recommend choosing Paperstone if it wasn’t for the difficulty in sourcing it. We were lucky enough to have a local source of Paperstone which made it easier. If you can source it easily, go for it!
Residential (High Efficiency) vs. Standard Renogy Solar Panels
Our Weight Savings: 16.3 lbs
Worth it? Weight wise no, but roof space wise, yes.
When running these numbers, we were not impressed by the weight savings. However, the use of higher efficiency, larger solar panels opens up more roof deck space, and a more efficient roof layout. Roof space is valuable and not to be overlooked!
Coosa Subfloor vs. DIY Subfloor
Our Weight Savings: 19.1 lbs.
Worth it? No, unless you have the budget.
The weight savings on the drop in Coosa subfloor that we opted for was not much compared to the DIY Subfloor we did in our first camper van. However, the benefits of Coosa substrate is what makes this swap worth it. We absolutely LOVE not having to worry about water getting into our subfloor from our skis dripping, or our shoes tracking water in. If you have room to splurge in your budget, we recommend this swap, but not for weight savings.
Camper Van Conversion Weight Breakdown Summary
This guide should give you a good perspective of how quickly weight adds up during a van build, some weight saving measures you can take during your van conversion, and why this all matters. Have a question, or need clarification? Drop a comment below and we will happily get back to you!
Recommended Next Reading:

Thanks for being here! Happy building!
Eric + Colby
✉️ Join our mailing list for more content!
🙏🏽 If you are looking for more 1:1 van build help, we are here to help via Consulting or Travel Van Building.
[Start Here] Beginner Guides:



Comments 10
Hello…we are very new to the van world and are looking at a 2021 Ran promaster 3500 ext that has an approximate 2,000 lb build added to it. If I am understanding your info ( which is extremely well done) that should be ok and still have enough lbs to add two adults, two bikes, an inflatable kayak along with food, clothing, etc. we are not full timers, but plan to drive across the country!
What are your thoughts on this purchase as far as lbs is concerned? Thank you
Author
Hello, welcome to the van world! 2,000 is a pretty average build weight for that size base van – so it seems like you would be fine! You could of course drive over a scale to double check this 🙂
I’m curious about whether you also looked at GAWR’s and weight distribution front/rear. Just curious as I make a plan and it is hard to find information on the internet for this particular topic.
Author
Yes – ideally they would be close to equal; however, it is hard as the cab is over the front, and the living space (most of the weight) is over the rear. Definitely focus more on the l/r weight, and then if you are concerned about a heavy rear, you can look at layout options that put modules more forward. One way we have seen this is the kitchen right behind the two front seats.
Thanks much for doing this! Gracias! I knew I’d have to look at all of this BUT you prompted me to do it upfront which is super helpful. I’m planning on getting one of the new eSprinters which are super heavy and have limited payload. The the trade-off with electric vehicles. More range = more battery = less payload. The Chevy Silverado EV is expected to have super great range BUT its payload is expected to be about the same as my little 1999 Toyota Tacoma!
Author
Wow, that is crazy! Thanks for sharing, glad you are thinking about it up front 🙂
A couple of questions.
1. ) You have a full gas tank included in cargo. Does Ford not include a full gas tank in their curb weight?
2.) How many square feet are you calculating for Paperstone surfaces? From what I can find Paperstone seems to be around 1.8lbs/sqft for 1/4″ thickness.
Author
Hey! Great question. We were wrong about the gas, Ford does include fuel in curb weight. Thanks for bringing that to our attention, we adjusted accordingly! Regarding Paperstone, we used 1/2″ which is about 3.25 lb/ sqft. I believe we had about 40sqft… we used it as seat covers, shoe box covers, and counters.
Pingback: Why We Build Camper Vans With 80/20 Extruded Aluminum - Vandoit
What’s the weight of your kitchen build?